


 11Likes
Thread: My 26T Coupe build thread


Results 61 to 75 of 426
 LinkBack URL
 About LinkBacks
-
07-08-2010 10:45 AM #61
 CHR Member

- Join Date
- Apr 2009
- Location
- watford
- Car Year, Make, Model: 26T Coupe, 32 Roadster, 41 Willys Coupe
- Posts
- 2,363
Thanks Jack, appreciate the comment.
 Originally Posted by Jack F

Its aweful lonesome in the saddle since my horse died.
-
Advertising

- Google Adsense
- REGISTERED USERS DO NOT SEE THIS AD
-
07-10-2010 12:26 AM #62
CHR Member
- Join Date
- Apr 2009
- Location
- watford
- Car Year, Make, Model: 26T Coupe, 32 Roadster, 41 Willys Coupe
- Posts
- 2,363
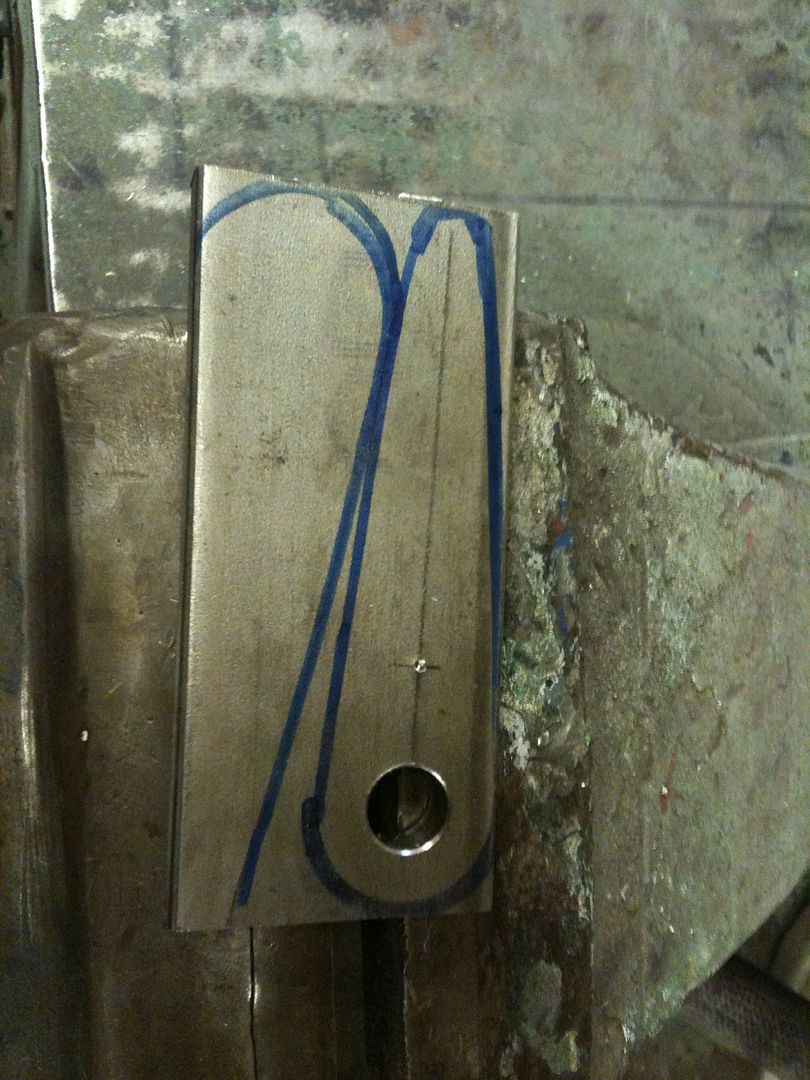
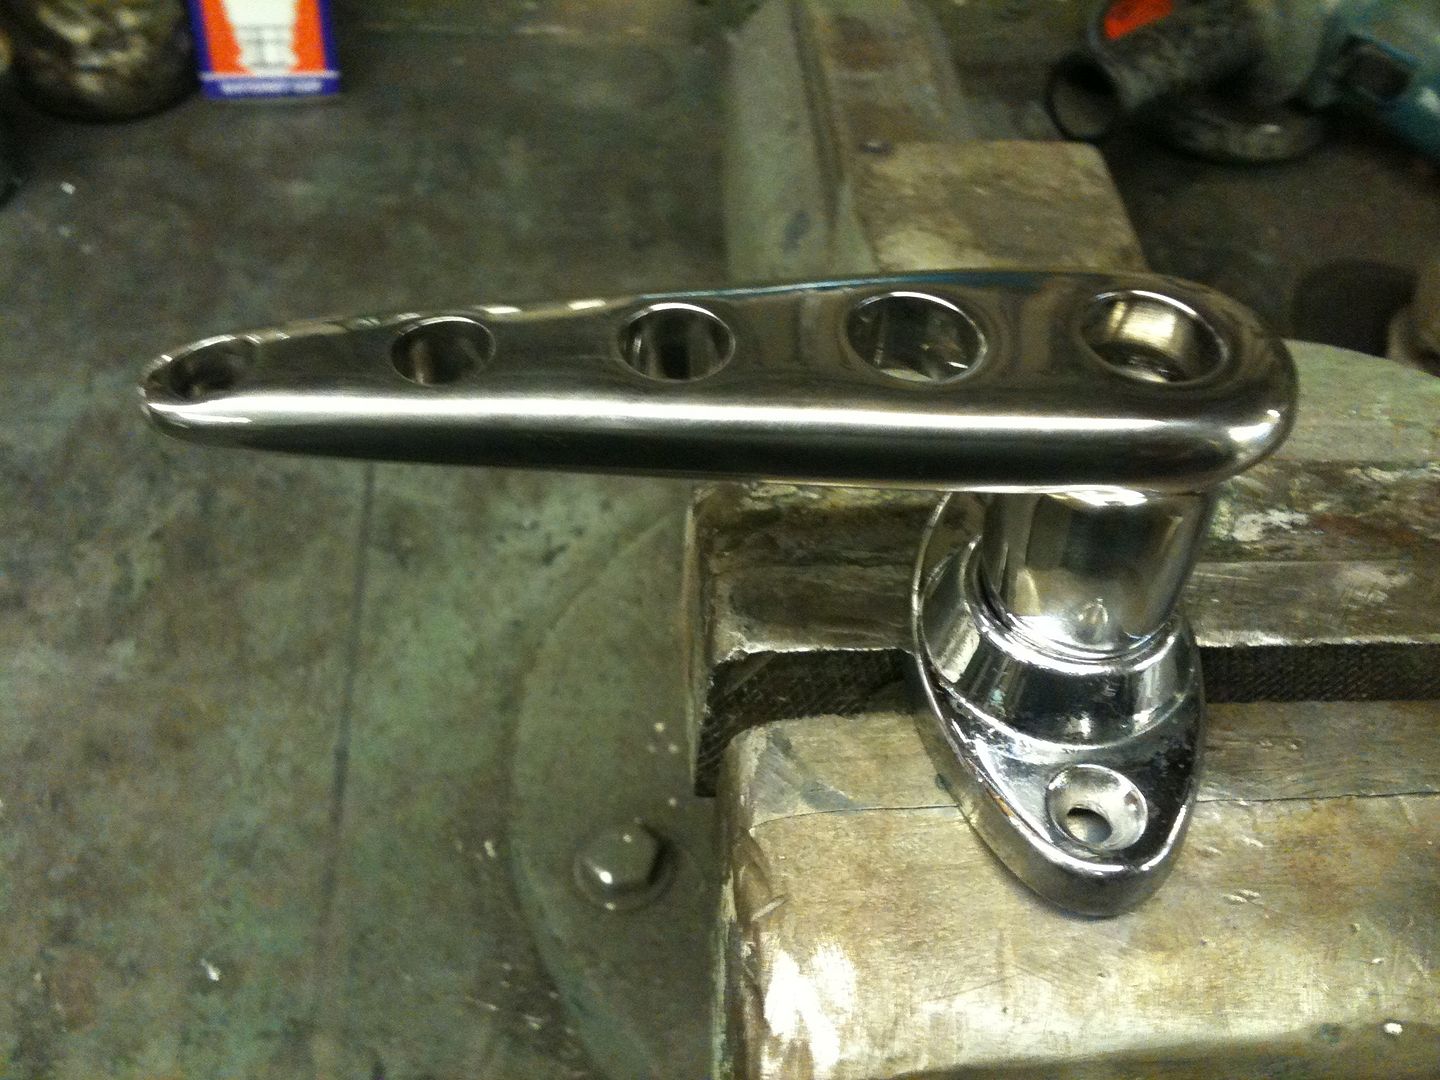
I've got most of the bits for this project squirrelled away but was lacking some door handles, had a look around but nothing floated my boat so decided to make some with holes in them to follow the theme in the car.
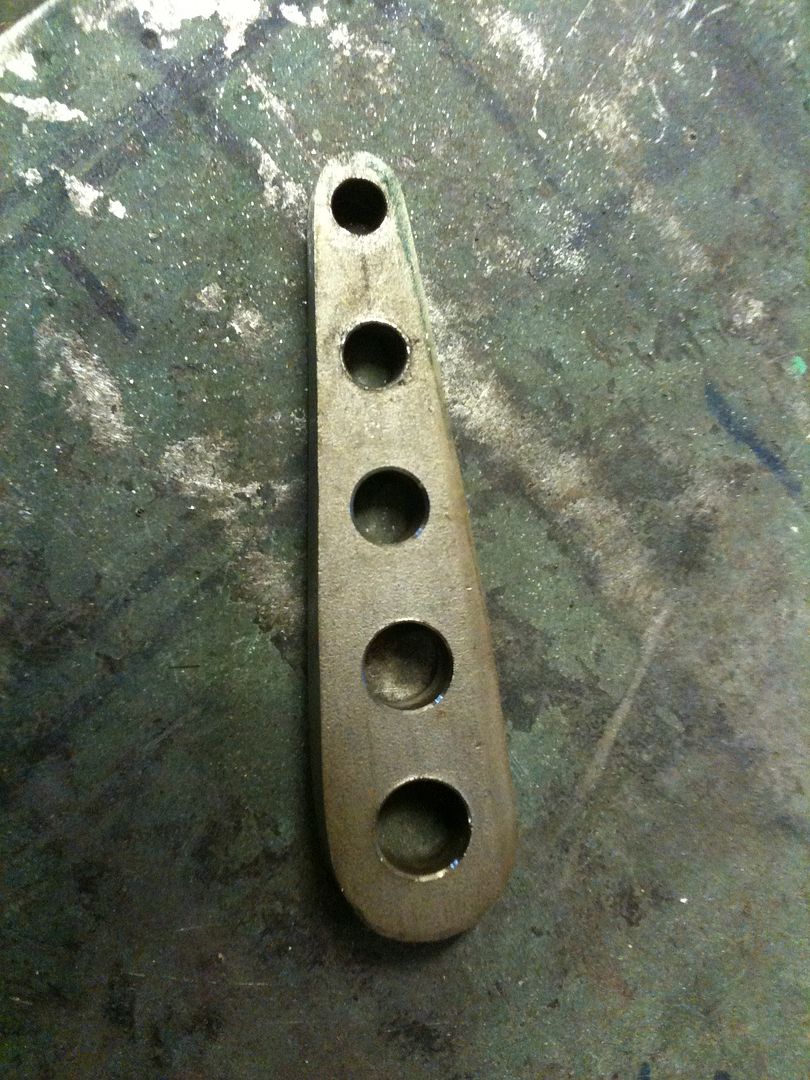
Luckily I had some 10mm stainless offcuts in the bin so a shape was drawn and cut out with a 1mm cutting disc, as this was easy to hold in the drill vice I drilled the holes before cutting out.
Once the shape was cut it was linished smooth ready for polishing. At this stage the shape was put into the handle with a soft sander and a curve was put into the handle by clamping in a vice over 3 small pieces of bar.
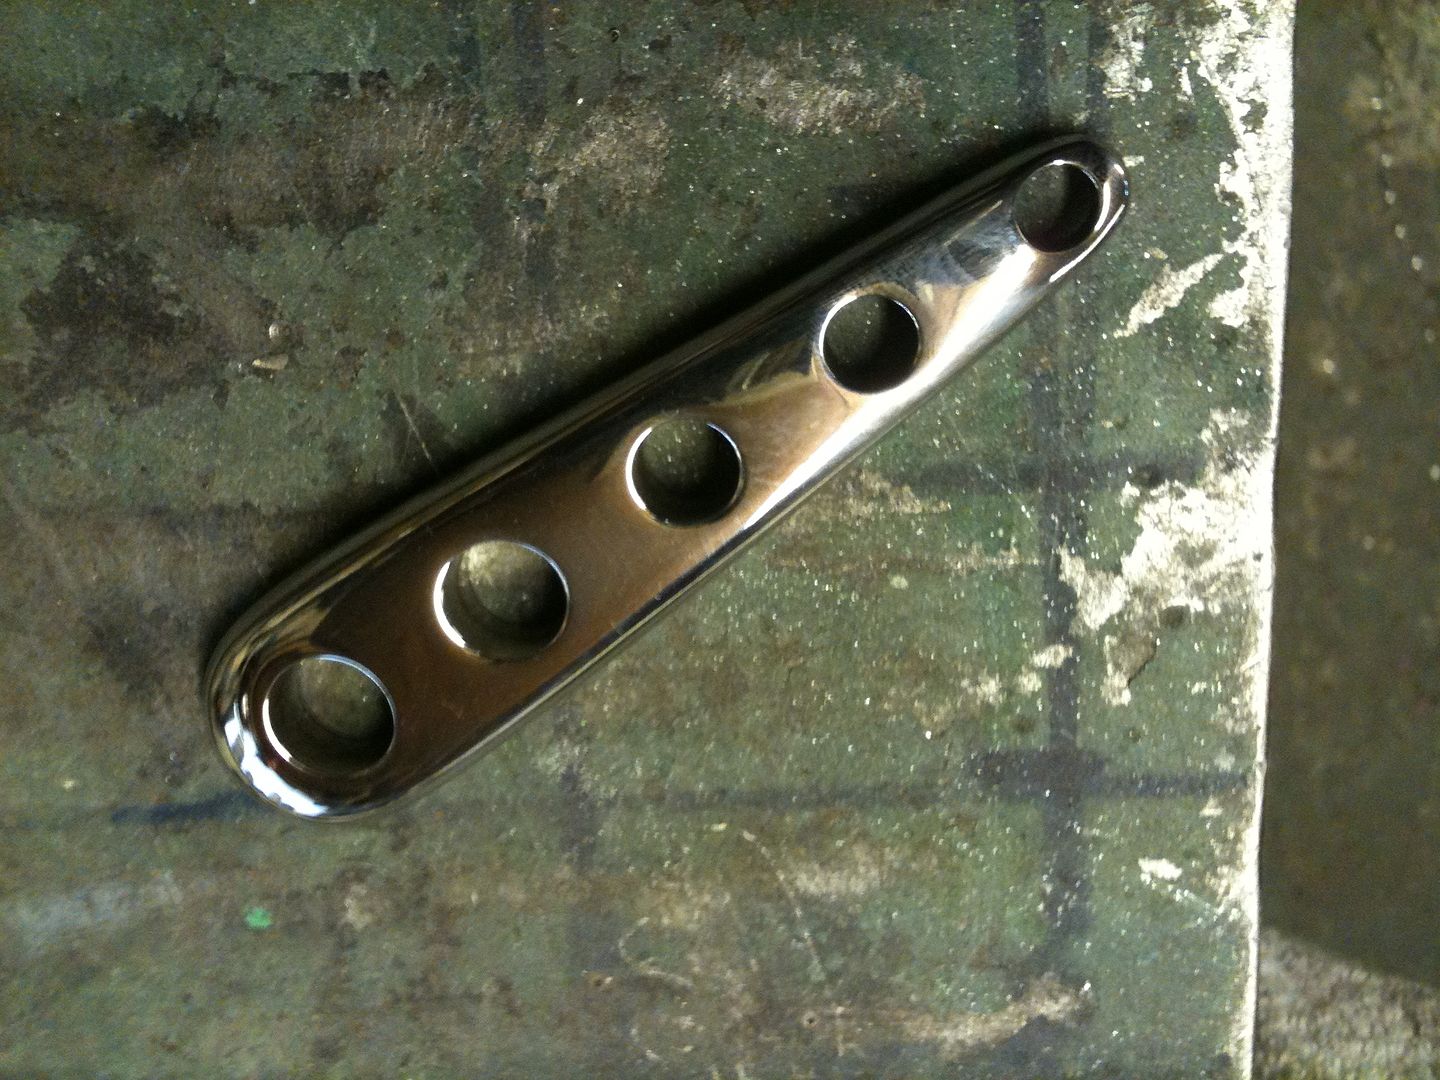
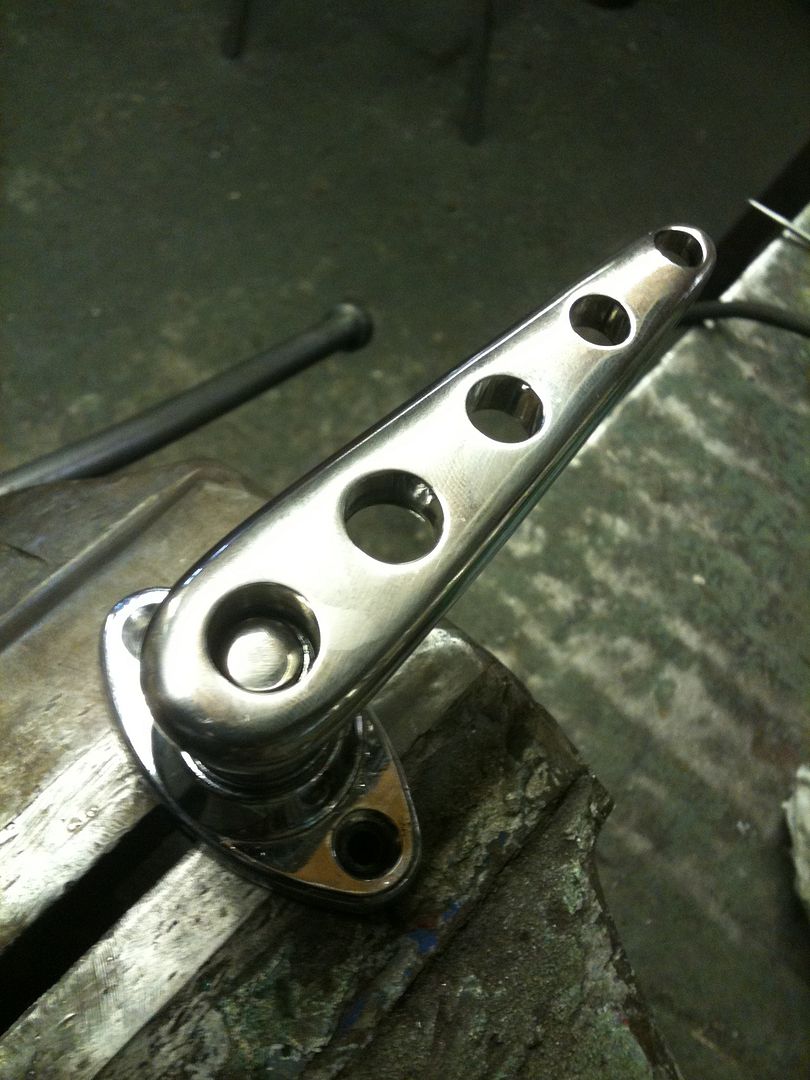
Here we have the polished handle, next I spun up a couple of pieces of stainless bar to weld to the handle to act as a extension, I forgot to take a picture of these I think
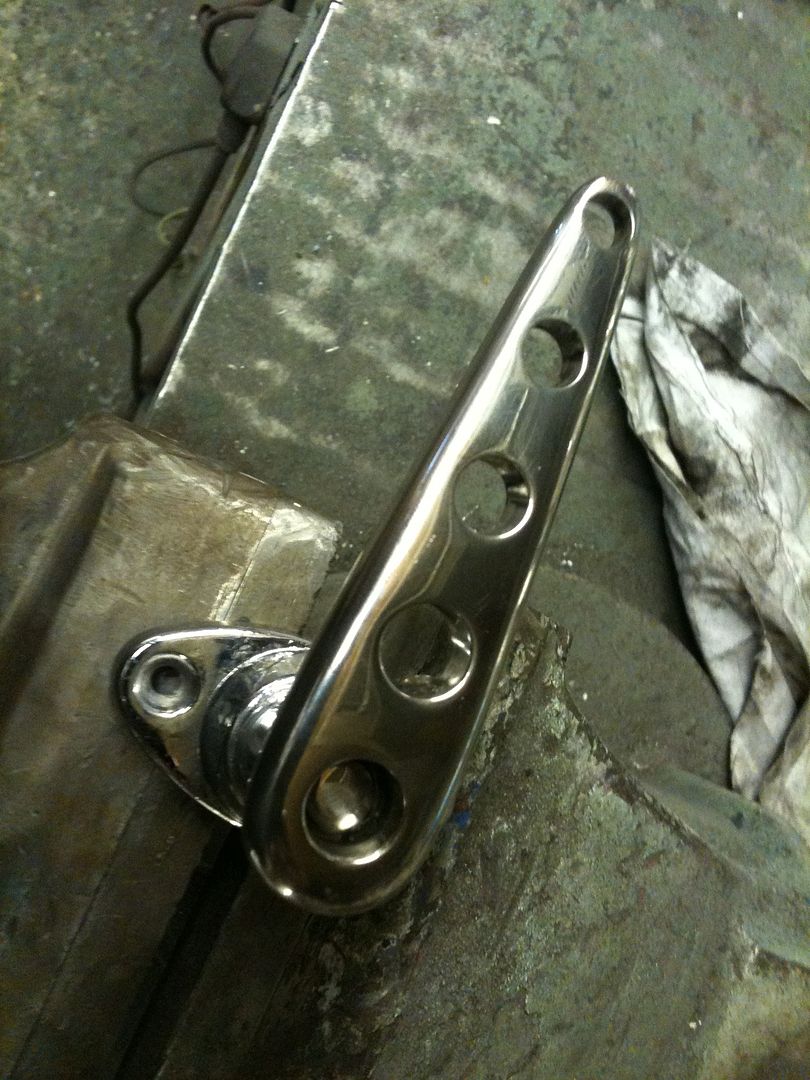
Here we have the handle welded up and the weld polished out, I'm pretty pleased the way they turned out
I robbed the baseplates off some old handles so these will be rechromed.
-Its aweful lonesome in the saddle since my horse died.
-
07-10-2010 01:47 AM #63
CHR Member
- Join Date
- Jan 2006
- Location
- fort myers
- Car Year, Make, Model: '27 ford/'39 dodge/ '23 t
- Posts
- 11,033
You've been using that new buffer, haven't you? Looks really nice Steve.
Don
-
07-10-2010 02:39 AM #64
CHR Member
- Join Date
- Apr 2009
- Location
- watford
- Car Year, Make, Model: 26T Coupe, 32 Roadster, 41 Willys Coupe
- Posts
- 2,363
Yup even managed to get inside the holes
Cheers Don
Originally Posted by Itoldyouso
Its aweful lonesome in the saddle since my horse died.
-
07-10-2010 09:37 AM #65
CHR Member
- Join Date
- Oct 2007
- Location
- Petaluma
- Car Year, Make, Model: 48 Ford F1
- Posts
- 9,795
This is going to look great when done. I like all the home made stuff!
"  "No matter where you go, there you are!" Steve.
-
07-10-2010 10:03 AM #66
CHR Member
- Join Date
- Apr 2009
- Location
- watford
- Car Year, Make, Model: 26T Coupe, 32 Roadster, 41 Willys Coupe
- Posts
- 2,363
Thanks, I like making stuff plus its cheaper
I like a car to have a type of theme so it all works together, This one as you probably guessed is holes.
Originally Posted by stovens
Its aweful lonesome in the saddle since my horse died.
-
07-10-2010 10:36 AM #67
CHR Member
- Join Date
- Jan 2006
- Location
- fort myers
- Car Year, Make, Model: '27 ford/'39 dodge/ '23 t
- Posts
- 11,033
Steve, I watched a very interesting program on TV the other night and learned some things I never knew. The subject was "Chrome" and it was on the History Channel. One thing that I never knew was that stainless steel is comprised of steel and chromium. They blend in a certain percentage of this chromium that looks like slag into the melter and that is what gives stainless it's ability to resist corrosion.
Just one of those things that you don't give any thought to about how something is made. They also discussed how regular chrome plating is done, and how things like the Chrysler building are sheathed in it. It was a good show.
Don
-
07-10-2010 03:50 PM #68
CHR Member
- Join Date
- Feb 2010
- Location
- Pukekohe, New Zealand
- Car Year, Make, Model: '23 Ford T Roadster
- Posts
- 2,199
Heck I could really really get sick at looking at all that awesome stuff that some people are just so talented at throwing together because they just couldn't find the right door handle..
I struggle getting the right size washer to fit the bolt most of the time and you call yourself "cheap". I call myself far worse most of the time when no one can hear.
You are simply doing a fantastic job as usual on this build and that must be abit of a curse when you have a reputation for excellent workmanship,there are just no shortcuts eh.
If you and Sue are tired of the hot summer weather up there you are both welcome to come downunder and do some work on the bucket oh and don't forget the flake samples,da....
I maybe a little crazy but it stops me going insane.
Isaiah 48: 17,18.
Mark.
-
07-11-2010 01:15 AM #69
CHR Member
- Join Date
- Apr 2009
- Location
- watford
- Car Year, Make, Model: 26T Coupe, 32 Roadster, 41 Willys Coupe
- Posts
- 2,363
Now i thought you might of known that Don, when i left school i did a precision toolmaking apprenticeship so metaluegy (spelling ?) was all part of the course, there are more than a few types of stainless.
I'm lucky that my mate is a chromer/polisher so i've been quite involved over the years as far as he has let me do the actual process on some of my own bits ( i have an inquisative mind)
Its quite surprising what is involved in the chrome process
Originally Posted by Itoldyouso
Its aweful lonesome in the saddle since my horse died.
-
07-11-2010 04:58 AM #70
CHR Member
- Join Date
- Apr 2007
- Location
- Satellite Beach
- Car Year, Make, Model: 69 El Camino SS
- Posts
- 401
WOW!
I do not know how I missed this thread, but I missed a doozey!!!!
Steve that is some awesome welding!
Thanks for sharing all these photos and descriptions of an amazing build!!!...at least I'm enjoying the ride!
-
07-11-2010 07:55 AM #71
CHR Member
- Join Date
- Apr 2009
- Location
- watford
- Car Year, Make, Model: 26T Coupe, 32 Roadster, 41 Willys Coupe
- Posts
- 2,363
Thanks for the comments
Originally Posted by Hot Rod Surfer
Its aweful lonesome in the saddle since my horse died.
-
07-16-2010 12:40 PM #72
CHR Member
- Join Date
- Apr 2009
- Location
- watford
- Car Year, Make, Model: 26T Coupe, 32 Roadster, 41 Willys Coupe
- Posts
- 2,363
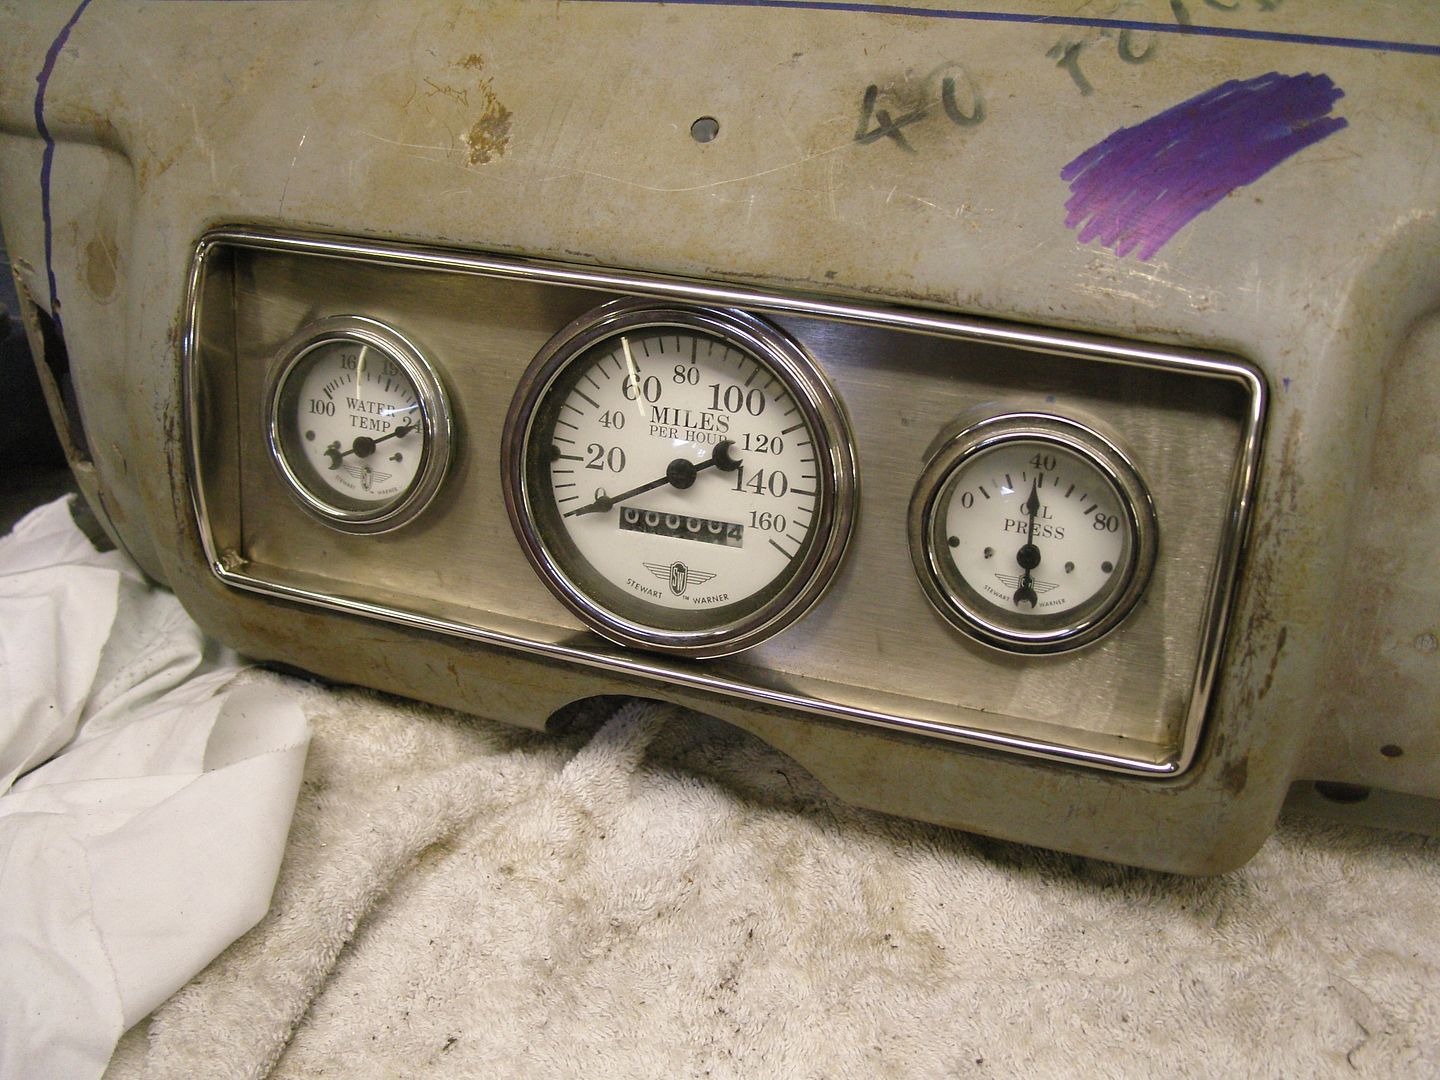
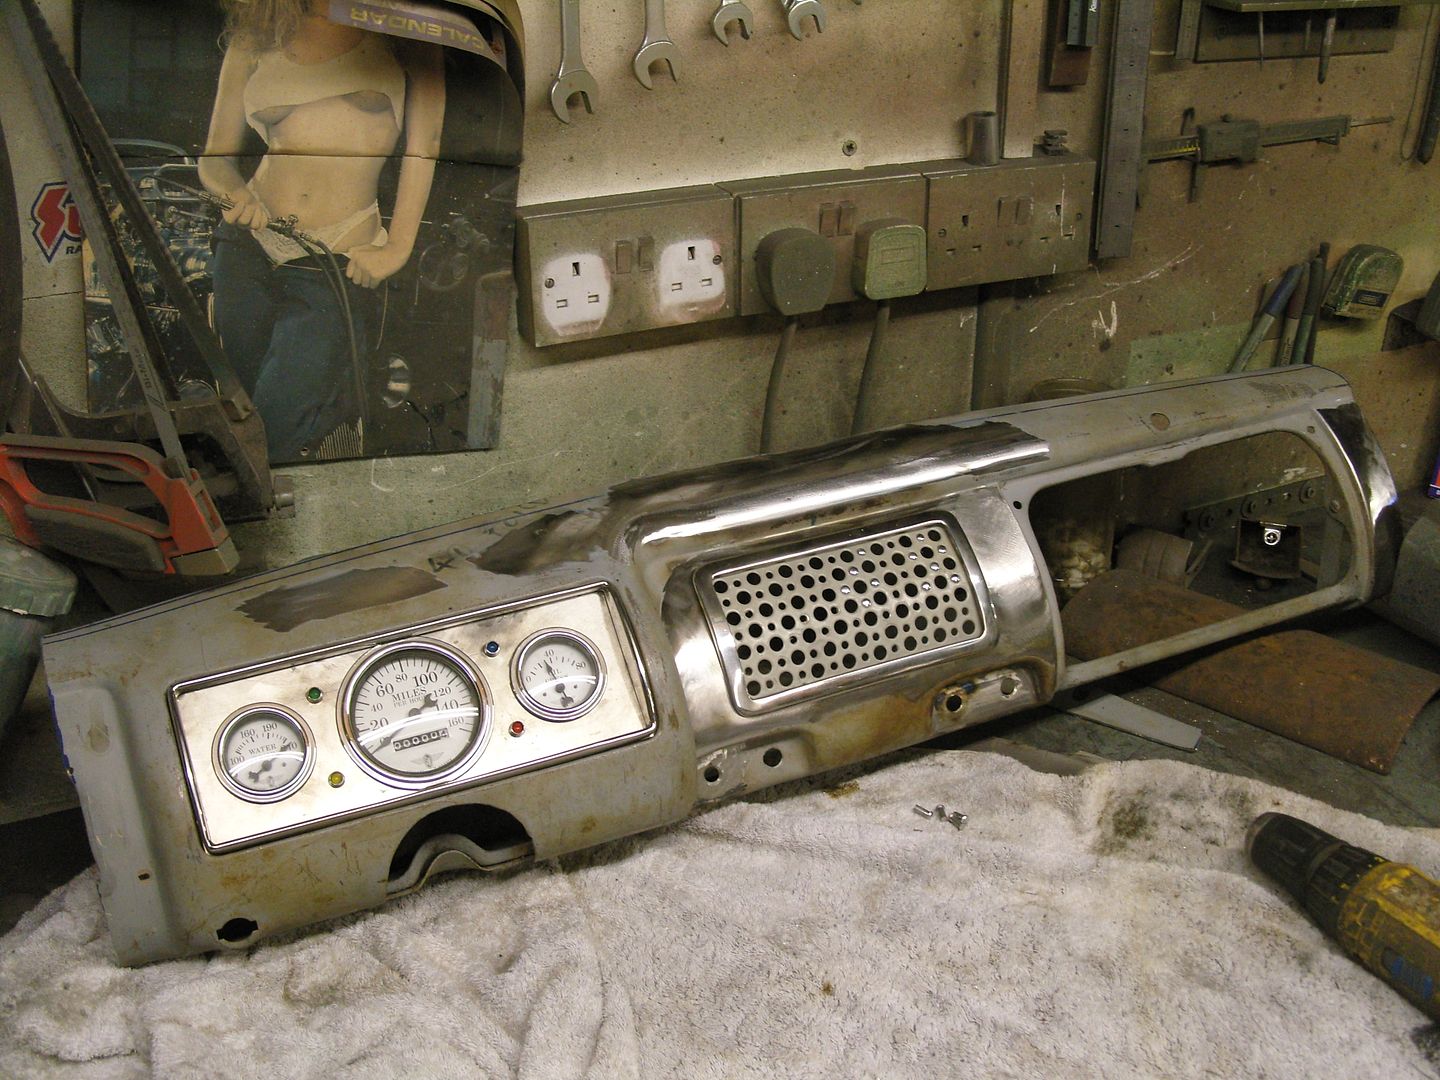
I'm stuck with welding chassis together as the jig has a frame on it at the moment so i decided to make a start on my 40 Ford dash, Its a fair bit wider than the T body and its usual to narrow them in the middle and recurve the ends.
I didn't want to narrow it so i cut it to length and will make new curved ends for it later.
One problem is with the 40 cluster is that its almost impossible to get a speedo and 4 small gauges in it, I've elected to fit just a speedo, oil pressure and water temp, my voltmeter and fuel gauge will be going elsewhere.
I made up a baseplate in 2mm stainless sheet and made the surround from 25mm x 5mm stainless bar, its made in 4 bits and welded at the corners. The baseplate is held to it by 8 x 3mm countersunk screws.
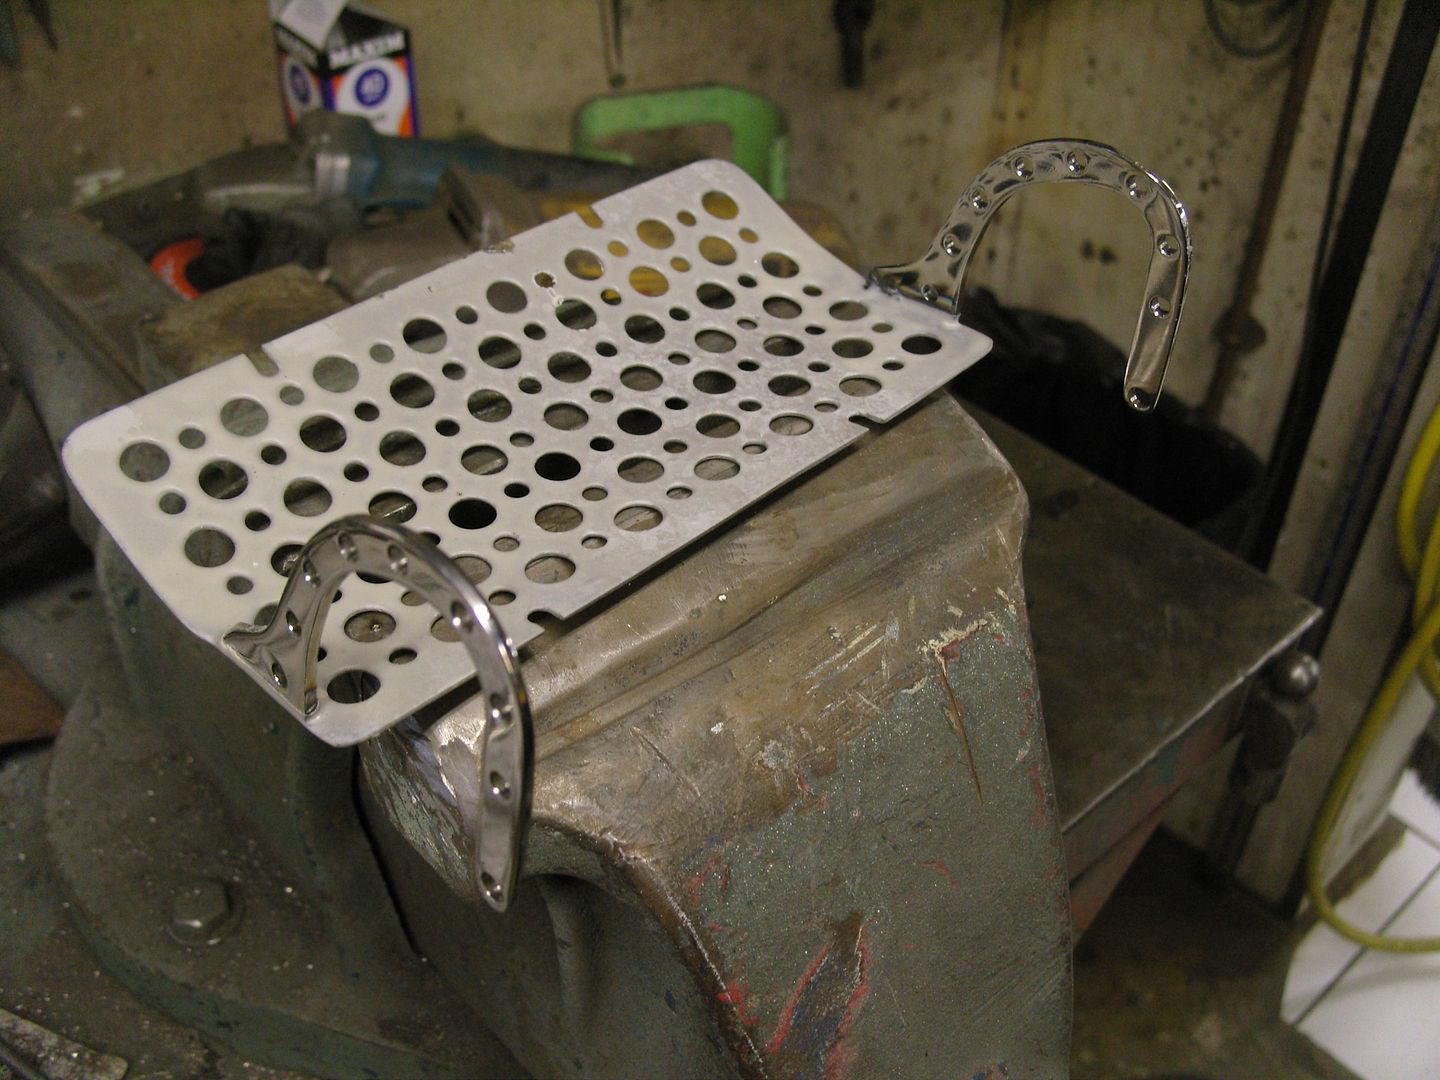
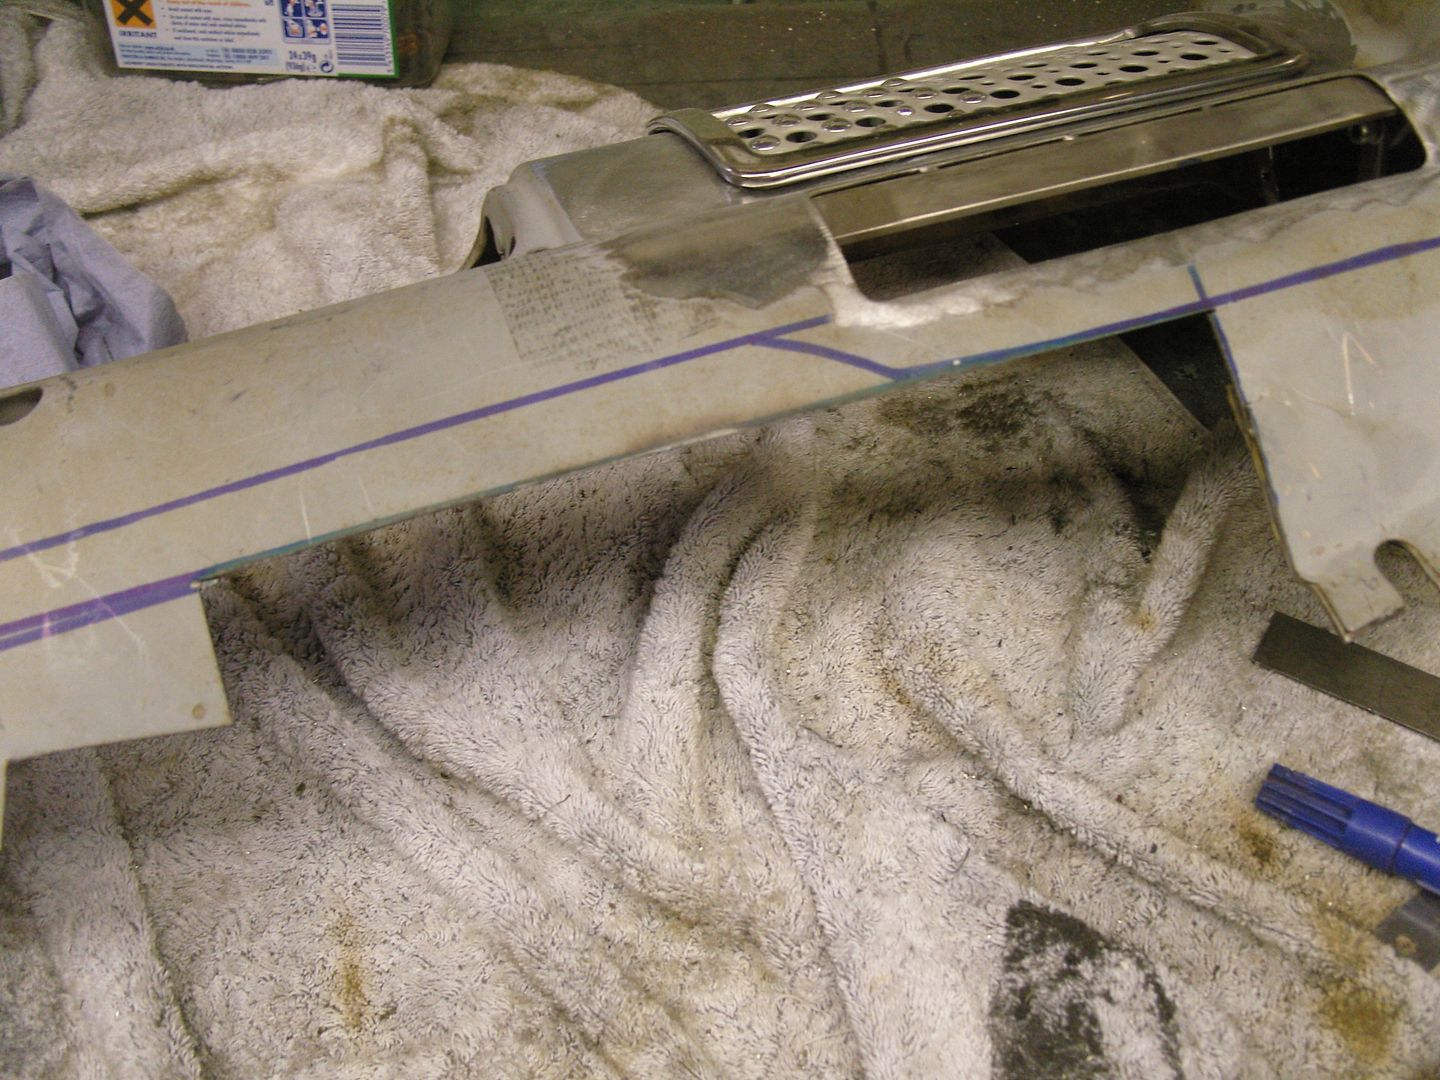
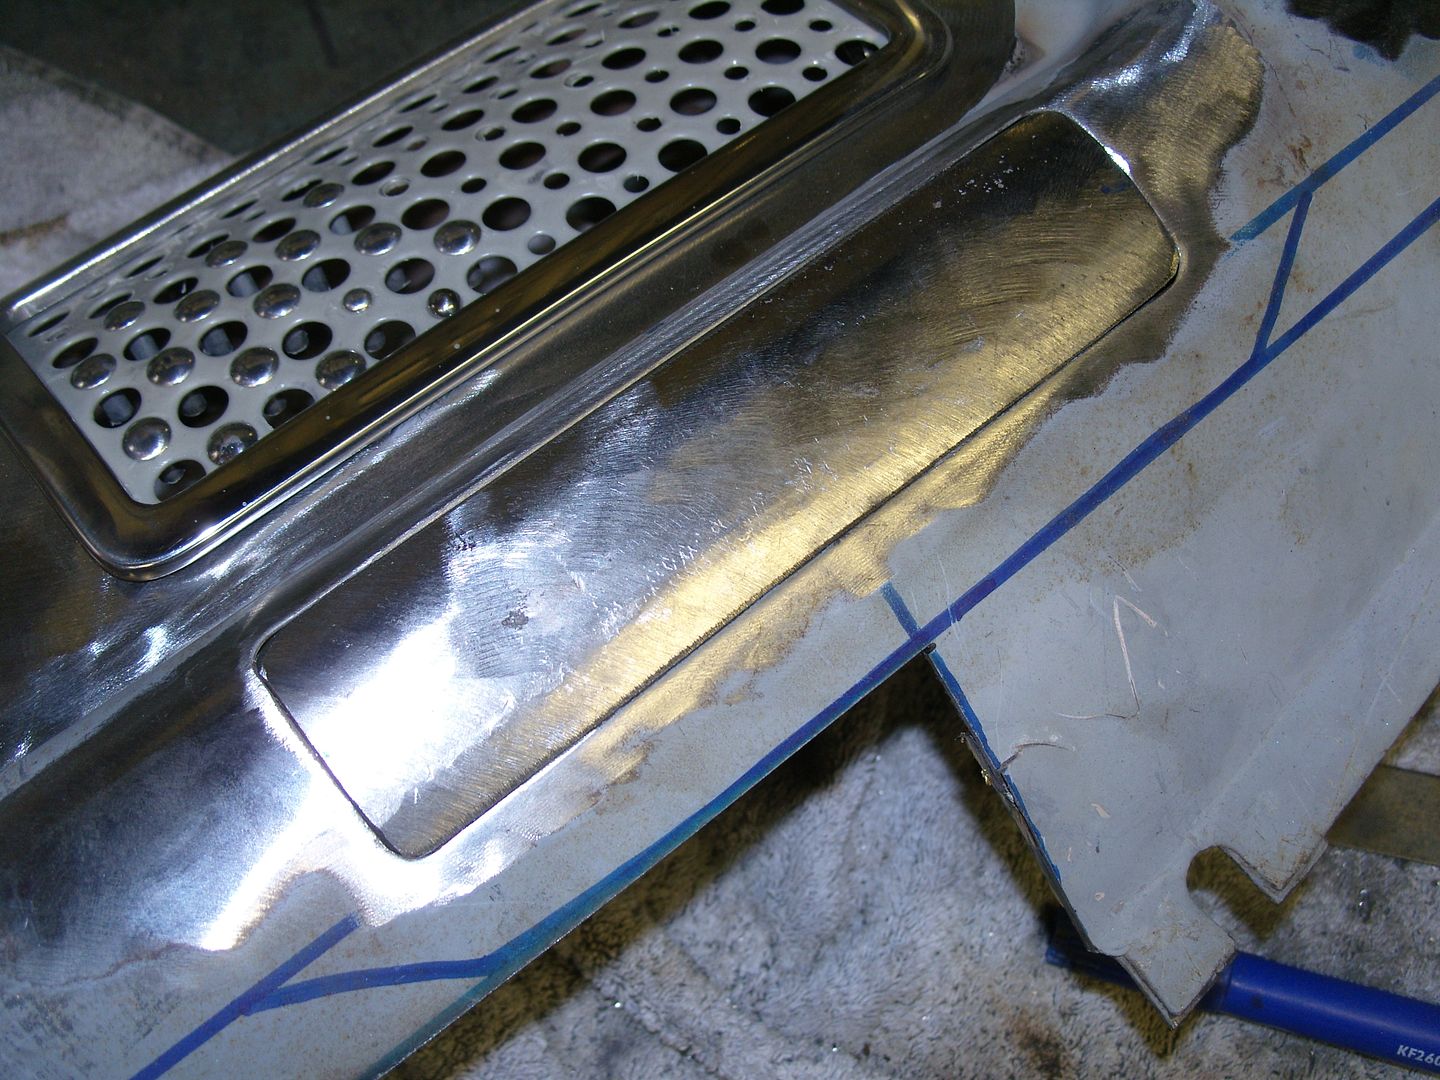
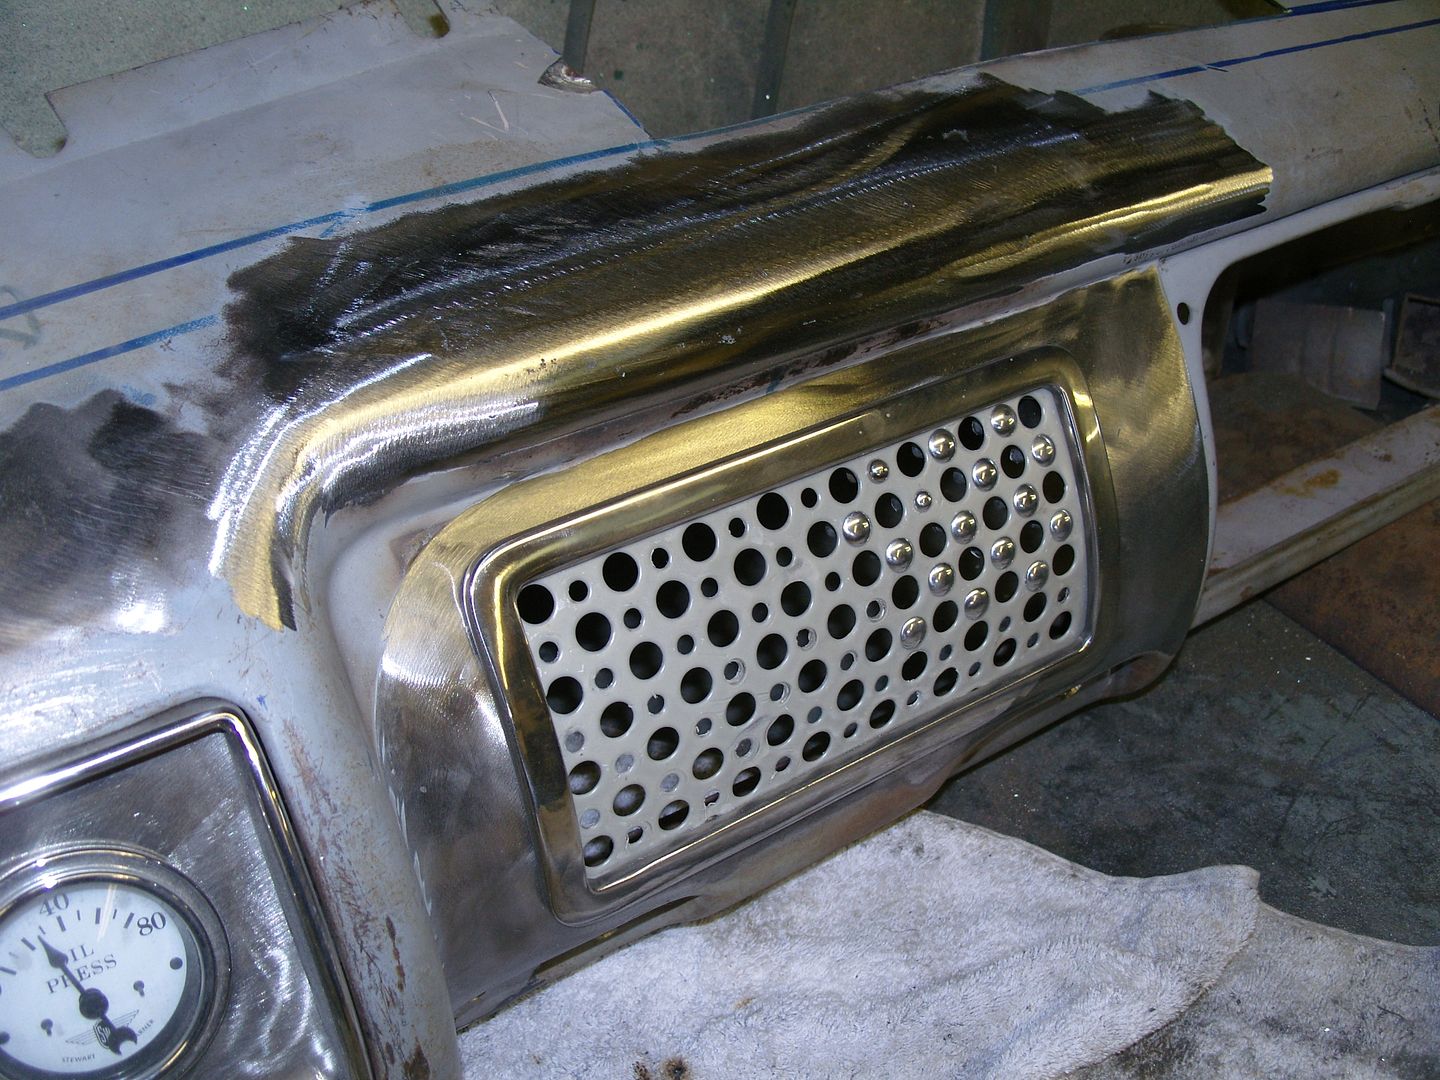
Next up was the speaker grille which actually will house my radio instead, easy way out would of been to get a repro chrome 40 grille but i did that on my 32 and while it has classic looks i wanted something different so i set about making something that would reflect the lightening hole theme in the car, again i started with a piece of 2mm stainless sheet and marked out my design that just happens to be the same as my grill insert, more about that later.
The outside finisher is 15mm x 5mm stainless bar again welded in each corner and radiused, the sheet is then secured to the back of the finisher with small screws.
It hinges up for access to the radio, I wish i had kept the hinge templates from when i did my 32 as they would of saved me a lot of time making it all work again.
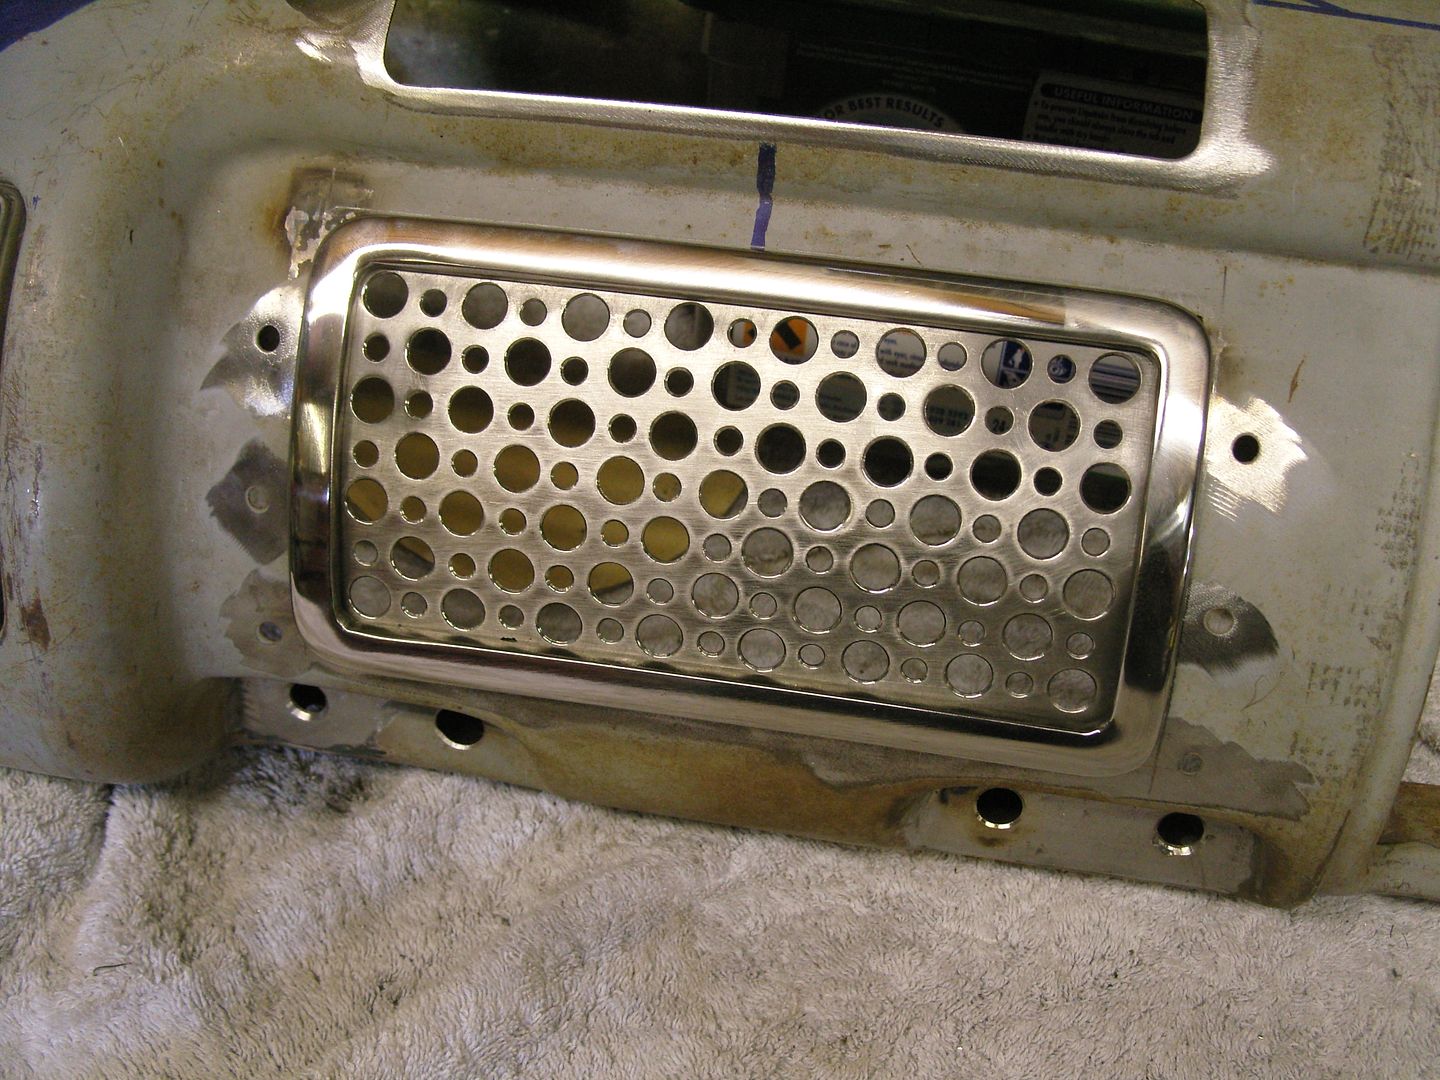
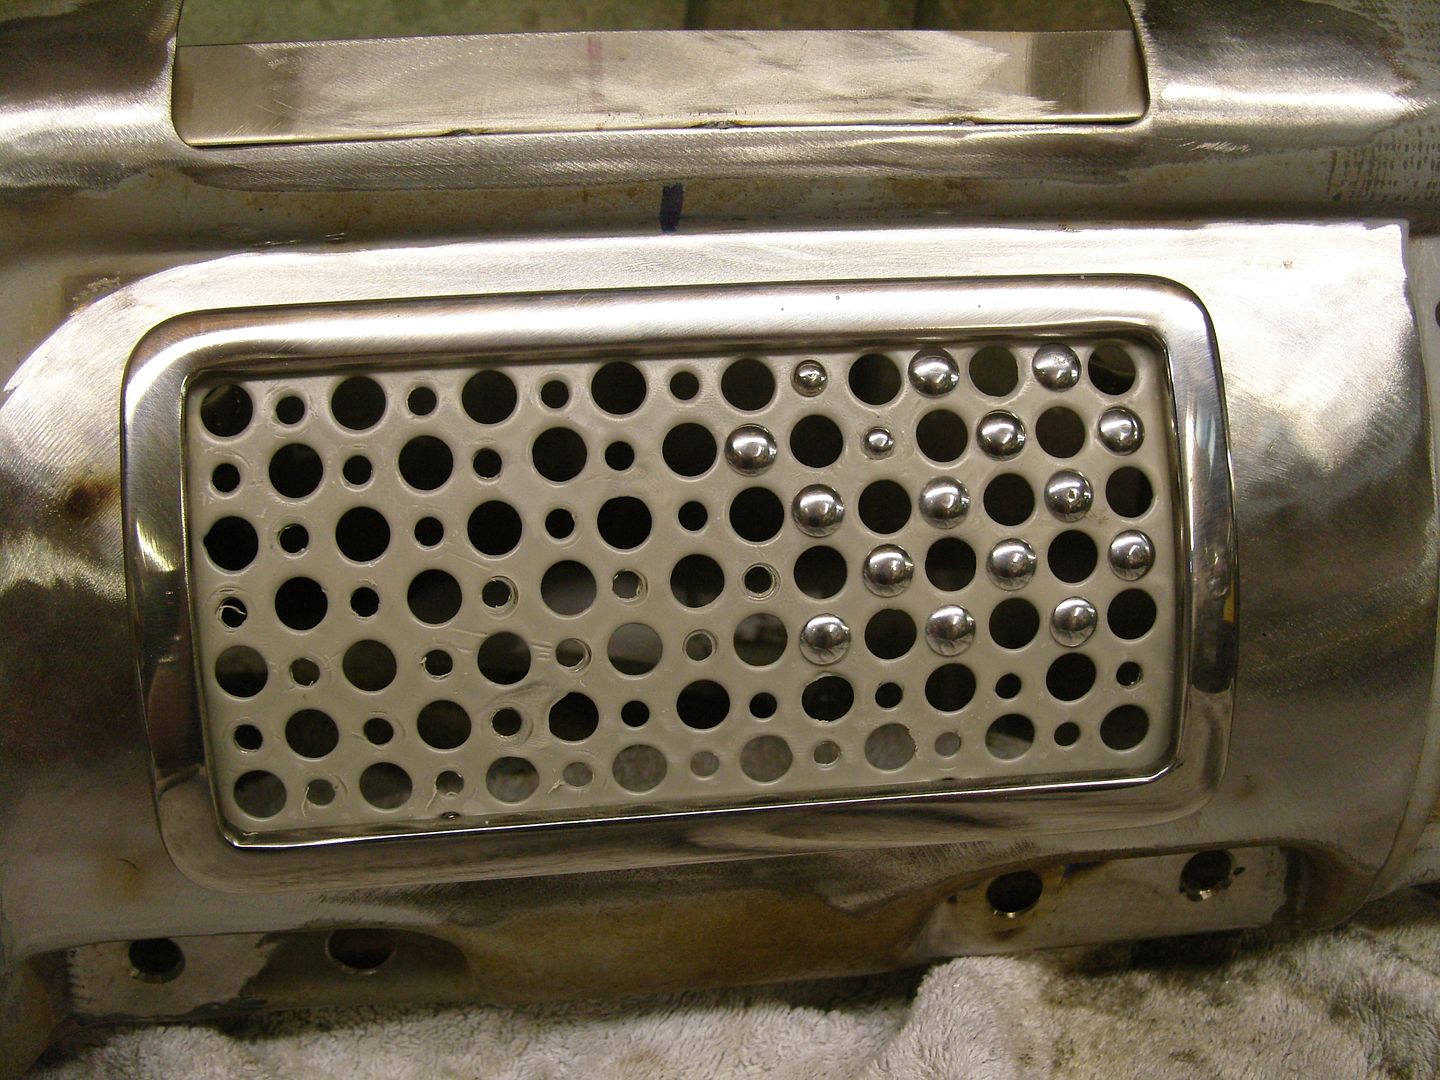
Polished hinges are welded to the 2mm stainless baseplate and connect to a hinge plate that is welded to the inside of the dash.
i was originally going to polish both baseplates but thought i might get reflections that might dazzle me so both will be copper flake, I think it will also highlight the polished stainless edges better.
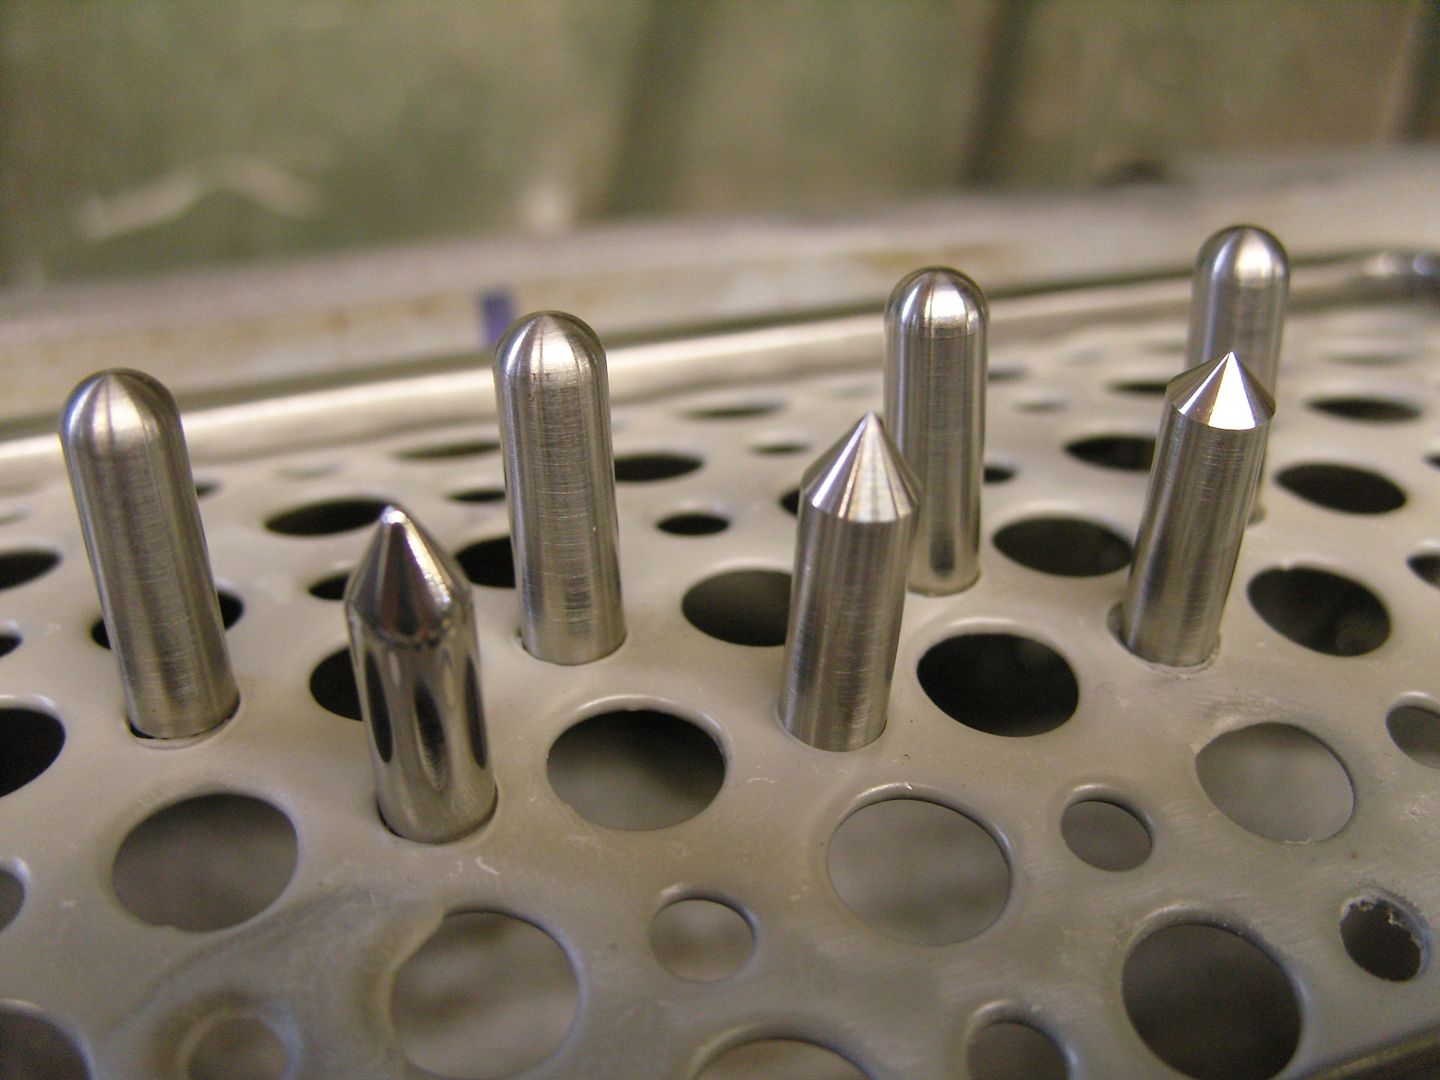
I was originally going with small bullet shaped thingys in the small holes but i've now scrapped that idea as i just didn't like it when i put some in, now i will be going with small rivet heads.
Where the ends were cut off the cut went through the ashtrays so fill in pieces were made and welded in and smoothed off.

There are quite a few holes to fill, some are stock but a fair few have been added by the various owners over the years.
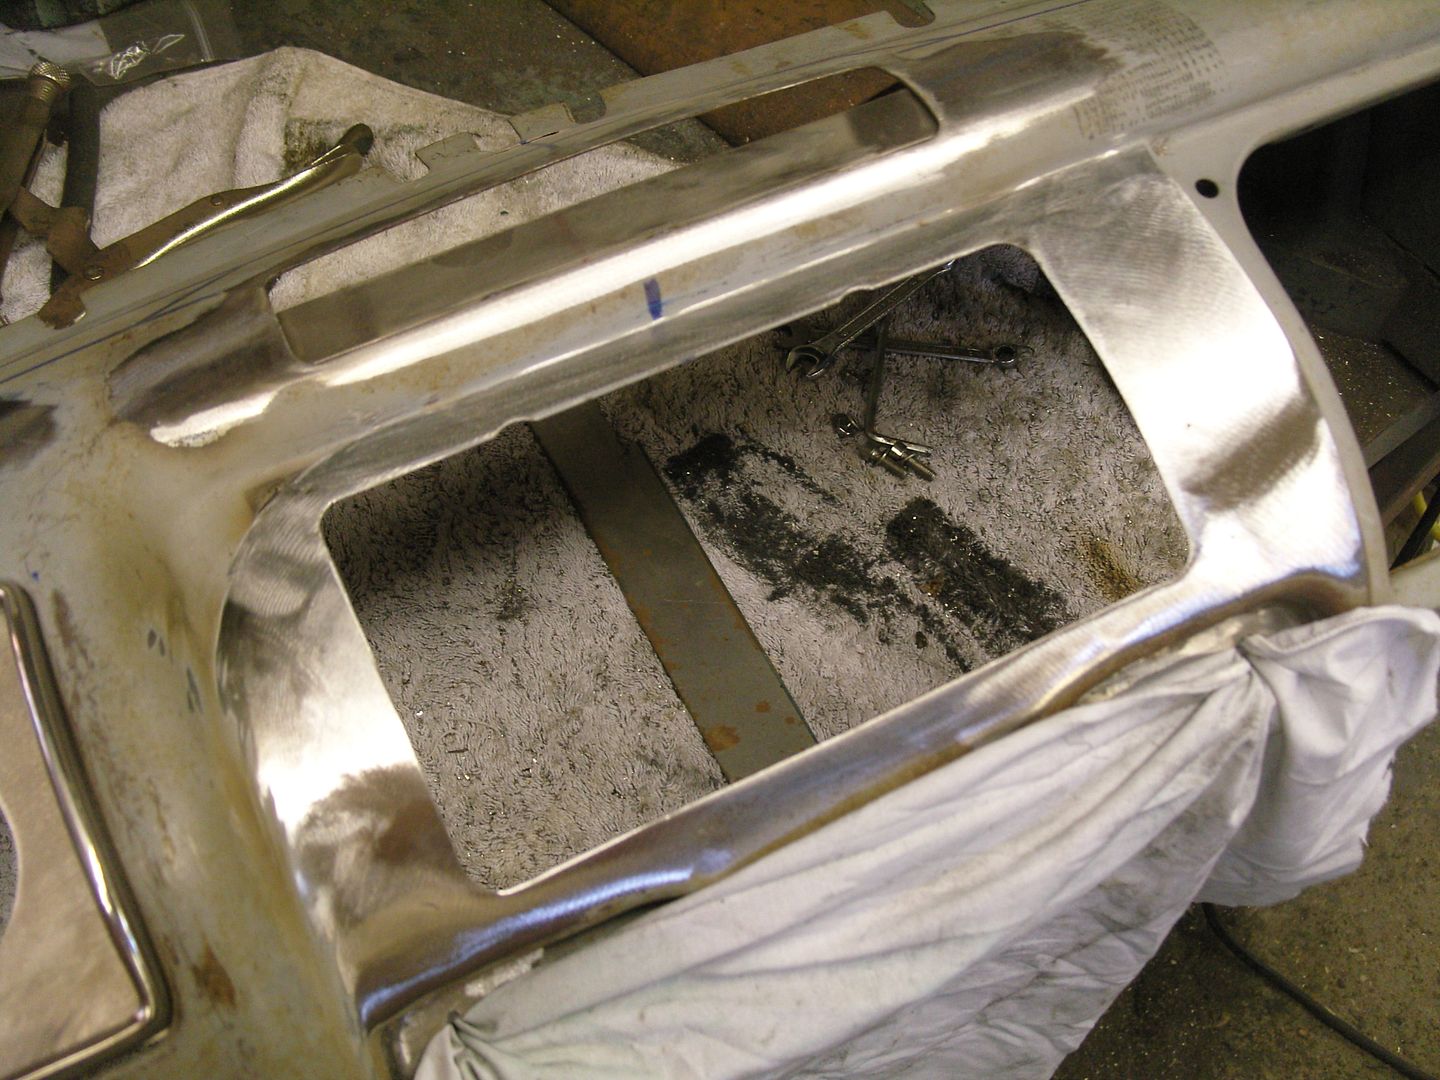

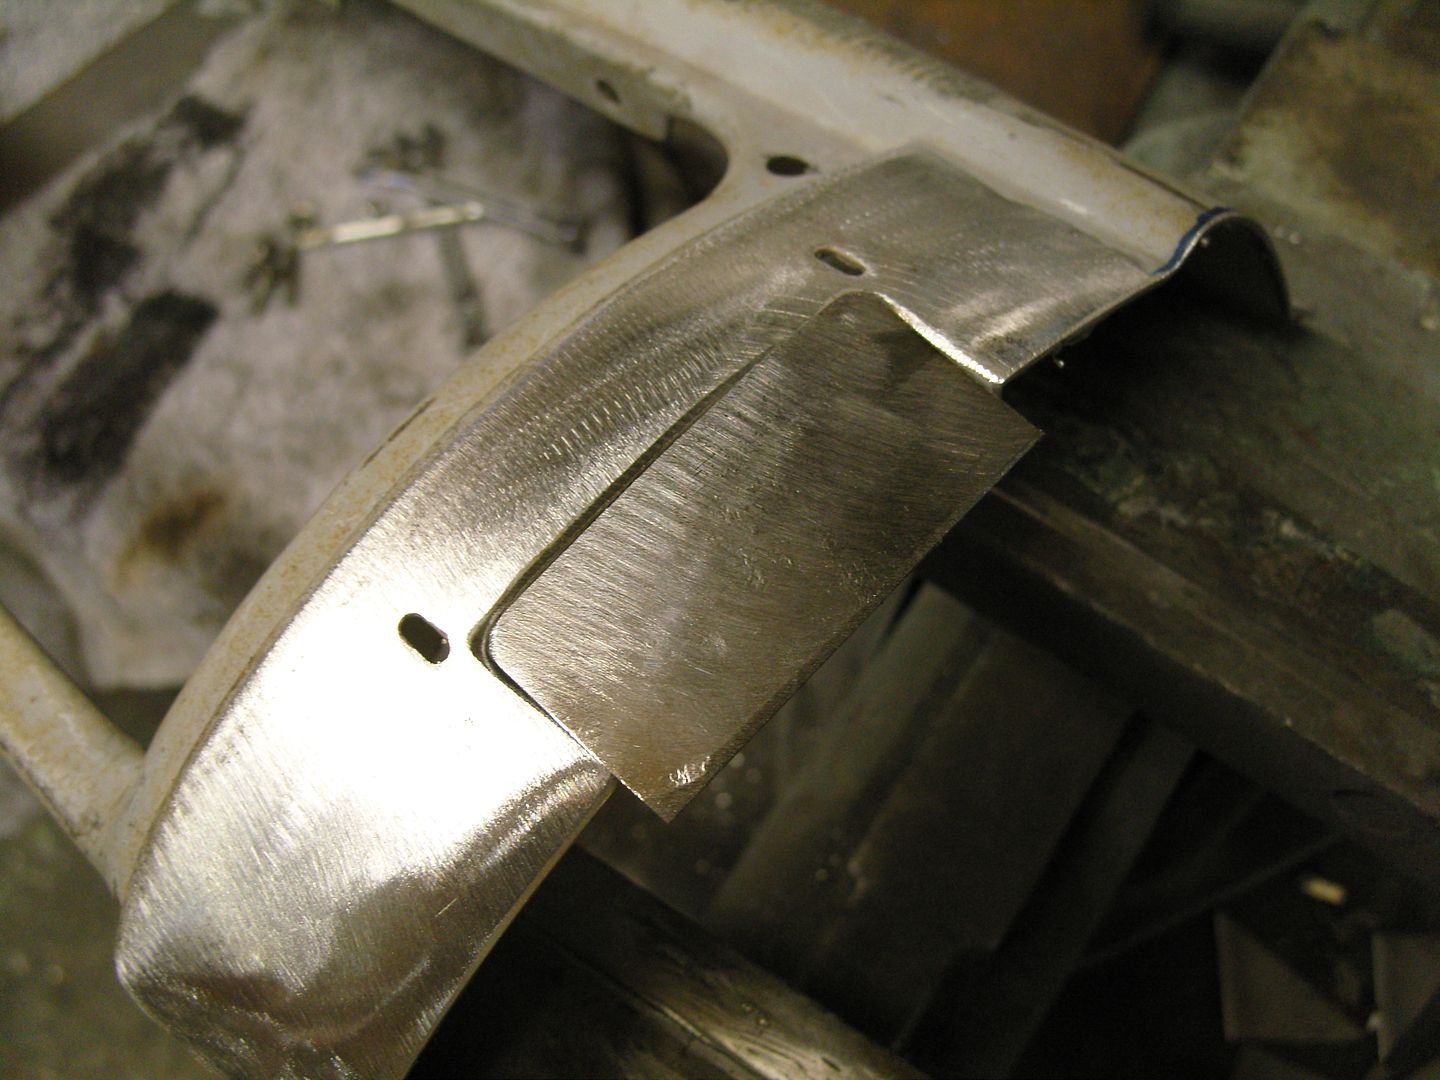
The original radio hole needed filling so i used the piece i cut from the top of the dash, no wastage here. The bar you see here is the hinge bar for the hinged opening grille.
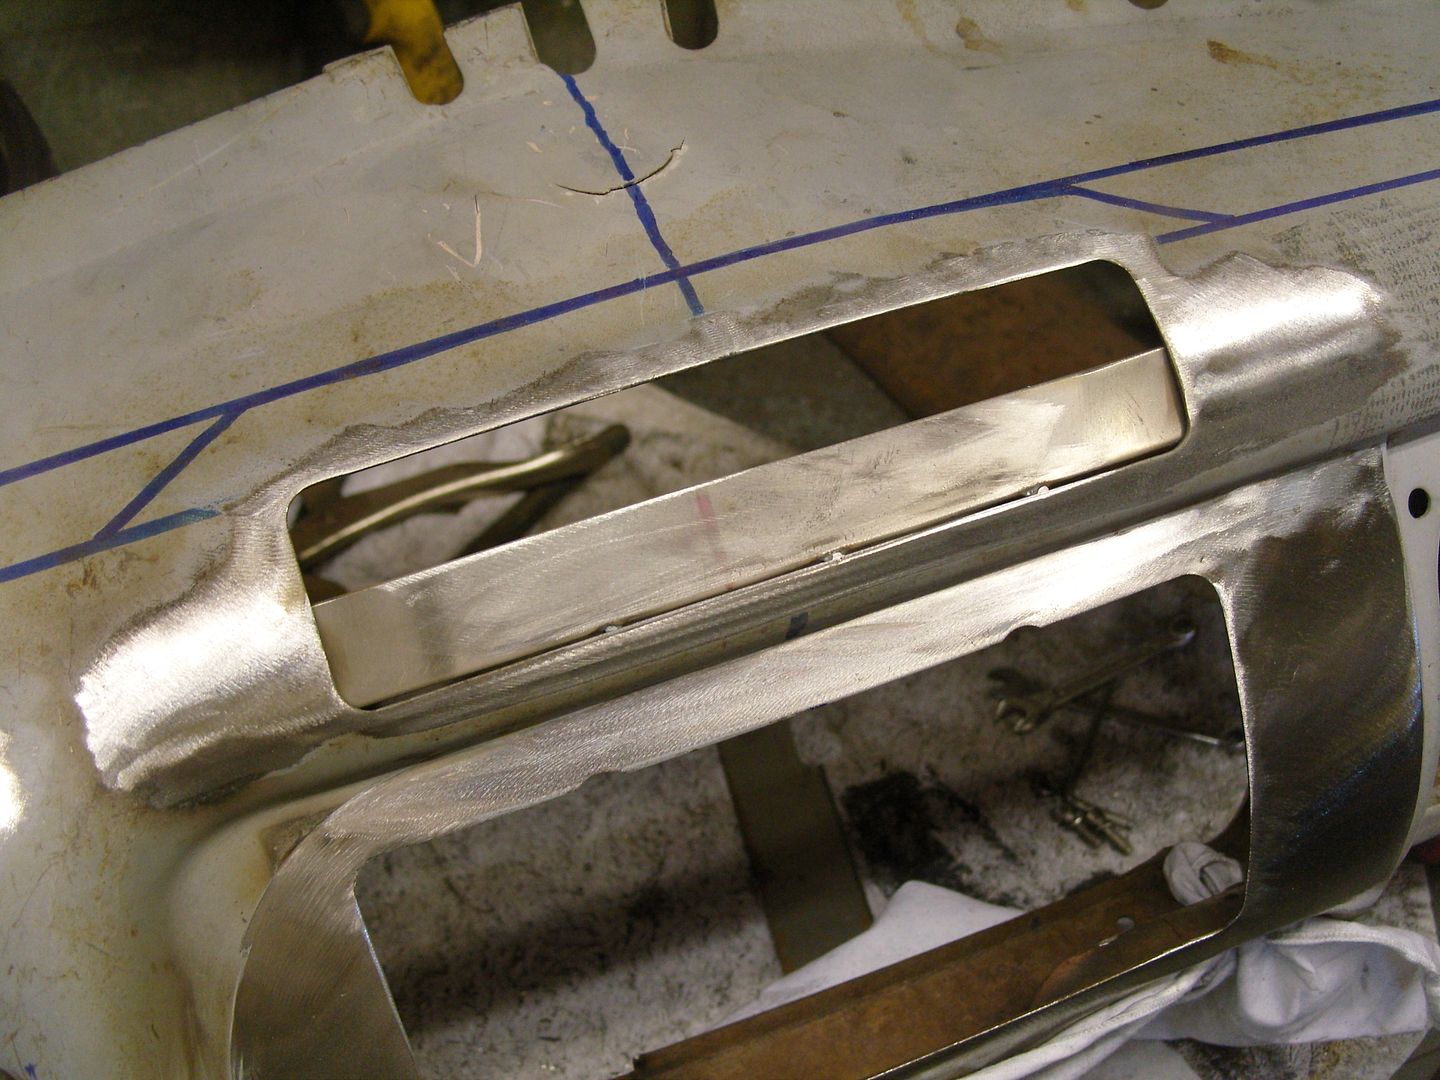
The piece was shaped to fit nicely and tack welded in place.

Then fully welded and smoothed off
Its aweful lonesome in the saddle since my horse died.
-
07-16-2010 01:59 PM #73
CHR Member
- Join Date
- Feb 2010
- Location
- Pukekohe, New Zealand
- Car Year, Make, Model: '23 Ford T Roadster
- Posts
- 2,199
MATE.....mate how tall do you think we are?????
Stop lifting that damn bar higher and higher.....
We are struggling to take it all onboard all those neat little things you are building....
What supermarket sold you all that raw talent???? I need to go shopping there!!!!
I maybe a little crazy but it stops me going insane.
Isaiah 48: 17,18.
Mark.
-
07-17-2010 02:05 AM #74
CHR Member
- Join Date
- Apr 2009
- Location
- watford
- Car Year, Make, Model: 26T Coupe, 32 Roadster, 41 Willys Coupe
- Posts
- 2,363
Ha ha ha, If only you could buy skills, would make life much easier
Originally Posted by Whiplash23T
Its aweful lonesome in the saddle since my horse died.
-
07-28-2010 01:02 PM #75
CHR Member
- Join Date
- Apr 2009
- Location
- watford
- Car Year, Make, Model: 26T Coupe, 32 Roadster, 41 Willys Coupe
- Posts
- 2,363
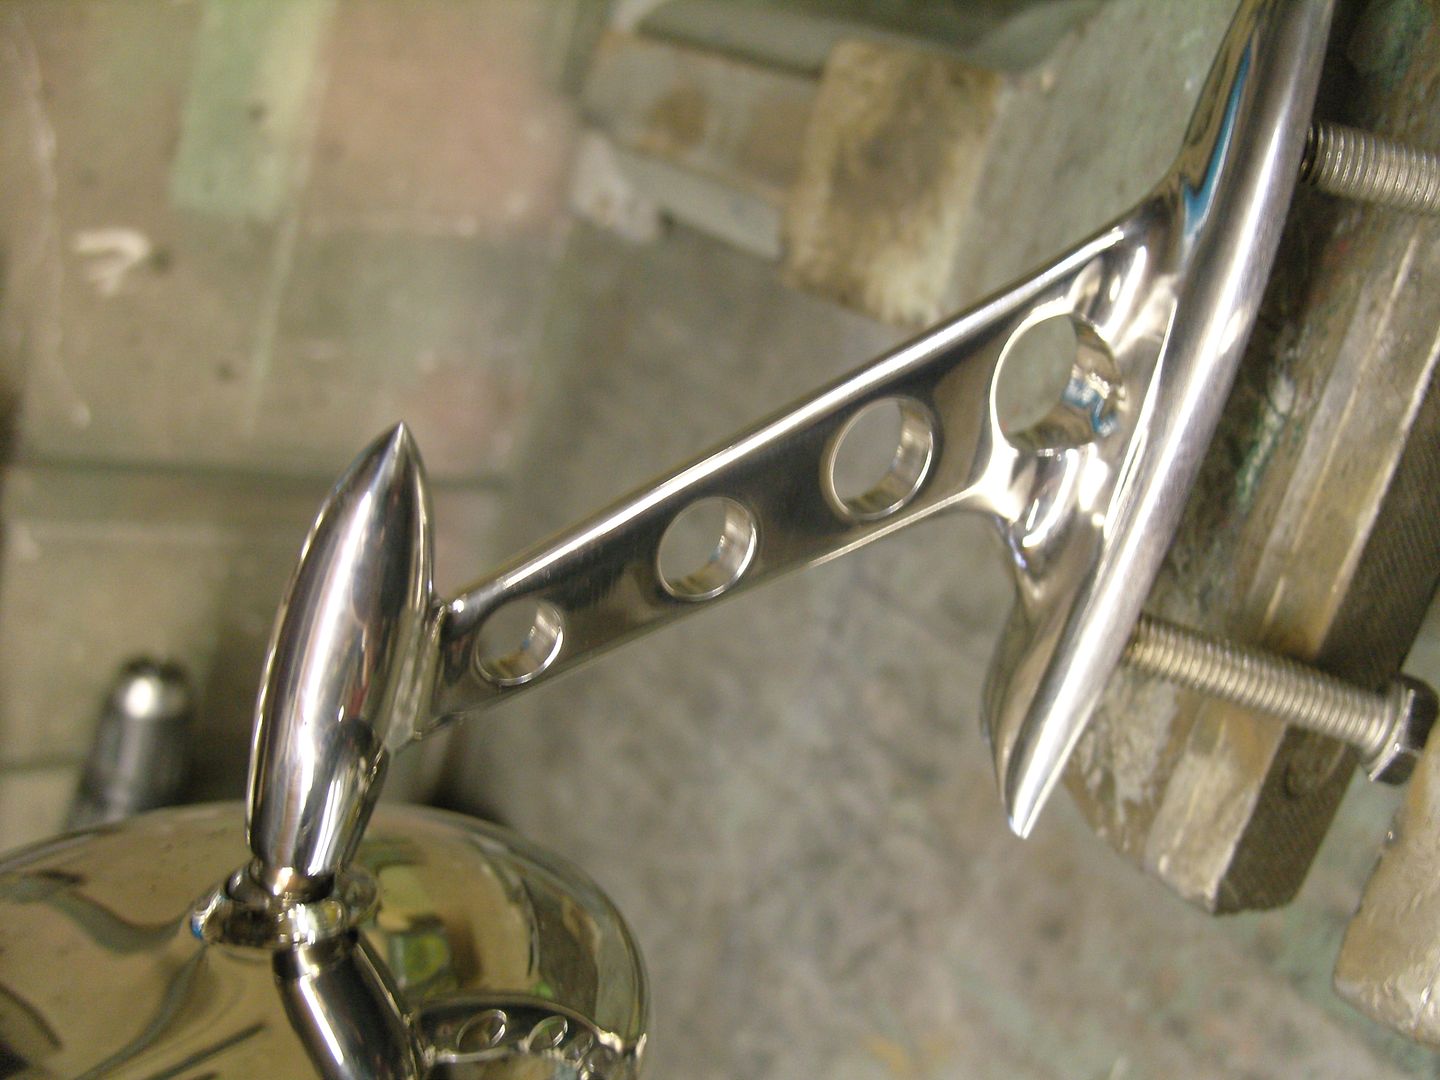
Once i finished the door handles i realised that i would need some matching door mirrors, found some the right shape but when i drilled the mirror arm the die cast was aweful, so decided to make some.
First a piece of 10mm stainless bar was drilled for the tail scallop, then it was cut in half so each half had a semi circle in it.
The upright is made from 6mm plate, all stainless is 316L
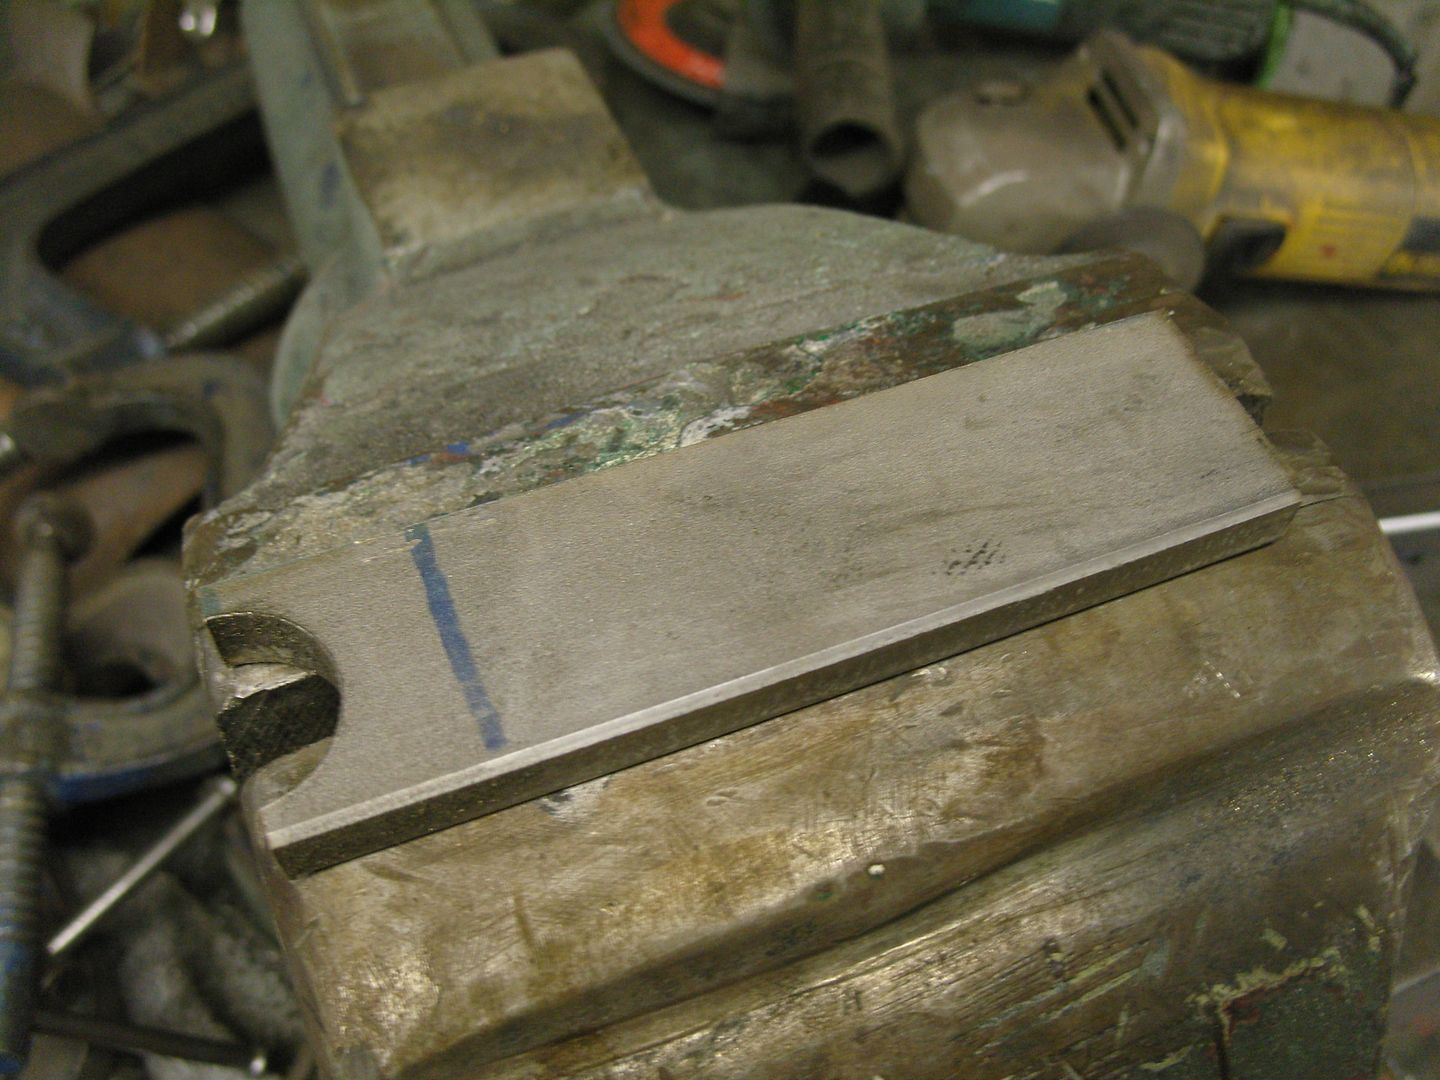
Next the basic shaped was cut and ground with a 1mm cutting disc and a flap disc in a angle grinder. The other parts were cut out, drilled and turned ready for welding together, the parts were polished before welding so only the welds needed blending and fettling.
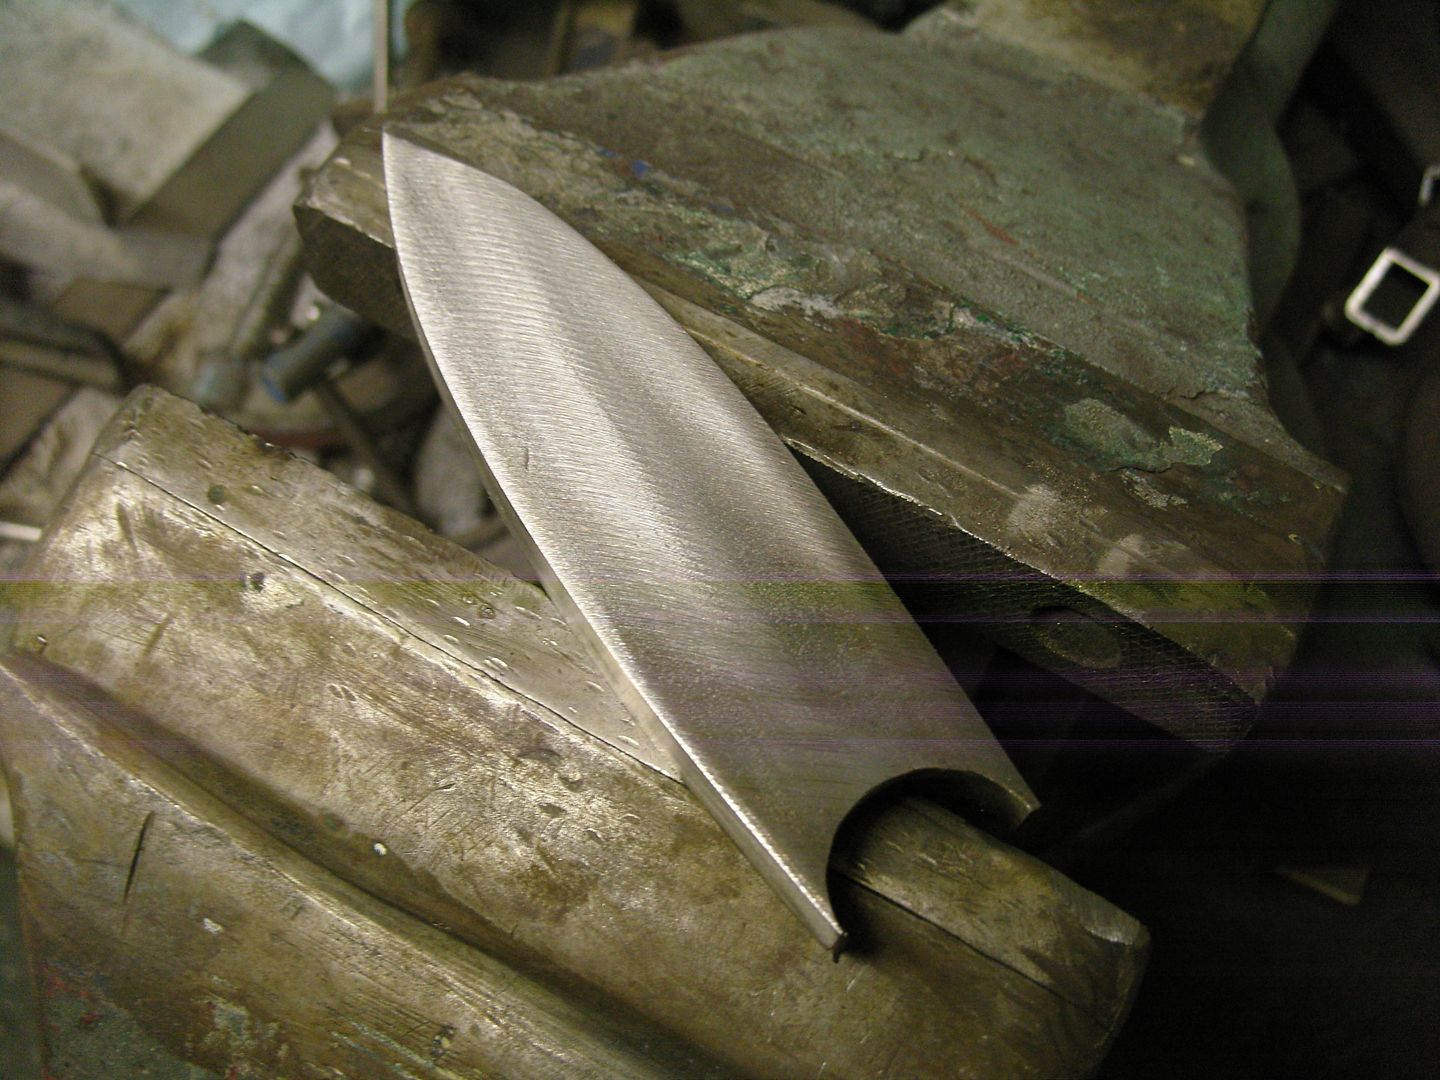
Next the edes were chamfered several times till a 50p shape was acheived, then the edges were soft sanded till smooth and radiused.
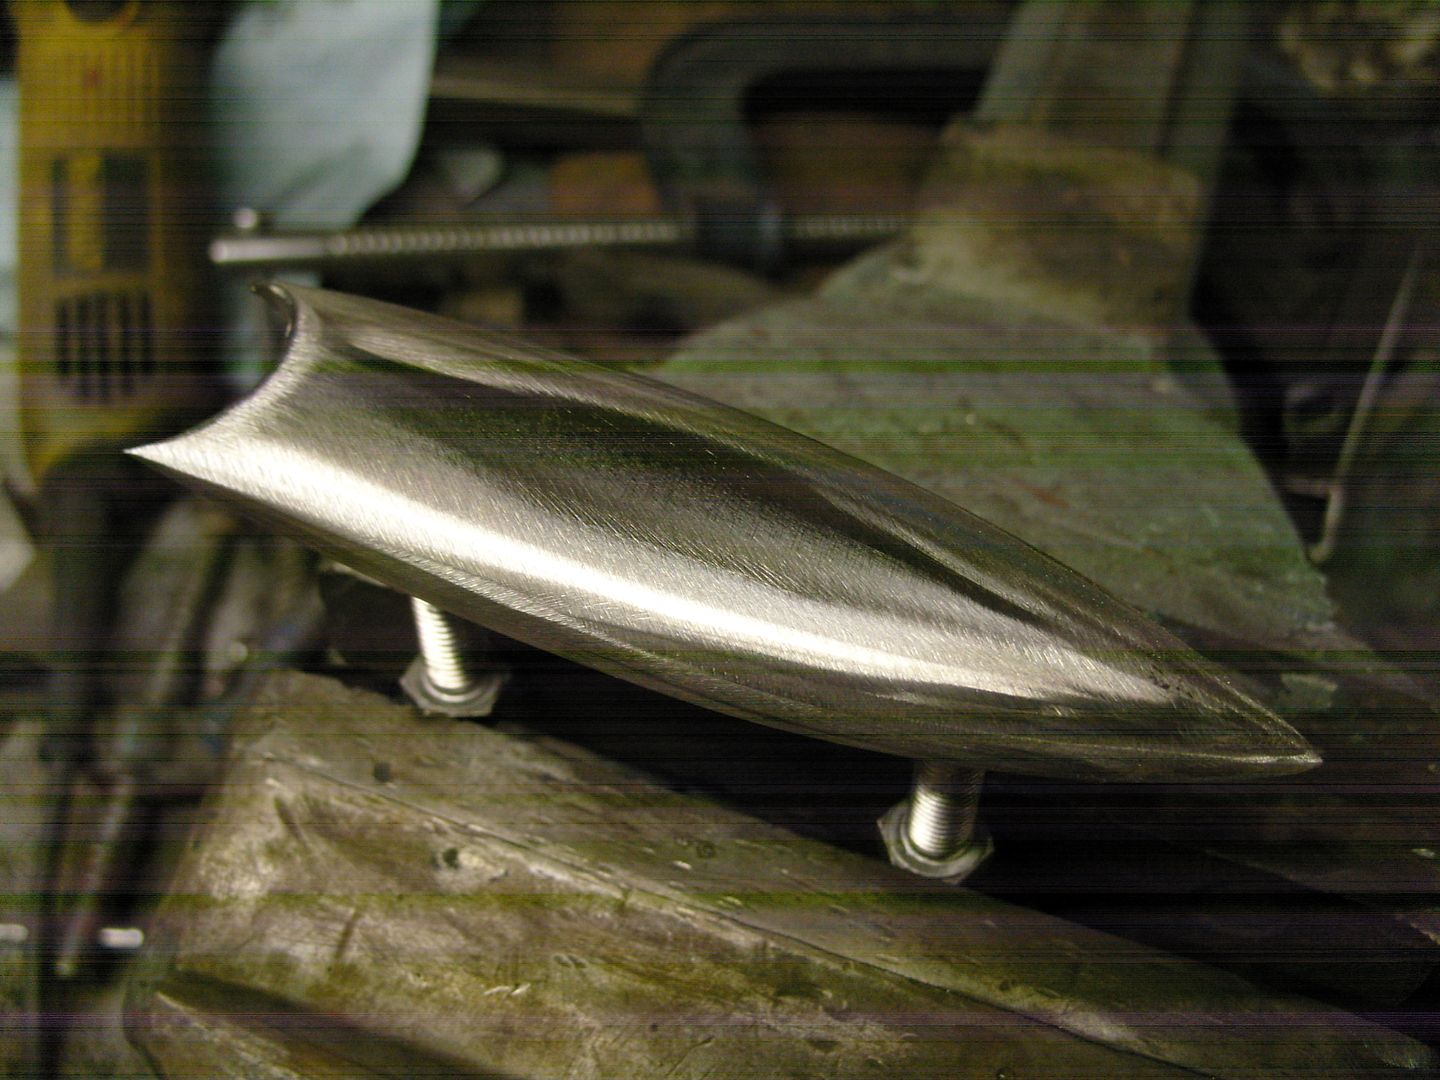
The reverse side had to be hollowed out as this sit on a swage line so again the back was ground away to suit.
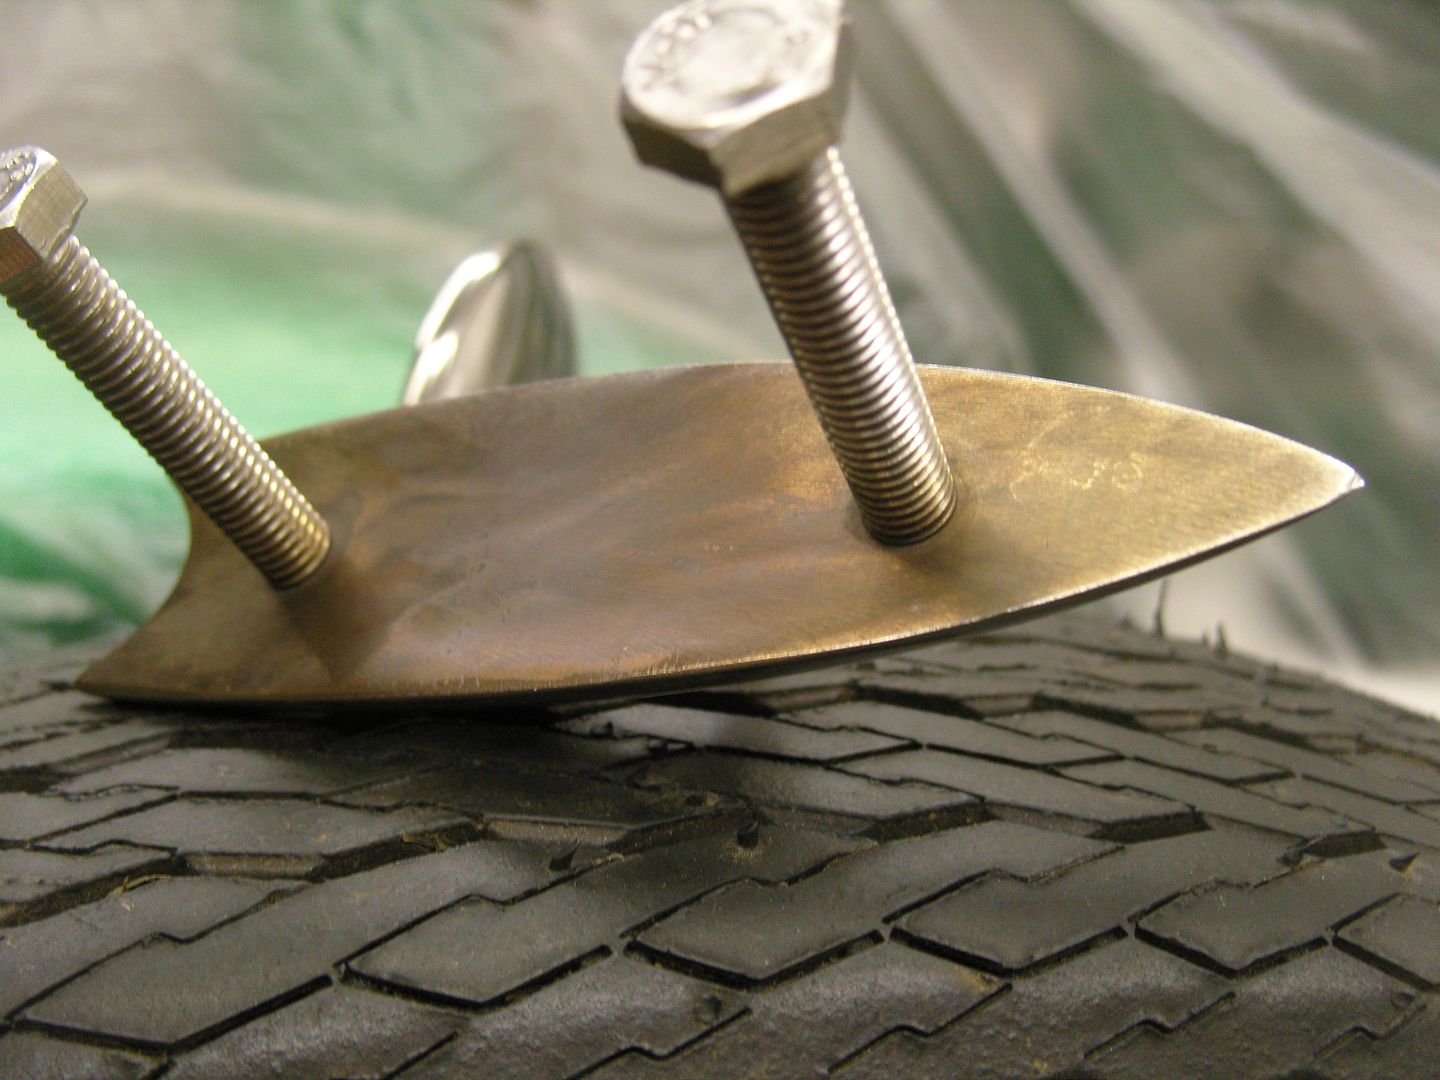
2 x 6.8mm holes were drilled and tapped 8mm for mounting studs, the long bolts are temporary and for holding during the polishing process.
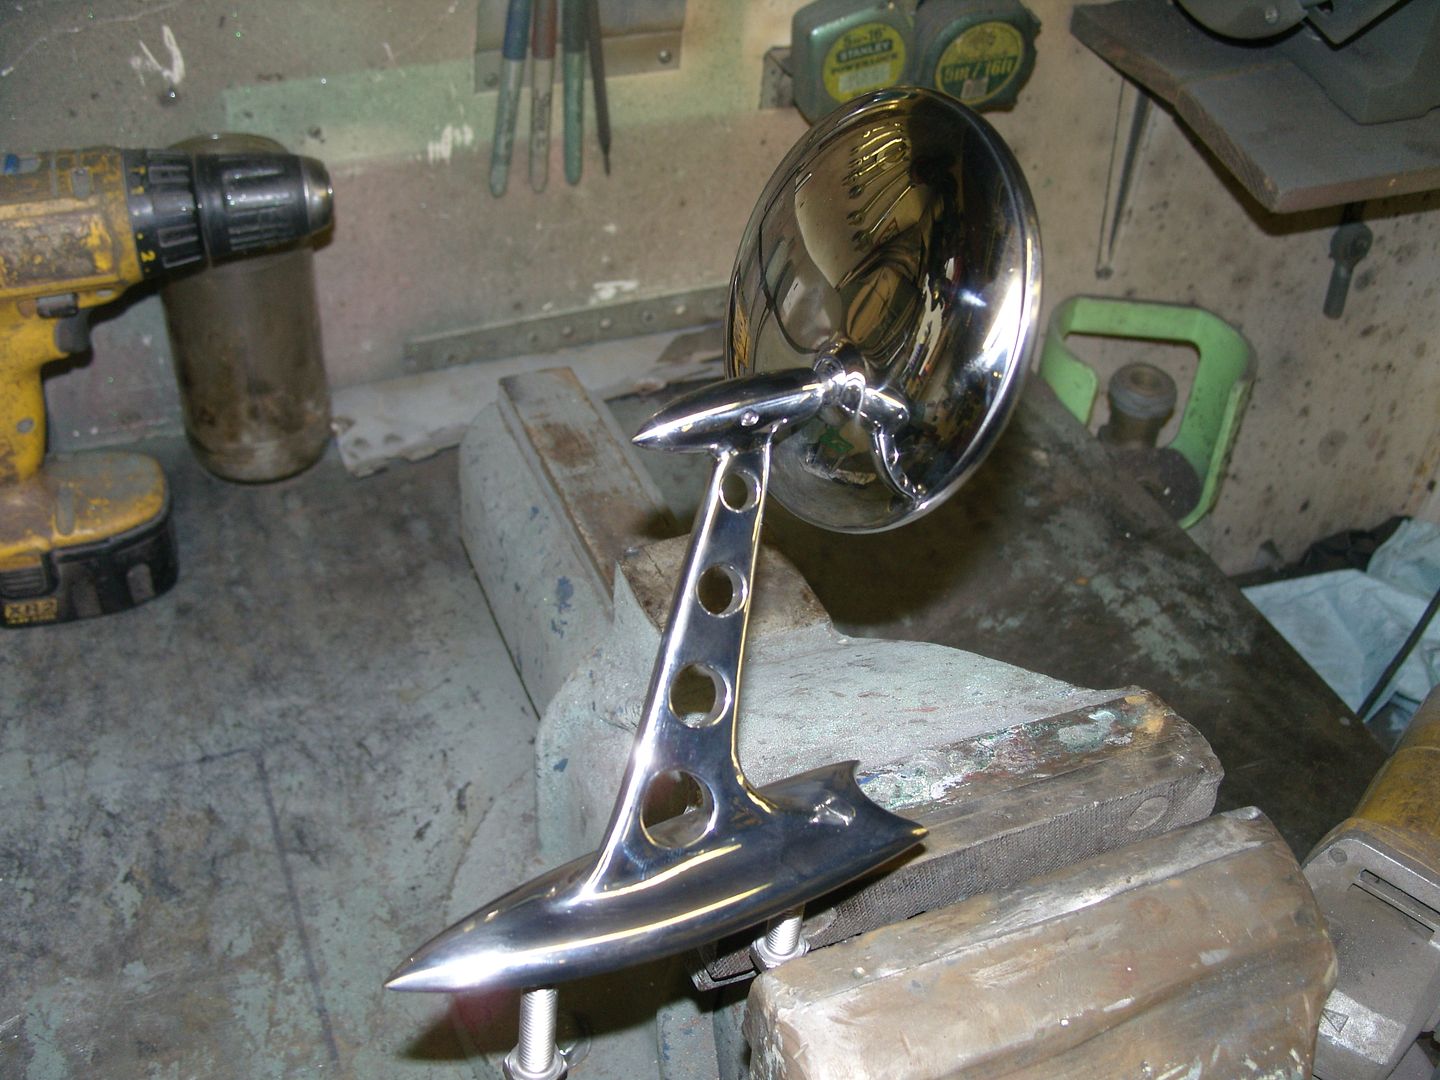
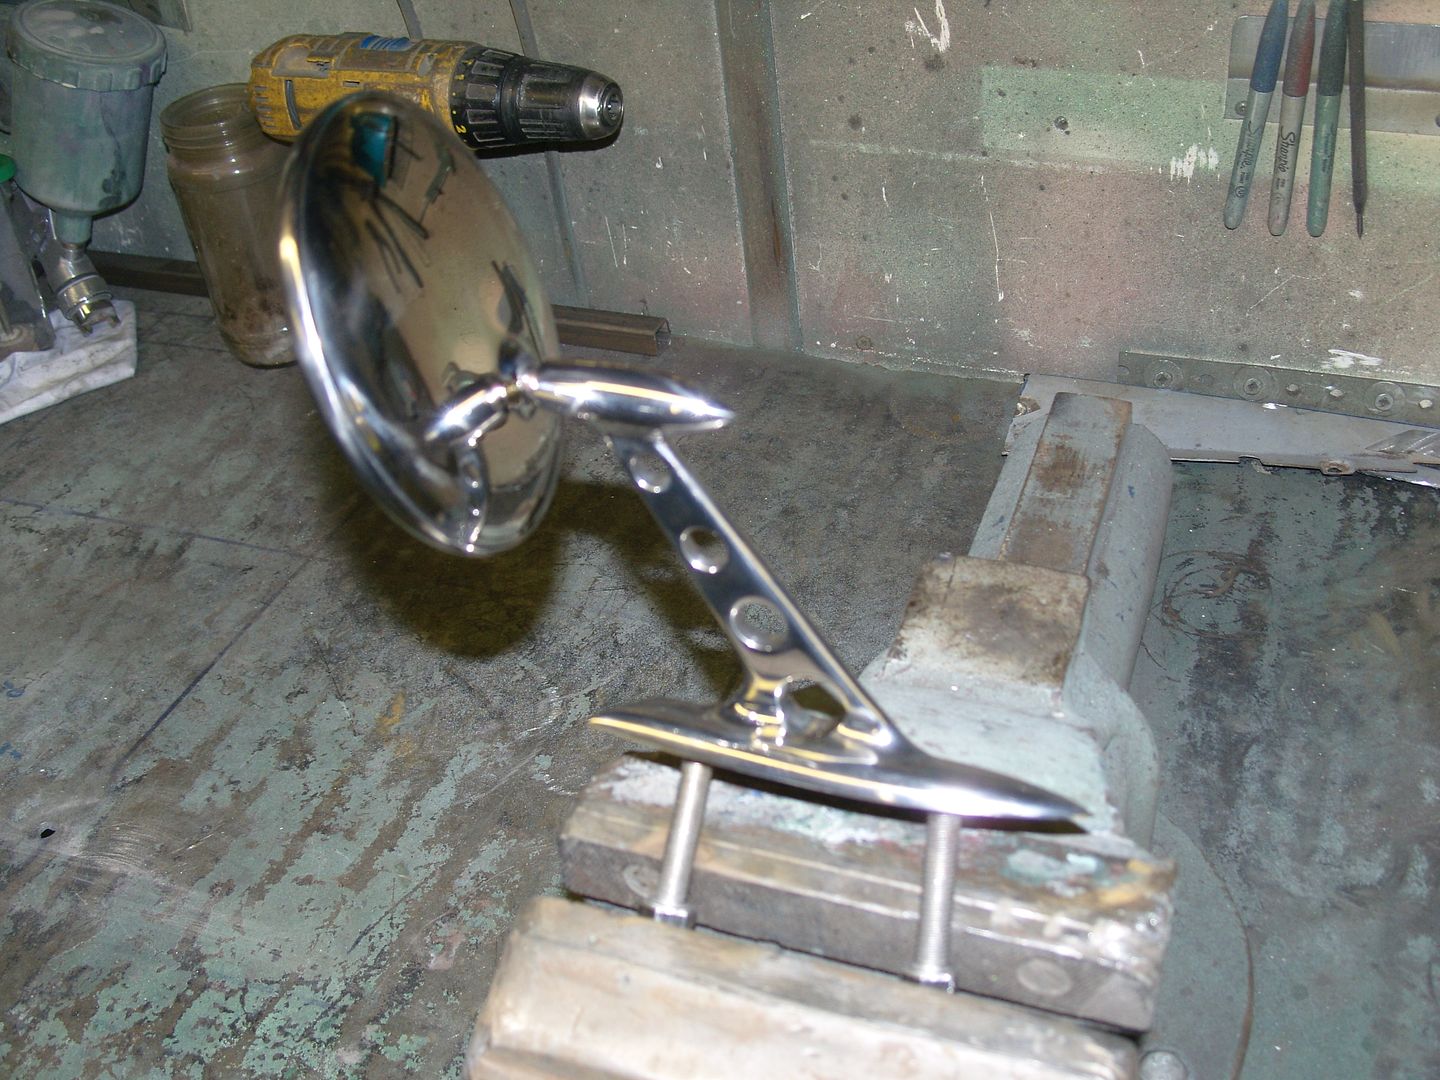
All the parts were then TIG welded together, a fair bit of rod was used so i had something to get a nice radius with.
The finished Mirrors.
Its aweful lonesome in the saddle since my horse died.
 Reply With Quote

Posting Permissions
- You may not post new threads
- You may not post replies
- You may not post attachments
- You may not edit your posts

i've enjoyed the years here . made a lot of friends. most who have left. i see no reason to continue with this so hope to see you somewhere else. i dont think this site will ever be back. it's lived...
Dead!