


Thread: Custom trim, advice needed


Results 1 to 10 of 10
 LinkBack URL
 About LinkBacks
-
04-03-2010 03:05 PM #1
 CHR Member

- Join Date
- Jan 2004
- Location
- Santa Ana
- Car Year, Make, Model: '32 High Boy, '60 VW, Teardrop Trailers
- Posts
- 355
Custom trim, advice needed
I'm looking to make a piece of custom trim for my "three piece" hood top. I want to finish the chrome trim back, from the radiator trim piece, but since it's not the normal folding four piece hood, it's going to require it be custom made.
I was thinking about purchasing a 36" piece of "half round" or "half oval" stainless bar stock and shaping it to look like the 32 radiator trim profile. How hard is it to file down the stainless, and then polish it. I will need to thread it, to bolt it to the hood from the underside (don't want to use double sided tape). Which "grade number" of stainless is soft enough to work with, and still give a good shine after it's polished?
Maybe it would be easier to use brass and have it chromed?
Looking for some advice, and ideas. Maybe even a source for this specialty metal shapes in So. Cal.
Thanks, John
-
Advertising

- Google Adsense
- REGISTERED USERS DO NOT SEE THIS AD
-
04-03-2010 04:52 PM #2
CHR Member
- Join Date
- Nov 2004
- Location
- orange
- Car Year, Make, Model: 4- 32 fords
- Posts
- 1,609
John,
I think Schoer Metals has it. I can check Monday if you want. If not I can machine it for you.
Ken
-
04-03-2010 04:53 PM #3
CHR Member
- Join Date
- Sep 2005
- Location
- Out in the country (Duncan)
- Car Year, Make, Model: 32Roadster/always buildin sumthin
- Posts
- 1,551
John, Have done exactly what you want to do.
Use brass, it's a lot easier to work and drill and tap.
Then chrome it.When I get to where I was goin, I forgot why I went there> 
-
04-03-2010 08:27 PM #4
CHR Member
- Join Date
- Jan 2004
- Location
- Santa Ana
- Car Year, Make, Model: '32 High Boy, '60 VW, Teardrop Trailers
- Posts
- 355
Don, good suggestion on the brass. The more I think about it, the existing Bob Drake trim is chromed and the chromed/brass trim would look better next to it than polished stainless trim.
Ken, Thanks for the offer, I'll let you know if I need a "bail out" on this project. I was just at Schoer Metal last week to buy a piece of aluminum bar stock to finish my "Childs & Albert" Piston Rod steering suport bracket.
-
05-30-2010 08:24 AM #5
CHR Member
- Join Date
- Apr 2009
- Location
- watford
- Car Year, Make, Model: 26T Coupe, 32 Roadster, 41 Willys Coupe
- Posts
- 2,363
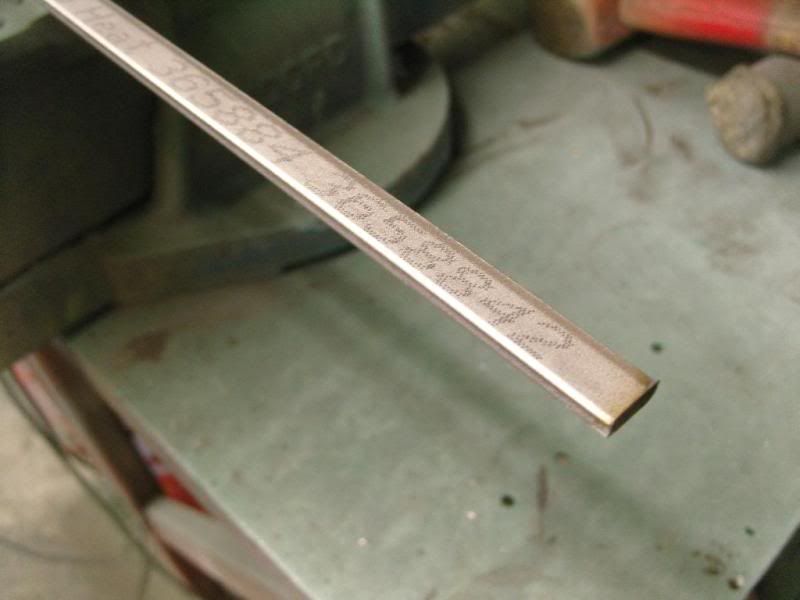
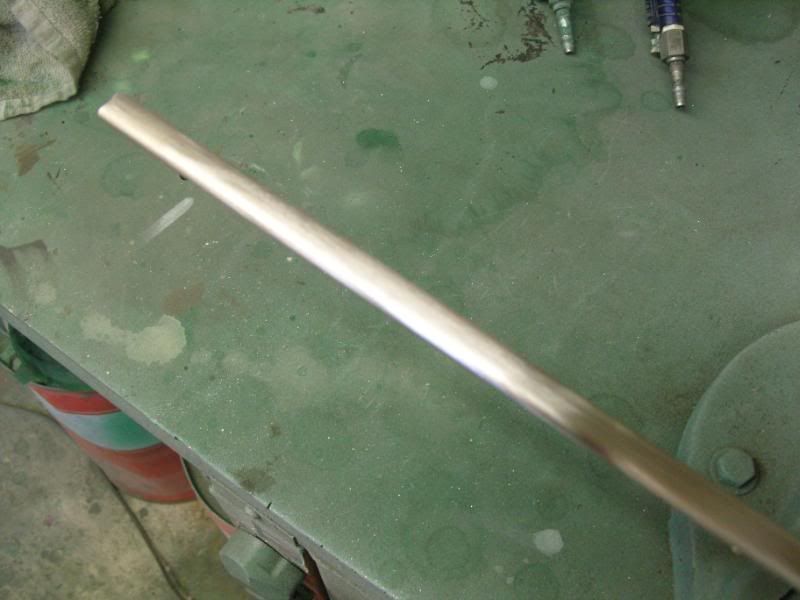
I use stainless bar, all i do is put a 45 angle on it with a grinder with a soft sanding disc in it, then i make it into a hex shape, finally blend all of them together then polish.
There is other ways of doing this i'm sure but this is just how i did it.
I started off with some 304L 12mm x 6mm stainless flat bar, this will take a radius cold quite easily but any thicker and heat would be needed.
Next i made a rough template in card and clamped the bar in the vice behind a large socket and started tweaking it slowly
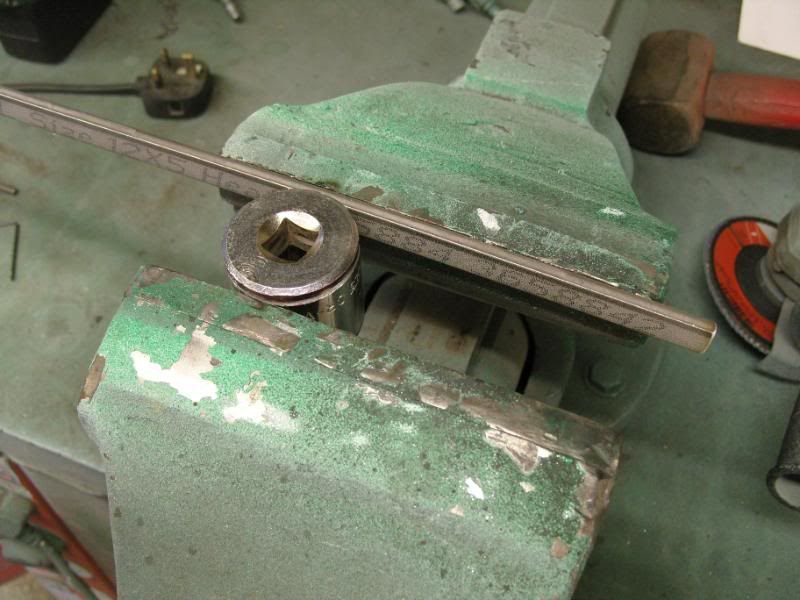
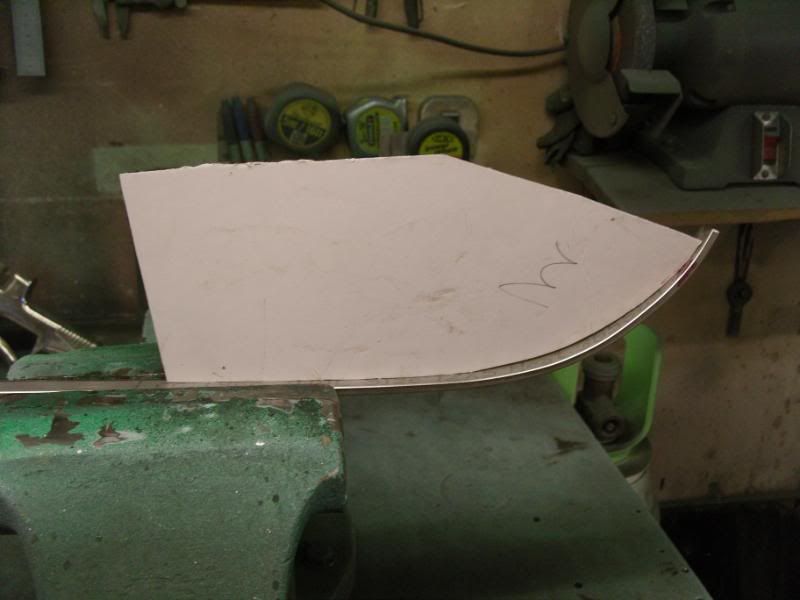
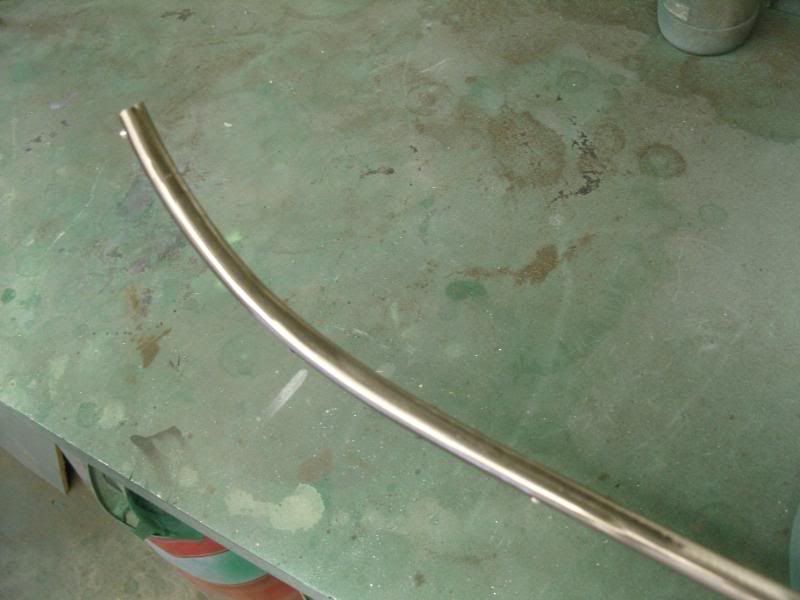
This piece was a little more fifficult to do as about 150mm from the end it curves down as well, Again it was tweaked slowly to form the curve, you will find as you bend one way the other will try and straighten out so you will need to go back and retweak.

Once the desired shape was acheived i drilled 3.3mm holes where the holding studs were needed, the pillar drill was setup so to prevent braeaking through the other side, these were then tapped for 4mm stainless grub screws.

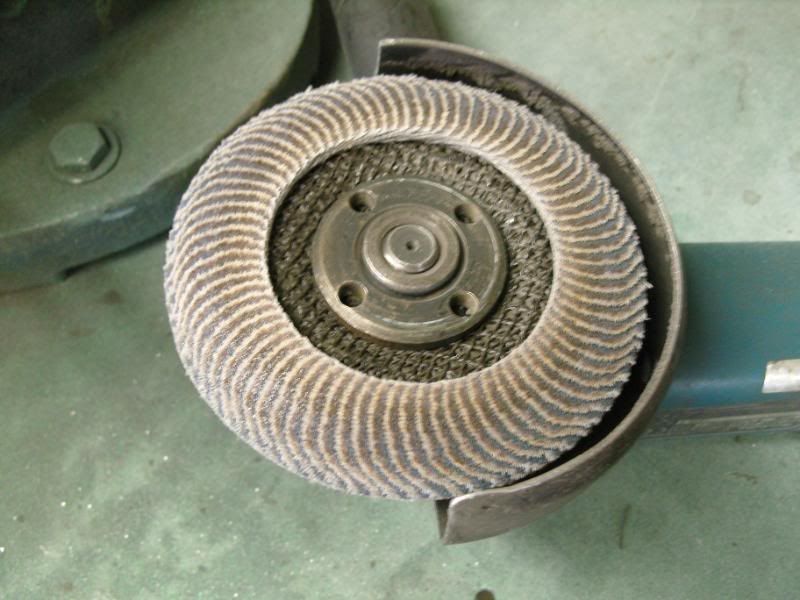
Next i started to radius the edges, first i ground a 45 degree chamfer on the edges with a angle grinder fitted with a 40 grit flap disc, I found a worn disc to work best as with a new one it was possible to remove to much metal too fast.

Next i added chamfers either side of the first so ending up with a 50p shape, Then i started to blend & fettle to a smooth radius.
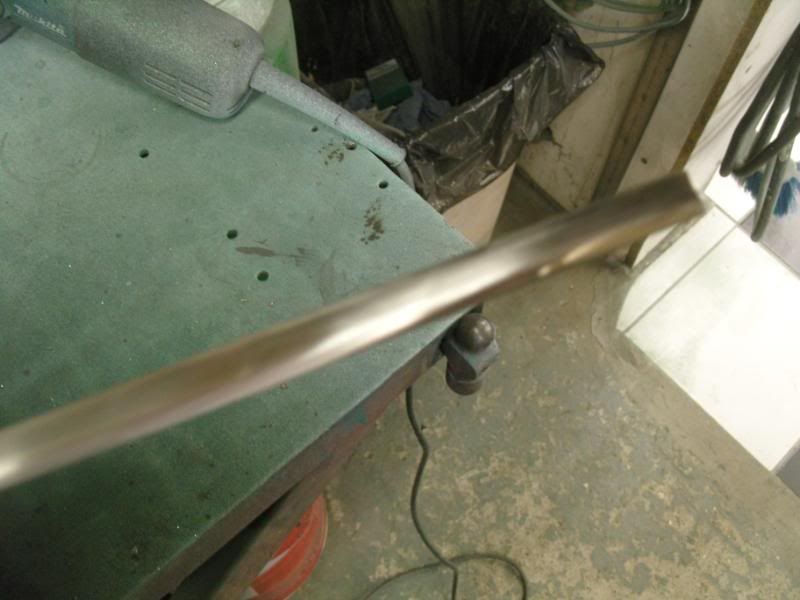
All the sanding will alter the shape slightly but its quite easy to reshape later after polishing.
Next job was polishing so i started with a 80grit on the polishing machine working down via 120, 180 to a final 320, this left a very smooth and shiny surface that just needed buffing with a sisal mop to remove the light scratches and was finally buffed with a cotton stitched mop to acheive a nice shine.

Here it is refitted
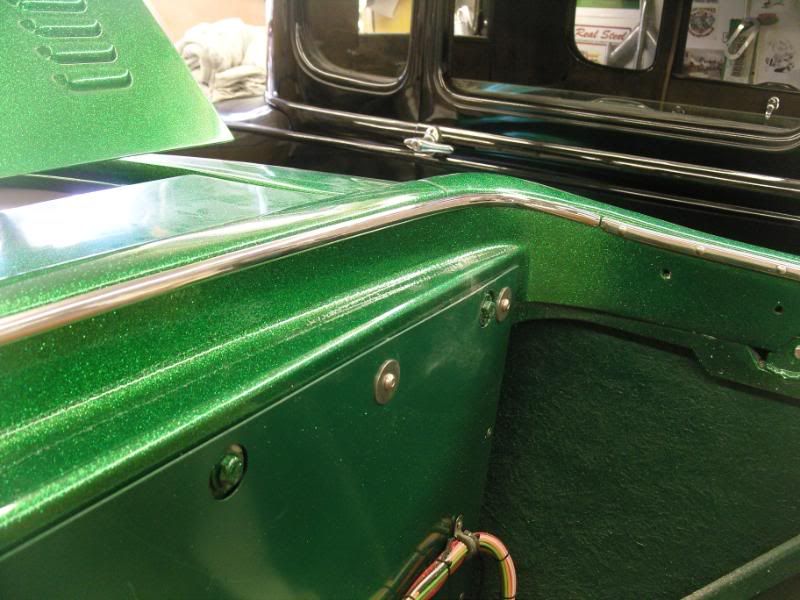
I've got a rivet theme going through the car so i then marked out the spacing and drilled 6mm holes for the rivets, the rivets are held from the rear by tiny tack welds, the whole thing was lightly repolished and fitted. The seat material now has to be restretched to fit snugly under the edge of the trim but i will leave that to Tom the trimmer as trimming isn't my forte


Its aweful lonesome in the saddle since my horse died.
-
05-30-2010 03:59 PM #6
CHR Member
- Join Date
- Jan 2004
- Location
- Santa Ana
- Car Year, Make, Model: '32 High Boy, '60 VW, Teardrop Trailers
- Posts
- 355
Steve, thanks for the encouragement and suggestions on using 304 stainless for my trim. I really like your use of stainless on your new frame.
I took the lazy way out to make my trim, LOL. I used a three foot piece of 1/4" by 3/4" brass flat bar stock. I taper milled it to 1/4" wide at the rear. Hand filed and belt sanded it to curved shape to match my Bob Drake "bull nose" radiator chrome trim. Then blind drilled it and taped it for 8/32 stainless machine screws, polished it till it was smooth and shiney. Then dropped it off at the chrome shop for the finish. The more I thought about it, because I was matching an adjacent trim that was chromed, I needed to go chrome plated for the match.
I did exactly as you did in taking a 45 degree angle off the edge first for the major cut, then rounded the remaining edges to the final shape. It's now mounted and it turned out better than I had hoped. A nice finishing touch.
Sorry, I cannot show you my finished photos. I really do appreciate the efforts and time many of you spend in documenting your projects for all of us. My goal for this year is to get better with my computer and posting of photos.
-
06-08-2010 01:51 PM #7
CHR Member
- Join Date
- Oct 2006
- Location
- Johnstown
- Posts
- 364
I know this isn't what you're asking for, but just to give you an idea of an easy solution that looks as good as anything else... I bought some rubber adhesive molding with chrome mylar online, I forget the name of the place but they sent me a sampler of every profile and size they make, and one of them was a perfect match to the bullnose trim and stainless So-Cal cowl spear. I then ordered enough to do my 3 piece hood and it's been on there for 3 years now without a problem. If interested i can track down where i got it.Last edited by joeybsyc; 06-08-2010 at 01:54 PM.
Joe Barr
1932 Ford Roadster
-
06-17-2010 04:09 PM #8
CHR Member
- Join Date
- Jan 2008
- Location
- Houston
- Car Year, Make, Model: '32 Ford 3 Window High Boy
- Posts
- 31
Joe,
If it's not too much trouble, I'd like to know where you got it.
Dan
-
06-18-2010 07:37 AM #9
CHR Member
- Join Date
- Oct 2006
- Location
- Johnstown
- Posts
- 364
Did some digging, and the stuff was called flexchrome. I'm not sure which size it was that's a perfect fit, but ONE of em' is dead-on. I ordered the 20.00 sampler kit and matched up the one that fit, and have even ended up using the other sample pieces for other things, including shims under the rubber hood to cowl seal to make my hood line up better! The piece on my hood has held up perfectly, looks as good or better than any polished stainless trim does, and was done in about 10 minutes. I'd highly recommend it. Originally Posted by DanM

Joe Barr
1932 Ford Roadster
-
06-18-2010 08:05 AM #10
CHR Member
- Join Date
- Mar 2005
- Location
- Springville
- Car Year, Make, Model: 35 5 window coupe
- Posts
- 382
Here is their website:
http://www.flexchrome.com/Have you ever noticed that anybody driving slower than you is an idiot, and anyone going faster than you is a maniac?
-George Carlin
 Reply With Quote

Posting Permissions
- You may not post new threads
- You may not post replies
- You may not post attachments
- You may not edit your posts

This site is up more often lately, but very little traffic.
Dead!