


 50Likes

Results 61 to 75 of 97
 LinkBack URL
 About LinkBacks
-
07-15-2016 08:29 AM #61
 CHR Member

- Join Date
- May 2015
- Location
- colombo, Sri Lanka
- Posts
- 37
Ok so I have finally got most of the new parts needed to get on with building this engine (courier company in USA lost one package containing $1500 worth of parts and refuse to pay) Originally Posted by techinspector1

Im using the valves recommended above, this cam which was recommended 271-139761 | JEGS High Performance
and that cam requires these springs Crane Cams 99896-16 | Buy Crane Cams Dual Valve Springs at JEGS
What should the valve installed height be with this combination of parts ?
-
Advertising

- Google Adsense
- REGISTERED USERS DO NOT SEE THIS AD
-
07-15-2016 03:33 PM #62
CHR Member
- Join Date
- May 2003
- Location
- Zephyrhills, Florida, USA
- Car Year, Make, Model: '32 Henway
- Posts
- 12,423
Crane says 1.900". A trial assembly without springs will tell you where you are, then you can use offset keepers, spring seat shims or whatever you need to set the installed height to 1.900". You don't need any fancy tools to find the installed height, just a 6" machinist's scale held onto the spring seat and measured to the bottom of the retainer. It won't matter a hoot if the scale isn't exactly straight up and down. This first offering on Amazon will work great..... Originally Posted by ceejay
https://www.amazon.com/s/?ie=UTF8&ke...l_71x2amhyg0_b
1 29/32 nds = 1.90625".....close enough.
.Last edited by techinspector1; 07-15-2016 at 03:39 PM.
PLANET EARTH, INSANE ASYLUM FOR THE UNIVERSE.
-
07-16-2016 05:14 AM #63
CHR Member/Contributor
- Join Date
- Apr 2005
- Location
- bay city
- Posts
- 10,546
a 1.900 set up is hard to get to with stock valve train parts and you go with a + 050 lock /valve keeper or a +100 retainer. you need to watch for rockers hitting or riding on the valve retainers . icon pistons are very good and use them in many builds at the shop .if you go with a icon and if you go with a 2618 piston they are 1/16 1/16 3/16 i have used much thinner rings under .042 on top ring and have no fear of using them as the make more power less drag but you machine shop better be on there game the thinner rings only come with mahle piston set power pack or other je or custom . use a drop in ring and not a file fit as there is less work on ring fit less your running max piston to bore . when going to a smaller valve stem size 11/32 from 3/8 i aways do this when rebuilding bbc head as bbc most all the time need valve guides valves are not hard to find on line and many to buy from as i deal with all brands .the is PEP .PBM . EPW. Engine Pro . CompetitionProducts will sell you valves i would not wast to much money going any bigger then 2.190 intake and 1.88 ex .as i built them with bigger valve for what your doing may help with HP but just sticking to the same size valves stocke with so bowl work and a good hi flow valve would be a good trade off less valve seats are beat in or heads seen many vavle jobs on then a bigger valve may help if you have a fear your machine shop putting in valve seats . this work take.s skill a valve seat is not what you want to fall out of the head when running . as for Crane at one time they were the one of the best and made and sold very good parts .i use others company now to make my custom cams or buy to buy shelf stocking parts. many cam companys just sell parts not every cam company makes valve springs .lifters . reatainers .rocker arms .cam cores. some even cams so you hope there parts line up is very good there are many companys using one company for rocker arms . srpings and lifters just there name stamp on the box i could tell you who but i not going to post stuff like this on lineLast edited by pat mccarthy; 07-16-2016 at 05:55 AM.
Irish Diplomacy ..the ability to tell someone to go to Hell ,,So that they will look forward to to the trip
-
12-17-2016 06:54 AM #64
CHR Member
- Join Date
- May 2015
- Location
- colombo, Sri Lanka
- Posts
- 37
Ok I have now got the big valves installed in the heads, the block bored out and have got all the parts with me to do the build.
Can someone please let me know the correct torque settings of the various nuts and bolts for this engine please
-
12-17-2016 08:24 AM #65
CHR Member
- Join Date
- Sep 2005
- Location
- Hamilton
- Car Year, Make, Model: 69 nomad, 73 charger, 74 vega
- Posts
- 3,900
Torque specs should be a simple Google search..
Education is expensive. Keep that in mind, and you'll never be terribly upset when a project goes awry.
EG
-
12-20-2016 05:50 PM #66
CHR Member
- Join Date
- Dec 2016
- Location
- Mount Dora
- Posts
- 5

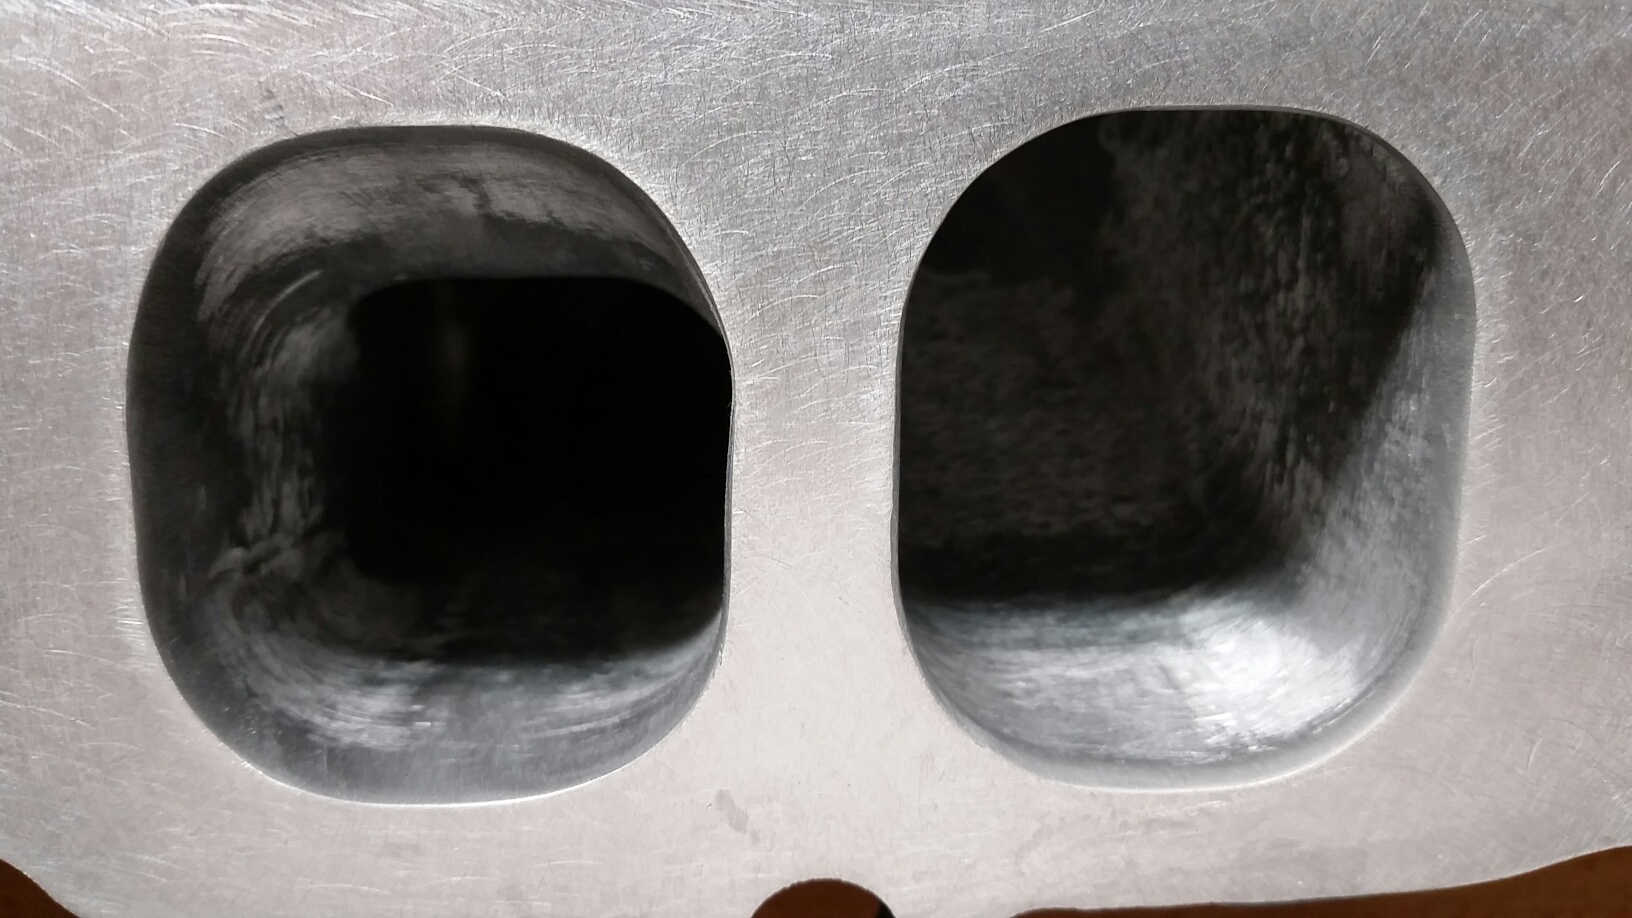
Unless you are racing i dont think the intake matters all that much. I read an article in one of the hot rod mags where they did a dyno test on an engine that had around 15-20 different manifolds installed on it. The difference in HP and Torque was so small, less than 5%. It is more important to port match. I attached pics of my Pro Comp air gap style manifold. I had to grind off a lot of metal to match it up with the heads. Well worth the time, not hard to do. Also, I would recommend a roller cam as well, probably a hydraulic if its a street cruiser.
-
06-02-2017 09:35 AM #67
CHR Member
- Join Date
- May 2015
- Location
- colombo, Sri Lanka
- Posts
- 37
I'm part way through building the engine as advised by all of you on this thread...
I have run into a problem.
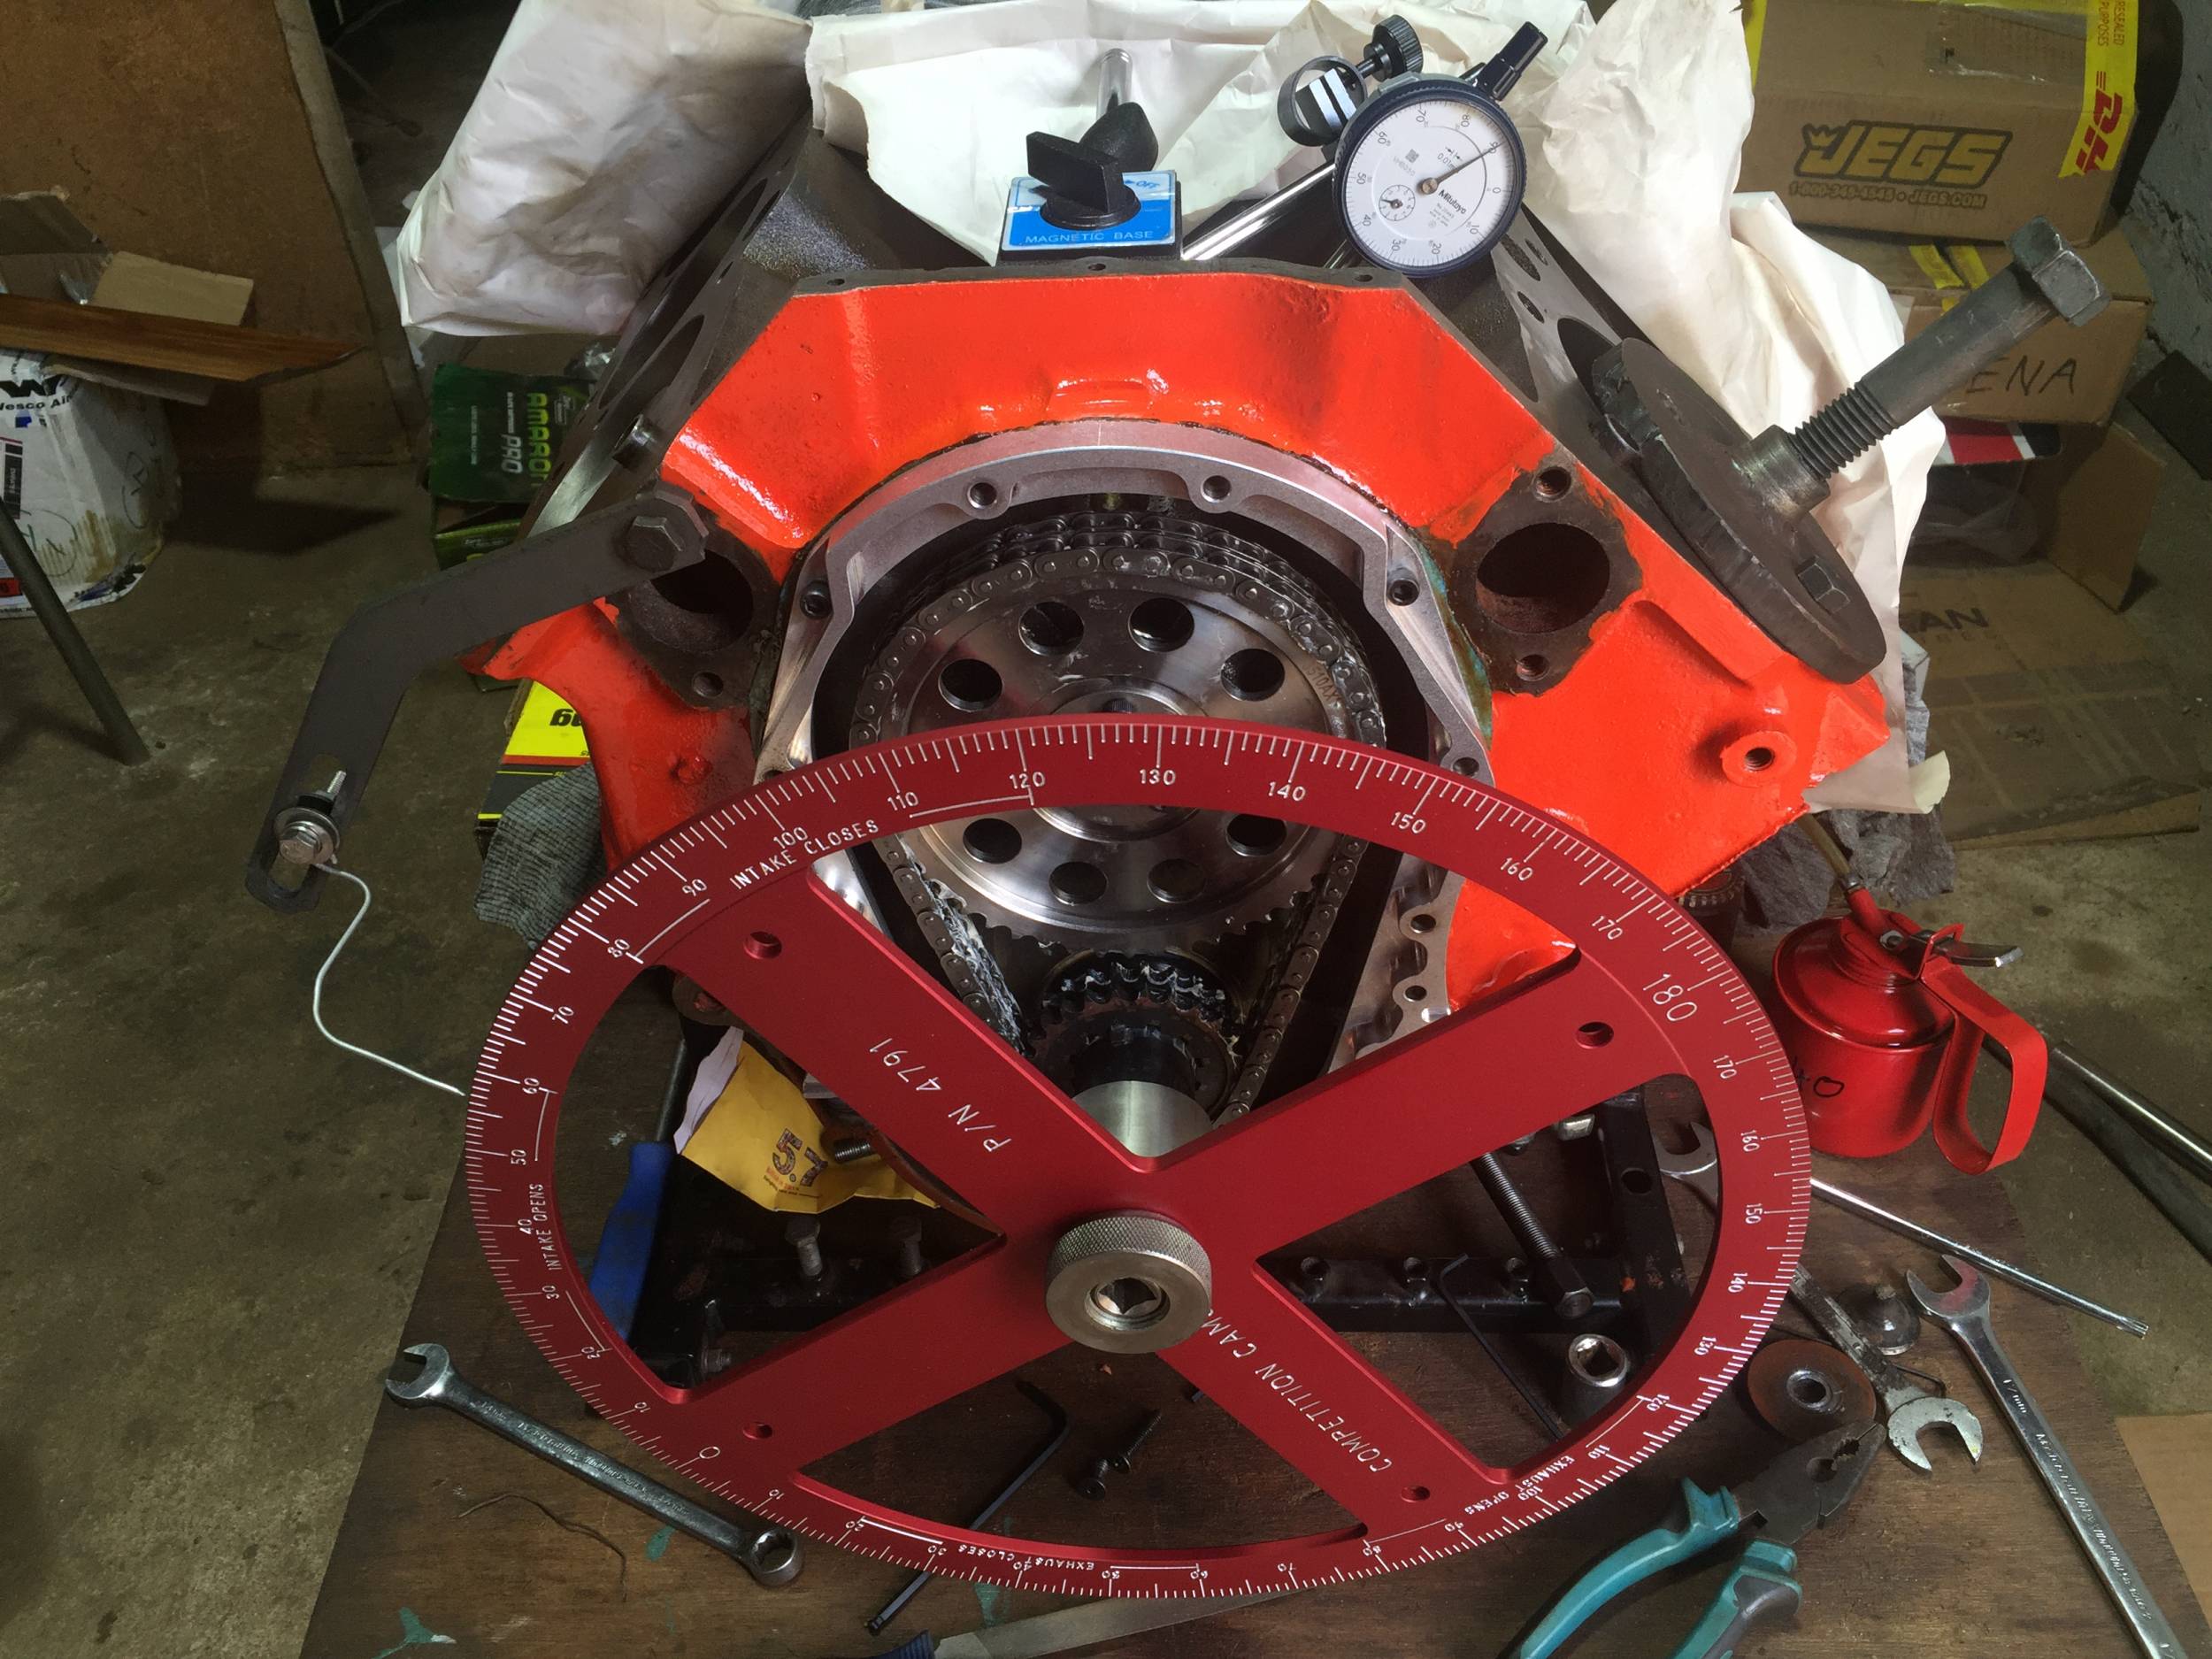
I am using a Comp Cams 2 piece timing cover and a new Damper.
I have obtained true TDC and checked it with a dial gauge.
Now when I install the damper and try to install the adjustable timing pointer supplied with the 2 piece timing cover, it does not line up with the mark on the damper.
Even with the pointer adjusted fully, it is still about 2mm away from the line on the damper. Is this a common problem ?
-
06-02-2017 11:06 AM #68
CHR Member/Contributor
- Join Date
- Sep 2007
- Location
- Gardner, KS
- Car Year, Make, Model: '33 HiBoy Coupe, '32 HiBoy Roadster
- Posts
- 11,245
With the mix of parts it's not surprising that your pointer doesn't line up. First, be 100% sure of true TDC and the proper dampener, then you've got a couuple of choices. !) Modify the pointer mount to give more adjustment and line up with the existing notch on the dampener, or 2) Buy a Degree Tape from Summit, Jegs or another for your diameter of dampener, and install it accurately. Either should be golden.
Just curious, are you finding TDC with the head off, measuring direct to #1 piston with a dial indicator?Roger
Enjoy the little things in life, and you may look back one day and realize that they were really the BIG things.
-
06-02-2017 02:46 PM #69
CHR Member
- Join Date
- Feb 2006
- Location
- Bartlett
- Posts
- 6,831
Are you using positive stop method for finding TDC? or just using a dial indicator to zero out?????
-
06-03-2017 11:49 AM #70
CHR Member
- Join Date
- May 2015
- Location
- colombo, Sri Lanka
- Posts
- 37
First set the pointer to zero on the big timing wheel by using the positive stop method. Checked it back and forth a few times to make sure it was correct, then checked again with a dial gauge. TDC is correct on the timing wheel. Originally Posted by jerry clayton
The supplied timing pointer on the 2 piece timing cover does not line up with the mark on the damper even when adjusted fully to one side.
-
06-03-2017 12:21 PM #71
CHR Member
- Join Date
- May 2003
- Location
- Zephyrhills, Florida, USA
- Car Year, Make, Model: '32 Henway
- Posts
- 12,423
Make your own pointer from sheet metal. Originally Posted by ceejay
.PLANET EARTH, INSANE ASYLUM FOR THE UNIVERSE.
-
06-03-2017 01:05 PM #72
CHR Member/Contributor
- Join Date
- Sep 2007
- Location
- Gardner, KS
- Car Year, Make, Model: '33 HiBoy Coupe, '32 HiBoy Roadster
- Posts
- 11,245
I'd take a piece of sheet metal, weld it to the base of the pointer and then elongate the holes enough to line it up. A little grinding and a shot of paint and no one will ever know but you. Originally Posted by techinspector1
Roger
Enjoy the little things in life, and you may look back one day and realize that they were really the BIG things.
-
06-03-2017 01:31 PM #73
CHR Member
- Join Date
- Feb 2006
- Location
- Bartlett
- Posts
- 6,831
OK-some have talked about it now but it hasn't been described in detail---please tell us exactly how you did this because I have found this is one of the most misunderstood items of engine building------------POSITIVE STOP TDC
-
06-03-2017 03:24 PM #74
CHR Member
- Join Date
- May 2003
- Location
- Zephyrhills, Florida, USA
- Car Year, Make, Model: '32 Henway
- Posts
- 12,423
I wrote this several years ago and it has been improved upon by several other members.....
http://www.crankshaftcoalition.com/w...op_dead_center
.PLANET EARTH, INSANE ASYLUM FOR THE UNIVERSE.
-
06-14-2017 09:41 AM #75
CHR Member
- Join Date
- May 2015
- Location
- colombo, Sri Lanka
- Posts
- 37
Hi folks,
Is it absolutely necessary to use valve stem seals on this build ? (Mark IV 454, Comp cams roller lifters)
The valve guides on my heads were fine when I took the engine apart so although the valves were replaced with big valves, the guides have not been disturbed.
I'm using the double valve springs recommended with the Crane Cams camshaft which I am using and find that there is no space for positive oil seals between the guide and the inner spring.
Will the engine smoke a lot of I don't use seals ?
 Reply With Quote

Posting Permissions
- You may not post new threads
- You may not post replies
- You may not post attachments
- You may not edit your posts

This site is up more often lately, but very little traffic.
Dead!