


 8Likes
Thread: Planishing Mig Welds
Results 1 to 6 of 6
 LinkBack URL
 About LinkBacks
Threaded View
-
02-04-2014 11:21 AM #1
 CHR Member

- Join Date
- Jun 2008
- Location
- Leonardtown
- Car Year, Make, Model: Walking
- Posts
- 1,228
Planishing Mig Welds
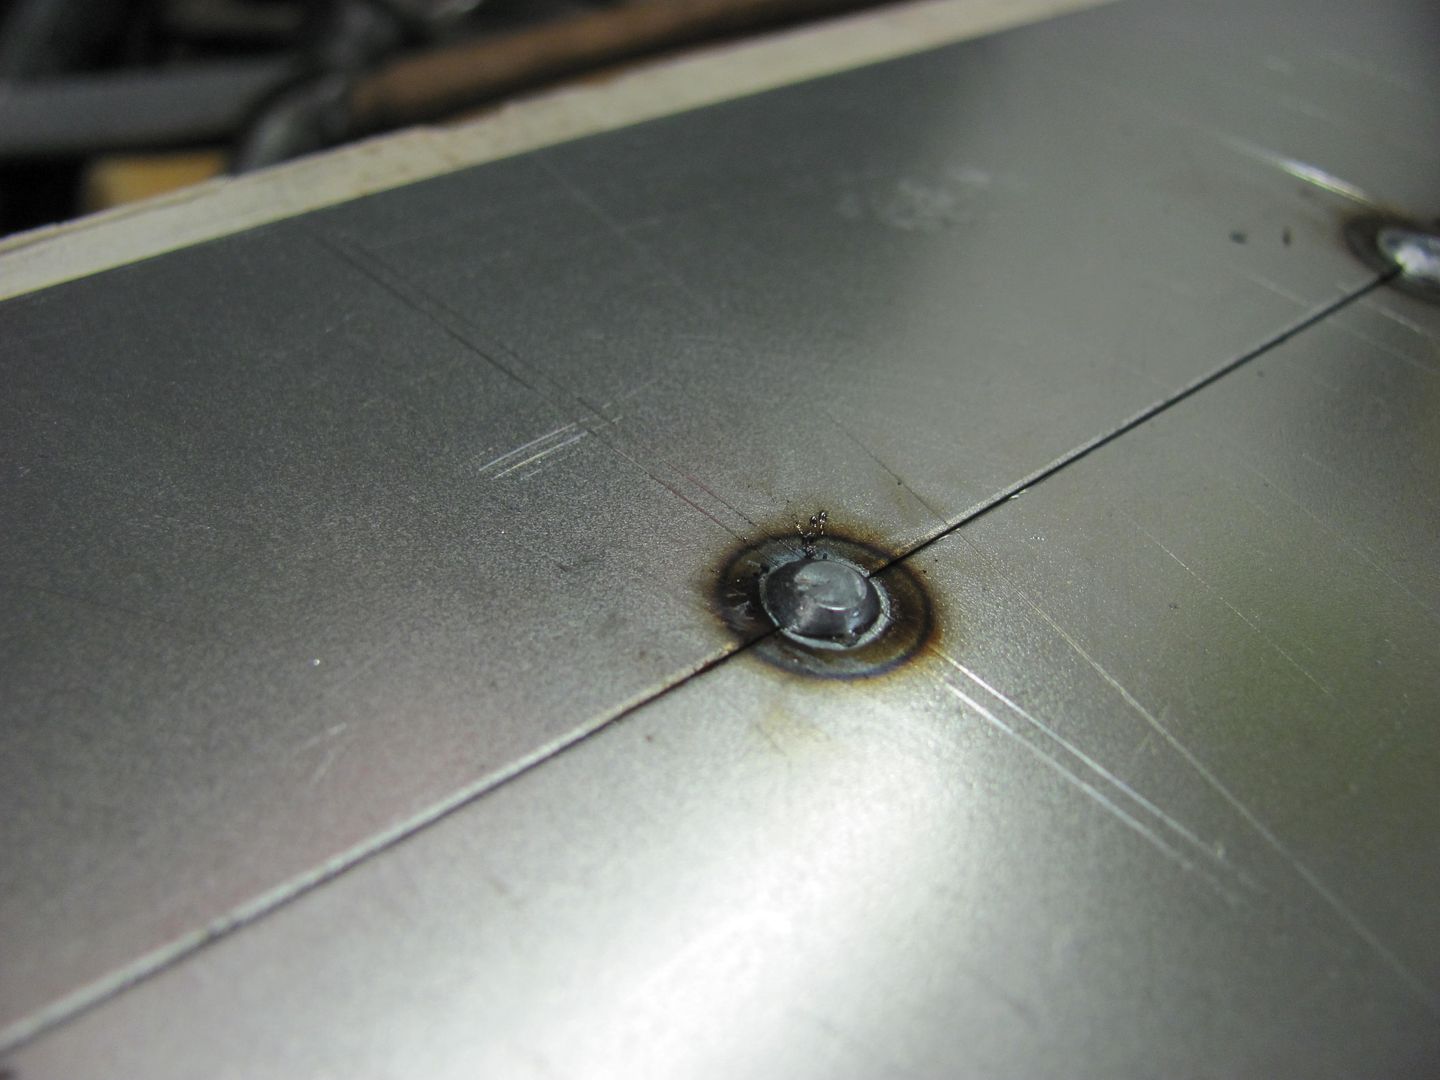
I had a request to do a tutorial that would help someone understand the process of planishing as it relates to Mig "dot" welding. I'll preface this by saying that this is a "test piece" to assist in actually seeing how the panel will deform when shrinking occurs, and how planishing will help to negate those effects, more so than establishing a hard and fast measured amount of planishing. It is not intended to be the end all-be all of how much, but it should get you in the ballpark of a measured amount to keep the panel in relatively good shape with minimal warping effects during the initial planishing efforts.
For your planishing test subject, you need two sheet metal strips about 1-1/2" wide by about 15" long. These will be tacked together on the long edge, and works best if you can cut it with a shear, as you can cut a piece 3" x 15 and then shear it through the middle for a perfect seam. For you to see the effects of the shrinking and then the planishing, it needs to be a perfect cut through the middle for best results. So if you have one or can find someone with a shear to help you out, it will help tremendously.
As long thin strips are more susceptible to bending/curving as the shrink occurs, it helps the "student" to see what is taking place. We could use two 24" square pieces, but it wouldn't be as readily apparent what is changing, so wouldn't serve as well as a learning tool.
Next, the process and specifically amount of planishing needed is going to be directly related to weld dot size and/or wire type/softness, etc.
Now that you have your fresh cut test pieces, take your two pieces and align together TIGHTLY along the long sheared cuts and tack the seam at about one inch in from one end.

DO NOT PLANISH at this point. Go another 3/4" and add another tack. Is there any change in panels positioning? Go another 3/4" and add another tack. What we are trying to do with this process is to monitor how much shrink is occurring and what is does to the panel. The first tack should "anchor" the two panels together at the end. With the panels tight together, each subsequent tack, and the shrinking effects realized once cooling takes place, will start to pull the panels even closer together and shrink along the long axis where the loose ends try to overlap each other. So If you haven't seen this happen, keep welding dots at 3/4" spacing until it does happen.
Now that you see these panels overlapping, the next phase is to see how much planishing it takes to "undo" the overlap. Start at your anchor tack, and hammer and dolly once.
Go to each subsequent dot and apply the same hammer and dolly in the same approximate force. The flat should be similar in size, but I'd gauge your effort more on hammer force than size of the flats. When you get to the end, check the overlap to see if it still interferes with adjacent panel fitment at the un-tacked end. If so, start at the beginning, repeating one dot at a time, monitoring overlap. When your panel overlap issue has been resolved, your weld dot planishing effort will be the number of hammer strikes as it took per weld dot to resolve the overlap, using approximately same striking force. This assumes your weld dots don't mysteriously grow in size to add the need for more planishing, so again the importance of OCD consistency. This planishing effort will not be the end of the metal bumping to your panel ie: once you get welding in your patch panel. It approximates the minimum needed to relieve the shrinking effects so the differing forces will relax a bit. So when you get to this process on the "real" panel, the planishing will proceed at the number of XX hammer strikes to to each weld dot, then move to the next weld dot. What we're doing here in this test is striking one dot once and then the next, etc, only for test purposes to identify the number of strikes you need per dot. On your actual repair, after this initial planishing, any remaining planishing needed will be based on what the panel looks and feels like, high spots, low spots, etc after welding, initial planishing, weld dot grinding, and panel reading is completed.
Now that you have completed this, just for the heck of it, go to the first anchor dot, and start planishing it and it alone. Keep repeating until you see the adjacent ends start to separate as the weld dot is being stretched. Look at how wide the gap is. This approximates the amount of extra effort needed at each weld dot to overcome the shrinking and panel movement that happens when you leave a gap that size in the panel. It also demonstrates the differing planishing efforts that will be needed for inaccurate and inconsistent gaps. Keeping track of what, where, and how much is the tricky part, and again stresses the importance of consistency in all the processes, starting with tight gaps at fit up. Everything that you can do to keep consistency throughout all the processes only makes the planishing efforts more consistent throughout, lessening the need to keep track of the errant what, where, and how much.Robert

 Reply With Quote
Posting Permissions
- You may not post new threads
- You may not post replies
- You may not post attachments
- You may not edit your posts

This site is up more often lately, but very little traffic.
Dead!