


Welcome to Club Hot Rod! The premier site for
everything to do with Hot Rod, Customs, Low Riders, Rat Rods, and more.
- » Members from all over the US and the world!
- » Help from all over the world for your questions
- » Build logs for you and all members
- » Blogs
- » Image Gallery
- » Many thousands of members and hundreds of thousands of posts!
YES! I want to register an account for free right now! p.s.: For registered members this ad will NOT show
-
-
« more 


· more »
« Previous image · Next image »
Shock Cover
Click on image to view larger image
« Previous image · Slide Show · Next image »
Photo Details
Don Shillady
CHR Member
Registered: May 2004
Location: Ashland
Posts: 2,160

A lot of time was lost trying to figure out how to fix this problem and Forum members helped with suggestions. Metal loaf pans turned out to be too large and a special shape fabricated from fiberglass looked to be very messy. By luck I found some "spoon trays" at the Target Store were just (tightly) wide enough to cover the top of the shocks and the two puny 5/16" bolts along the side which are supposed to hold the weight of the optional rear bumper. Later this was augmented by 7/16" bolts in other places to support a 250 pound adult on the rumble step plate. Sheet metal hold down frames were fabricated after I sweetalked a nearby metal shop with a large shear to cut them out from 1/16" thick stock; the rectangular holes were cut with a drill and saber saw with a metal blade, bent and then bolted down over the lip of the inverted thick plastic (Rubbermaid) spoon trays. Inner tube rubber was cut to cover the whole opening and will be further sealed with urethane sealer. The picture shows one side covered by an inverted spoon tray and next to it on the stainless gas tank one of the hold down sheets. Although this set up will probably leak splash water eventually, the rumble area is already subject to the lack of gutters below the pivot points and holes at the rear of the fiberglass floor provide for drainage. Bolts liable to get wet are stainless steel. Most of the cutout is behind the hump in the fiberglass and hopefully drainage will roll back rather than forward. The gas tank is above these inverted spoon trays but access to the shock bolts can be obtained by removing the hold down plates without removing the gas tank. The two red pipe plugs in the gas tank are for the gas line (upper) and the vapor vent (lower) which will be routed outside the body with a hose through the rear fender well.· Date: · Views: 6,368
· Filesize: 39.6kb, 70.0kb · Dimensions: 800 x 600 ·
Additional Info Keywords: Shock Cover Linked Thumbnail: Linked Medium: Medium Image:
-

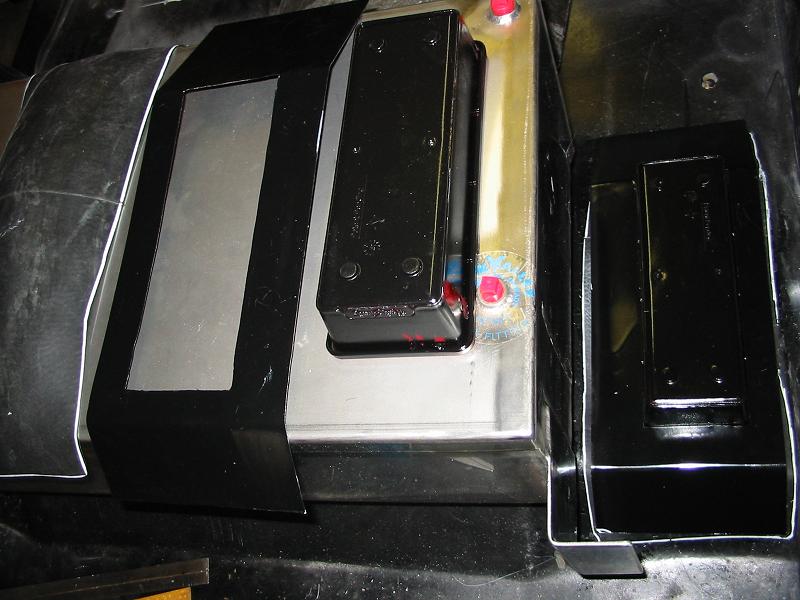
Photo Sharing Gallery by PhotoPost
Copyright © 2007 All Enthusiast, Inc.
Copyright © 2007 All Enthusiast, Inc.