Welcome to Club Hot Rod!  The premier site for everything to do with Hot Rod, Customs, Low Riders, Rat Rods, and more. 

  •  » Members from all over the US and the world!
  •  » Help from all over the world for your questions
  •  » Build logs for you and all members
  •  » Blogs
  •  » Image Gallery
  •  » Many thousands of members and hundreds of thousands of posts! 

YES! I want to register an account for free right now!  p.s.: For registered members this ad will NOT show

 
Like Tree22Likes

Thread: 1950 Studebaker Champion Mordoor project!


Reply To Thread
Page 1 of 4 1 2 3 4 LastLast
Results 1 to 15 of 53
  1. #1
    dmw56's Avatar
    dmw56 is offline CHR Member Visit my Photo Gallery
    Join Date
    Jul 2008
    Location
    Edgewood, New Mexico, United States
    Car Year, Make, Model: 30,34,39,50,54,65,68,70,71,72
    Posts
    571

    1950 Studebaker Champion Mordoor project!


    Thought I'd post up my Stude build. I started this about 4 years ago and got stalled out on it and side track with my Rat Rod project.

    The car is a 1950 Studebaker Custom Champion. Which was the lowest cost Studebaker Champion. It originally had a 169 cubic inch flathead 6 with a 3 speed transmission. My dad bought it in 1969 for $50 he was looking for a car and found this and couldn't pass it up since he had Studebakers before. He drove it for a few months before he found another car and parked this one.

    When I turned 16 the car had been parked for 3 years by then, I got it running and stopping again (brake job) and drove it to high school and then used it for a back-up cars as I got into Muscle Cars and was always wrenching on the ones I had at the time. Muscle cars seem to break a lot for some reason. The Stude pretty much sat for about 20 years before I finally began working on it again after I restored my 1970 AMX.


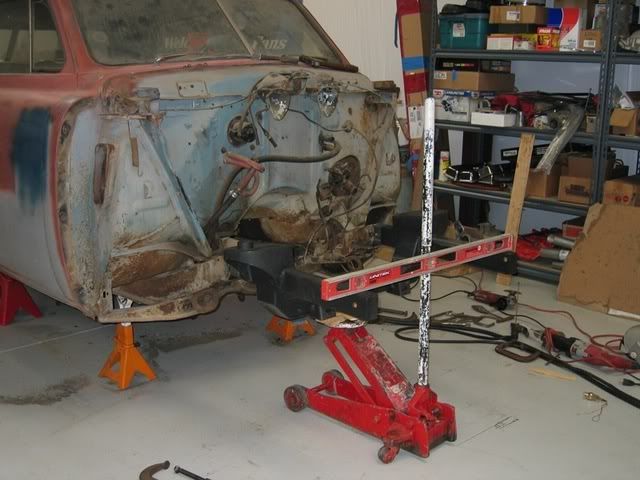
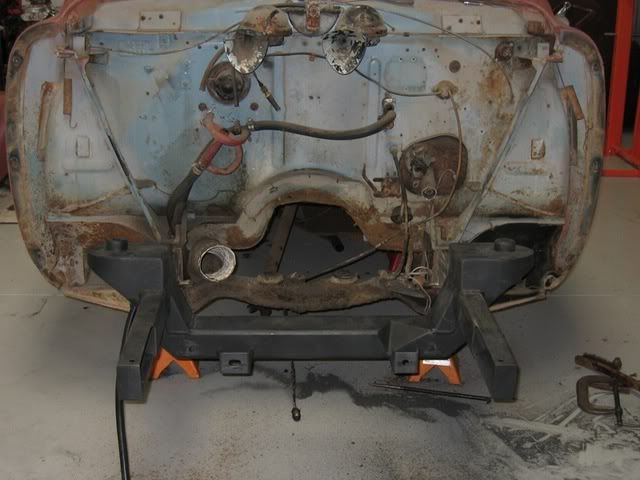
    I got a Fatman front clip with the Mustang II front suspension. It has the Stainless Steel a-arms with 11" disc brakes and power rack and pinion steering.

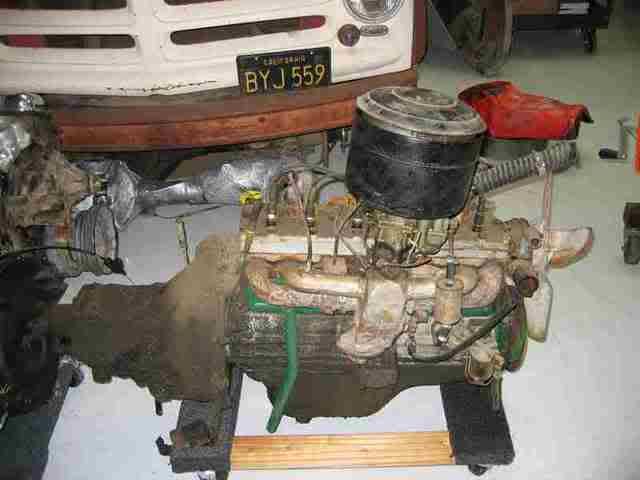
    Flathead 6 removed from car


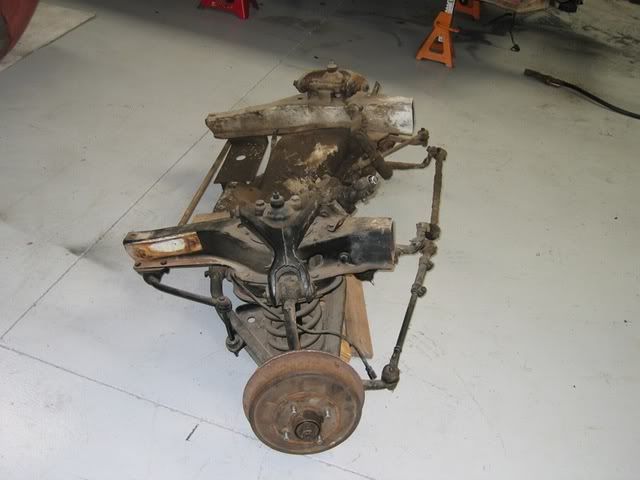
    Stock Front suspension removed from car


    Fatman Front suspension Installed


    Livin' on Route 66

  2. #2
    dmw56's Avatar
    dmw56 is offline CHR Member Visit my Photo Gallery
    Join Date
    Jul 2008
    Location
    Edgewood, New Mexico, United States
    Car Year, Make, Model: 30,34,39,50,54,65,68,70,71,72
    Posts
    571

    My plans for the car are to update the front and rear suspension and the interior keeping most of the body stock appearing.

    Here's the front suspension put together for now.


    I got a got a good deal from a friend on the tires and wheels. They had only about a 1000 miles on them. They are Coker tires and Chevy rims the trim rings I had from my 95 Chevy pick-up. I kept them when I put new rims on the truck and saved them.


    I pulled the rear end out and made some new spring hangers for the front and rear. I have a 2003 Chevy S-10 rear end for it and it fit perfect. I was going to use the stock S-10 springs but they had too much arch and the back end was too high might have been a little stiff too. I didn't want to use lowering blocks so I got a pair of lowering leaf springs from Chassis Engineering. Those are the S-10 springs in the picture.


    Close up view
    Livin' on Route 66

  3. #3
    dmw56's Avatar
    dmw56 is offline CHR Member Visit my Photo Gallery
    Join Date
    Jul 2008
    Location
    Edgewood, New Mexico, United States
    Car Year, Make, Model: 30,34,39,50,54,65,68,70,71,72
    Posts
    571

    Once I got the front and rear suspension in I mocked up a Chevy Small Block with a 700R4 inplace to check for firewall clearance. I had to move the firewall back 4".

    Here a shot from the front.

    And one from inside. I'm using a Lokar shifter.


    Here's the engine I will be using. Its a 400 Chevy from Speedway Motors. My ex brother-in-law had it in a 71 Chevelle. He pulled it out when he sold the car. It had only about 10k miles on it. He left it at my sisters house and she called me one day and said for me to come get it out of her gargage. I said OK!

    It was just a long block but the price was right. Free!

    Livin' on Route 66

  4. #4
    dmw56's Avatar
    dmw56 is offline CHR Member Visit my Photo Gallery
    Join Date
    Jul 2008
    Location
    Edgewood, New Mexico, United States
    Car Year, Make, Model: 30,34,39,50,54,65,68,70,71,72
    Posts
    571

    The only place there was rust was on the drivers side floor and body mount. I cut out the floor and put some beads in it and welded it in.


    When I built the trans tunnel I used the old tunnel just raised it up about 4". I left a removable panel so I could get the linkage easier.

    Here's the body mount I had to replace. I found a replacement on a site on the internet. So I didn't have to fabricate one.


    Front view with new recessed firewall. I think on 51 Studes the year of their first V8 they had a recessed firewall to make room for their V8. The booster and master cylinder were out of a 78 Firebird.


    As was the brake pedal assembly and steering column (with key). The seats are 6 way power, heated leatherfrom a 2003 Trailblazer $300 for the pair. I also got the center console and over head console for another $100.

    Livin' on Route 66

  5. #5
    dmw56's Avatar
    dmw56 is offline CHR Member Visit my Photo Gallery
    Join Date
    Jul 2008
    Location
    Edgewood, New Mexico, United States
    Car Year, Make, Model: 30,34,39,50,54,65,68,70,71,72
    Posts
    571

    The driveshaft tunnel I made on a 3' sheetmetal brake making a small bend every 1/8"-1/4". Sure wish I had a slip roller.


    Here's a shot of the dash. I had to add 4" to widen the original dash to clear the Vintage air conditioning condenser. It can get hot here in NM and I want to be comfy!


    There's a view of the console too. It fit perfect!
    hammer-time likes this.
    Livin' on Route 66

  6. #6
    dmw56's Avatar
    dmw56 is offline CHR Member Visit my Photo Gallery
    Join Date
    Jul 2008
    Location
    Edgewood, New Mexico, United States
    Car Year, Make, Model: 30,34,39,50,54,65,68,70,71,72
    Posts
    571

    Another view of the dash.


    I made a cardboard template for the front of the dash and cut it out of 18 gauge.


    Finished dash with Auto Meter Gauges in Billet Specialties Bezel. I used the original glove box door.


    Test fit in car.

    hammer-time likes this.
    Livin' on Route 66

  7. #7
    dmw56's Avatar
    dmw56 is offline CHR Member Visit my Photo Gallery
    Join Date
    Jul 2008
    Location
    Edgewood, New Mexico, United States
    Car Year, Make, Model: 30,34,39,50,54,65,68,70,71,72
    Posts
    571

    I finished up the dash and got it in the car. Started making a mounting place for the CD/DVD player. I need to make some sort of side panels to go from the console to underneath the dash to cover this area and mount the heater vents.


    Got an electric wiper motor from Newport Engineering. O boy, no more vacuum wipers that only worked when it wasn't raining! Bolts right in place of the original motor.


    Here's a shot of the 6 way power Leather seats and console from a 2003 Trailblazer.

    Last edited by dmw56; 12-26-2009 at 11:59 AM.
    hammer-time likes this.
    Livin' on Route 66

  8. #8
    dmw56's Avatar
    dmw56 is offline CHR Member Visit my Photo Gallery
    Join Date
    Jul 2008
    Location
    Edgewood, New Mexico, United States
    Car Year, Make, Model: 30,34,39,50,54,65,68,70,71,72
    Posts
    571

    Put on a new power brake booster this one is 7" diameter. The stock GM one was hitting the fender. As it is I will still have to modify the fender for clearance.


    Steering Shaft using a SS Borgeson double universal Chevy splined to double D.


    I'm using a support in the middle since it has 3 universals in the shaft. Lower universl is a SS Borgeson Mustang II rack to double D

    Last edited by dmw56; 02-20-2010 at 10:25 PM.
    Livin' on Route 66

  9. #9
    dmw56's Avatar
    dmw56 is offline CHR Member Visit my Photo Gallery
    Join Date
    Jul 2008
    Location
    Edgewood, New Mexico, United States
    Car Year, Make, Model: 30,34,39,50,54,65,68,70,71,72
    Posts
    571

    After some research I found out that a Chevy 55-57 radiator with the 6 cylinder mounts will work with some minor mods.

    The size is almost exacty the same dimensions. It has the center inlet and passenger side outlet. It is aluminum with 2-1" cores.


    Livin' on Route 66

  10. #10
    dmw56's Avatar
    dmw56 is offline CHR Member Visit my Photo Gallery
    Join Date
    Jul 2008
    Location
    Edgewood, New Mexico, United States
    Car Year, Make, Model: 30,34,39,50,54,65,68,70,71,72
    Posts
    571

    Well after a year of putting it off I'm finally started back to work on the Studebaker. I spent 2 days clean up all the junk around the car so I can get work on it and have room to get the gantry crane over it to pull the body off.


    I assembled the body dolly I bought. I know I could have built it but sometimes it's just easier and less expensive just to buy it. I'll get plenty of use out of it in thr future too.


    The car is amazingly straight and rust free. Since we have owned it since 1969 and it spent a good part of it's life in CA or garaged. I did finish all the body work and primered it back in 1977 but never painted it. It's been a Rat Rod for 32 years. But I plan on doing a shinet paintjob on it.


    Livin' on Route 66

  11. #11
    dmw56's Avatar
    dmw56 is offline CHR Member Visit my Photo Gallery
    Join Date
    Jul 2008
    Location
    Edgewood, New Mexico, United States
    Car Year, Make, Model: 30,34,39,50,54,65,68,70,71,72
    Posts
    571

    Here is the rear end from a 2003 Chevy S10, it fit perfect. Spring perch width was exactly the same. I'm even using the same drive shaft it turned out to be the exact length needed.


    I weld the rear spring mounts to the frame reinforced with a piece of angle iron. The springs are lowering leafs, spring mounts, lower shock mounts and u-bolts are from Chassis Engineering.


    The front spring mounts I made and are bolted onto the frame.


    [/QUOTE]
    Livin' on Route 66

  12. #12
    dmw56's Avatar
    dmw56 is offline CHR Member Visit my Photo Gallery
    Join Date
    Jul 2008
    Location
    Edgewood, New Mexico, United States
    Car Year, Make, Model: 30,34,39,50,54,65,68,70,71,72
    Posts
    571

    Cleaned out the car I've been storing stuff in it. Took a picture of the trunk. Just a little surface rust but as solid as it was 59 years ago. I will leave it as is just clean it up.


    Livin' on Route 66

  13. #13
    pastor bubba's Avatar
    pastor bubba is offline CHR Member Visit my Photo Gallery
    Join Date
    Dec 2008
    Location
    Salina
    Car Year, Make, Model: 80 Spirit, 40 Nash, 55 hudson, 55 Chevy
    Posts
    277

    That is pretty cool and I am really impressed with that dash.

  14. #14
    dmw56's Avatar
    dmw56 is offline CHR Member Visit my Photo Gallery
    Join Date
    Jul 2008
    Location
    Edgewood, New Mexico, United States
    Car Year, Make, Model: 30,34,39,50,54,65,68,70,71,72
    Posts
    571

    Finally pulled the body off the frame just a little bit to go and I'll get it on the dolly.


    Frame is fully boxed and in excellant condition. I just need to put in some angle braces to the center cross member and finish the drive shaft hoop. Make a removable rear transmission crossmember and some upper rear shock mounts. The stock mounts may work just fine.

    Livin' on Route 66

  15. #15
    dmw56's Avatar
    dmw56 is offline CHR Member Visit my Photo Gallery
    Join Date
    Jul 2008
    Location
    Edgewood, New Mexico, United States
    Car Year, Make, Model: 30,34,39,50,54,65,68,70,71,72
    Posts
    571

    Got the car on the dolly and moved them around so I could work on them both. I'm running out of room!


    This the only rust on the entire car.


    Finished the drive shaft hoop. This was the support crossmember for the center bearing for the original two piece driveshaft. I just cut the center out and raised it up the floor rests on the top on a piece of rubber. I added half if a 4" pipe on the bottom.

    Livin' on Route 66

Reply To Thread
Page 1 of 4 1 2 3 4 LastLast

Posting Permissions

  • You may not post new threads
  • You may not post replies
  • You may not post attachments
  • You may not edit your posts
Links monetized by VigLink