


 21Likes

Results 1 to 15 of 54
 LinkBack URL
 About LinkBacks
-
08-04-2012 09:55 AM #1
 CHR Member/Contributor

- Join Date
- Dec 2006
- Location
- Woodstock
- Car Year, Make, Model: 34,stroker,32pu,2020 MustangGTpp2
- Posts
- 1,109
How about a home built or cheap tool modification thread?
Show us your answers for purpose built home made tools. How about that cheap HF tool modified to actually function the way the tool was designed. Example, I made a sheet metal brake, purchased a metal ban saw modified it so it would make good clean cuts and not tip over when moved, you know the one.
Upload pictures of your tools, could give others ideas of how to solve shop problems. Sometimes cheap tools have the necessary functioning parts but lack the sturdiness to produce repeated clean accurate cuts or bends, how did you fix that ?
Some, one time problem solver tools. I've seen some really good off the cuff tools over the years, only stipulation they must be safe to use .Last edited by pepi; 08-04-2012 at 09:58 AM.
I have two brains, one is lost and the other is out looking for it
-
Advertising

- Google Adsense
- REGISTERED USERS DO NOT SEE THIS AD
-
08-04-2012 10:46 AM #2
CHR Member/Contributor
- Join Date
- Apr 2005
- Location
- bay city
- Posts
- 10,546
i only built or reworked engine rebuilding machines may not be manys cup of teaIrish Diplomacy ..the ability to tell someone to go to Hell ,,So that they will look forward to to the trip
-
08-04-2012 11:52 AM #3
CHR Member
- Join Date
- Jun 2008
- Location
- Leonardtown
- Car Year, Make, Model: Walking
- Posts
- 1,228
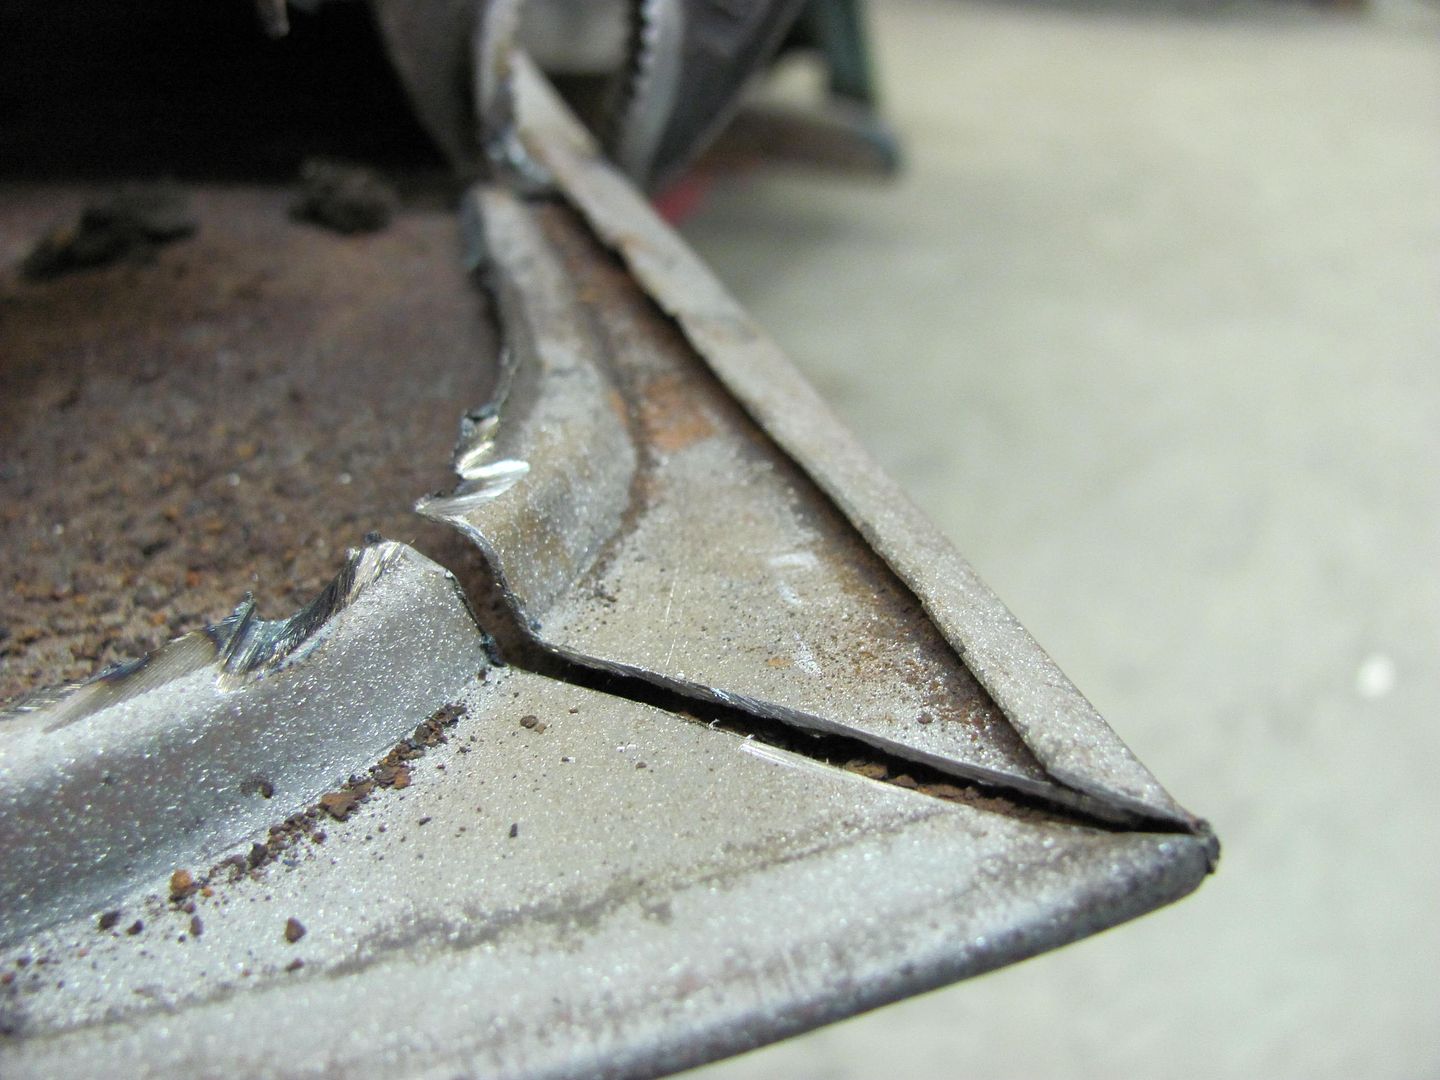
Here's a low-buck tool I made that would help out with removing your door skins, expecially on those you want to keep intact:
Probably one of the biggest challenges in taking things apart for repairs is doing so without inflicting more damage. It's hard to use an old part for a template if you mangle it beyond recognition during removal.
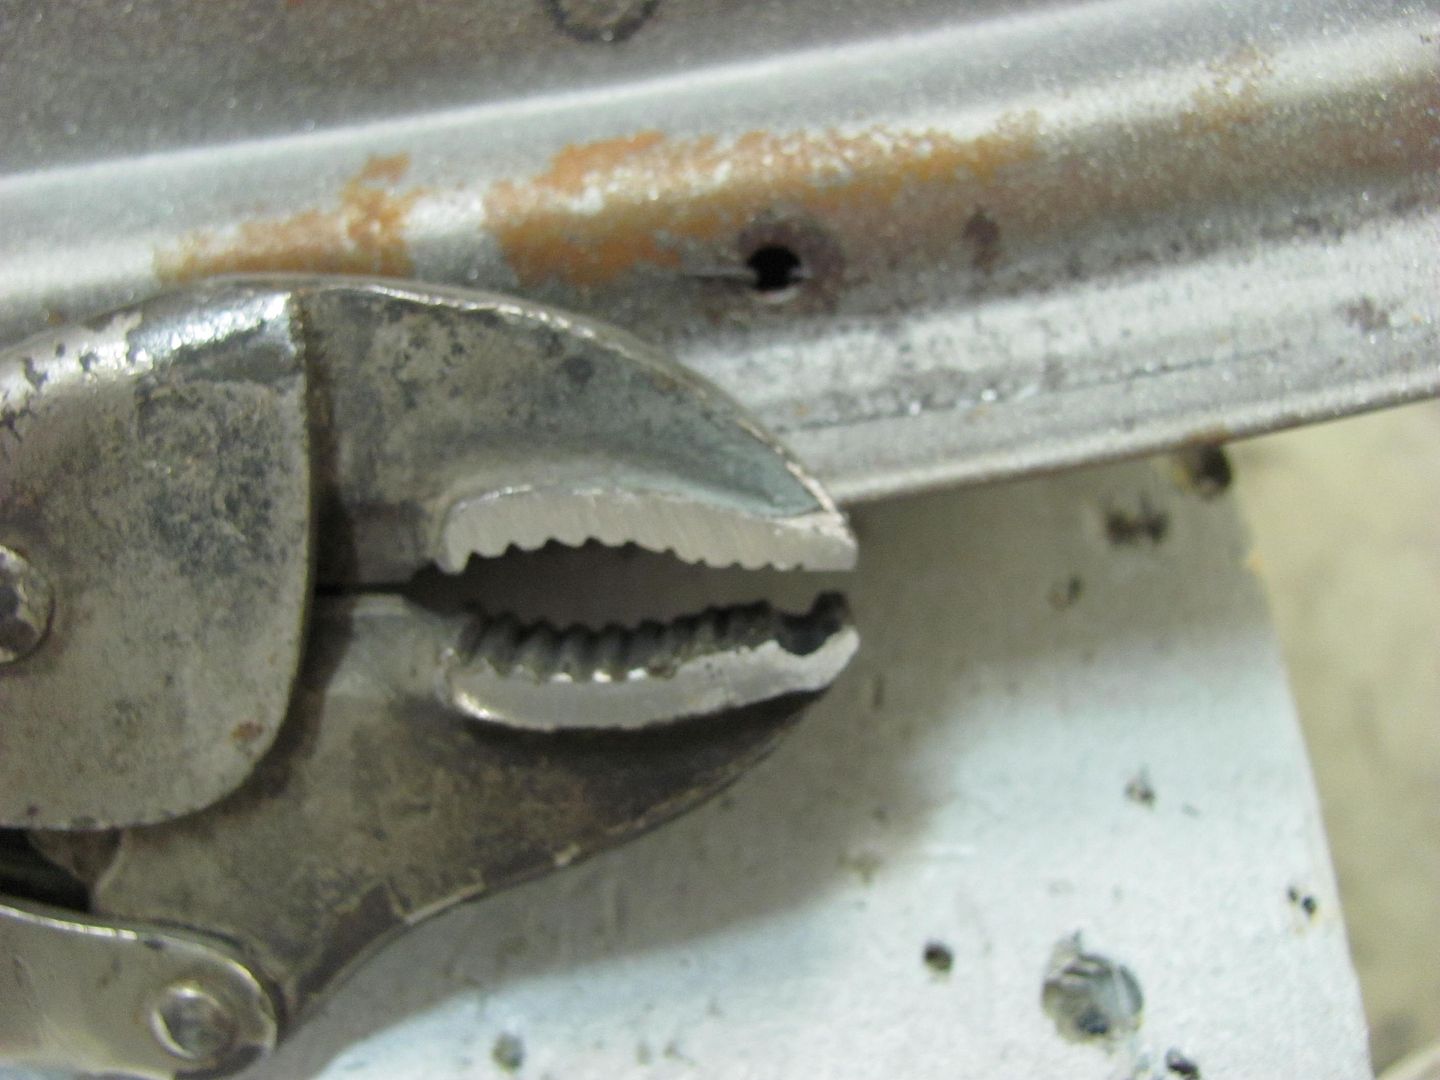
This is why you never throw away Vice grips that have the rounded off teeth that have just lost their bite, they are always good starts to a re-purposed tool.
The lower jaw is modified to receive the edge of the door skin...
Then a suitable "blade" is found, with plenty of material left over for replacements....
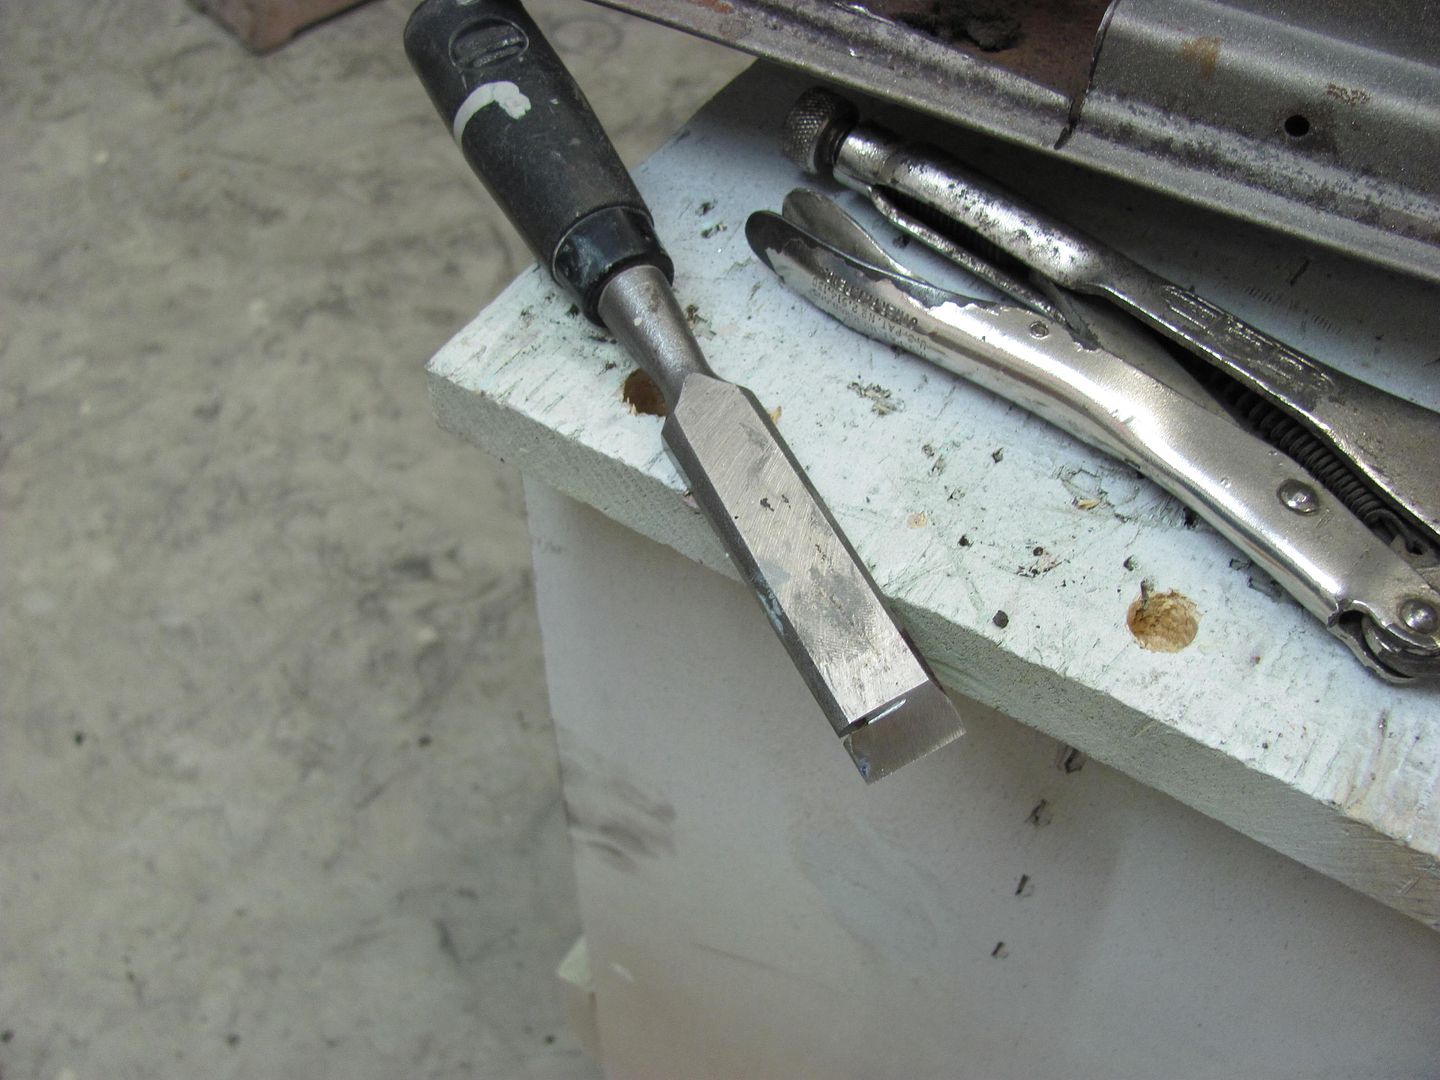
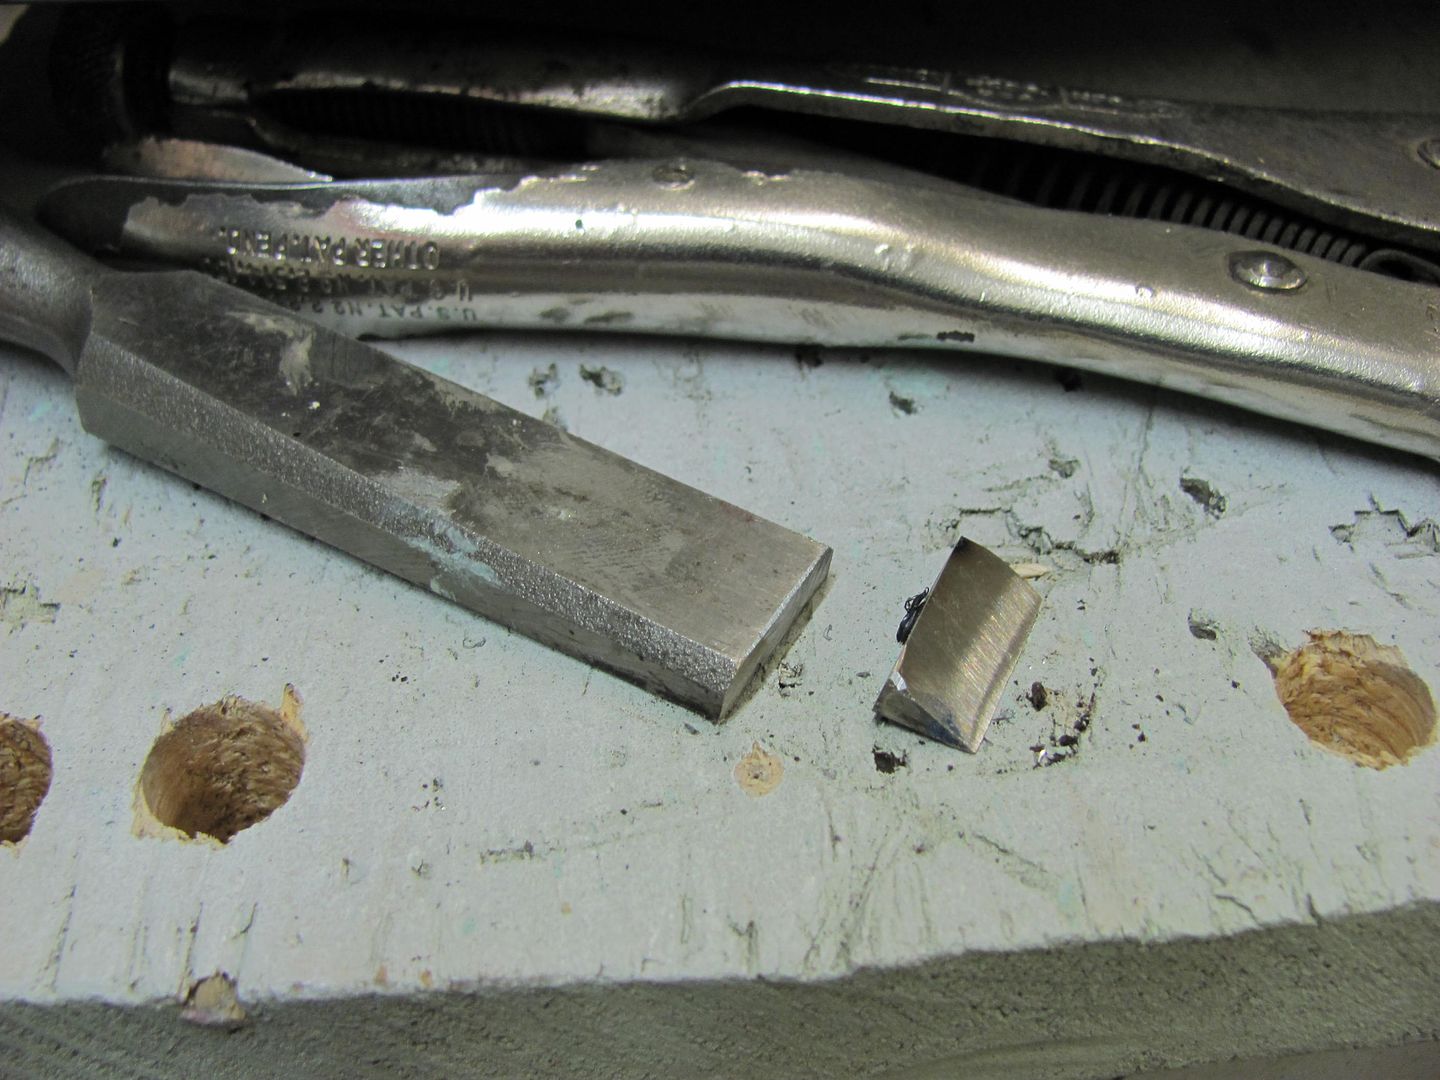
Some welding and grinding, and we have a new body tool.....
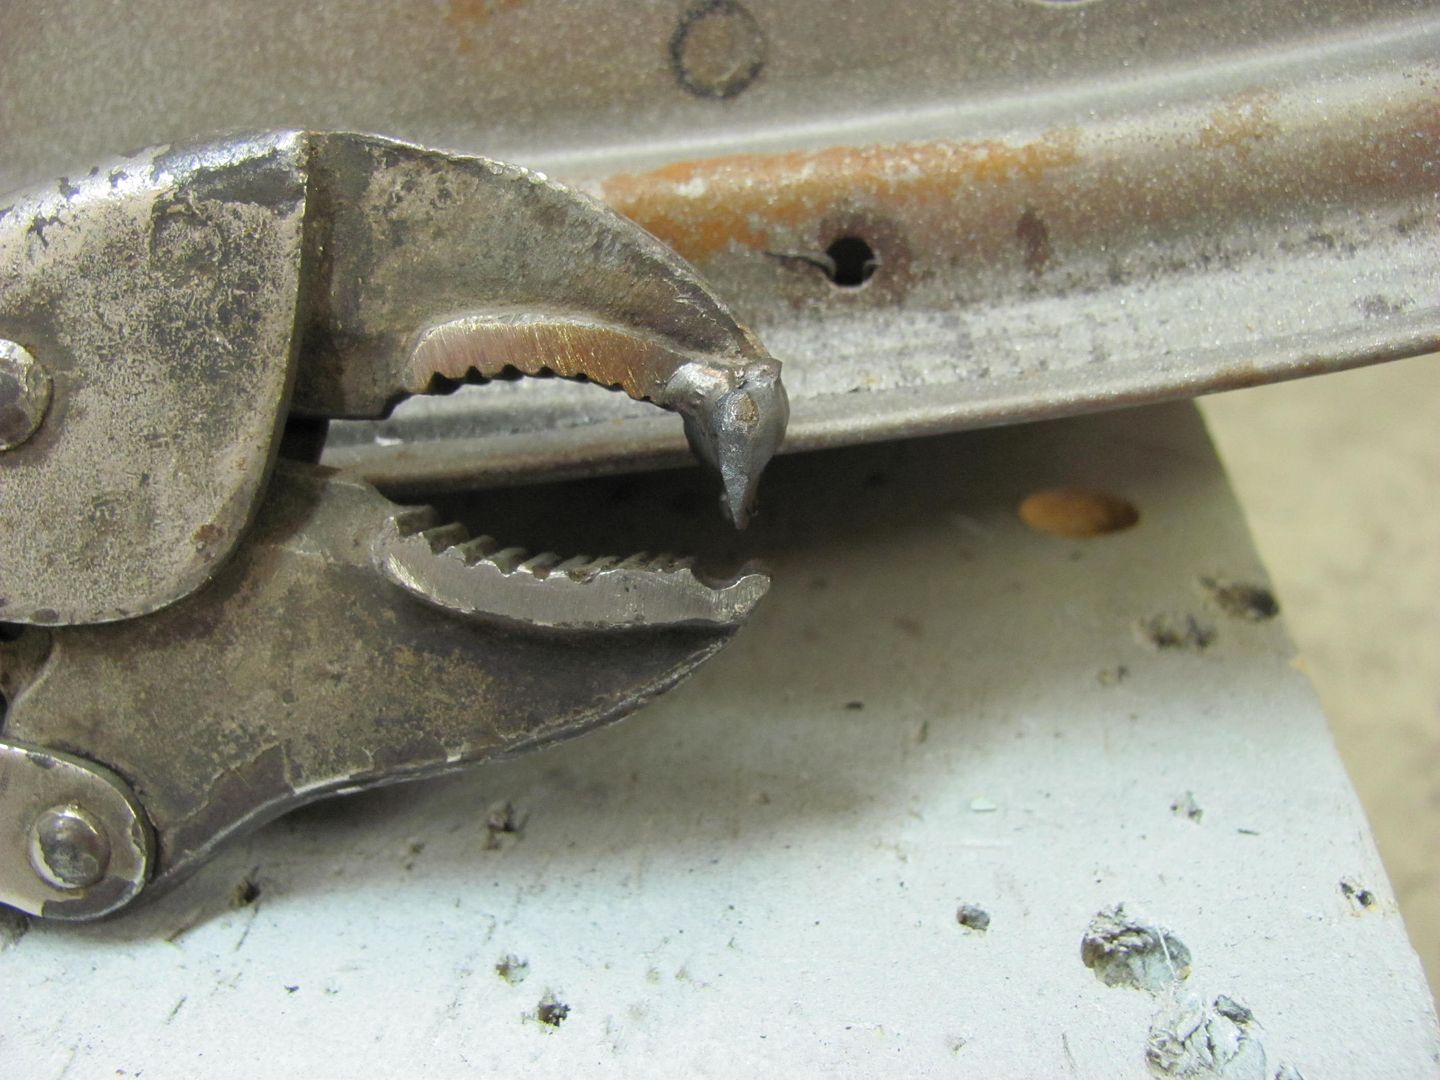
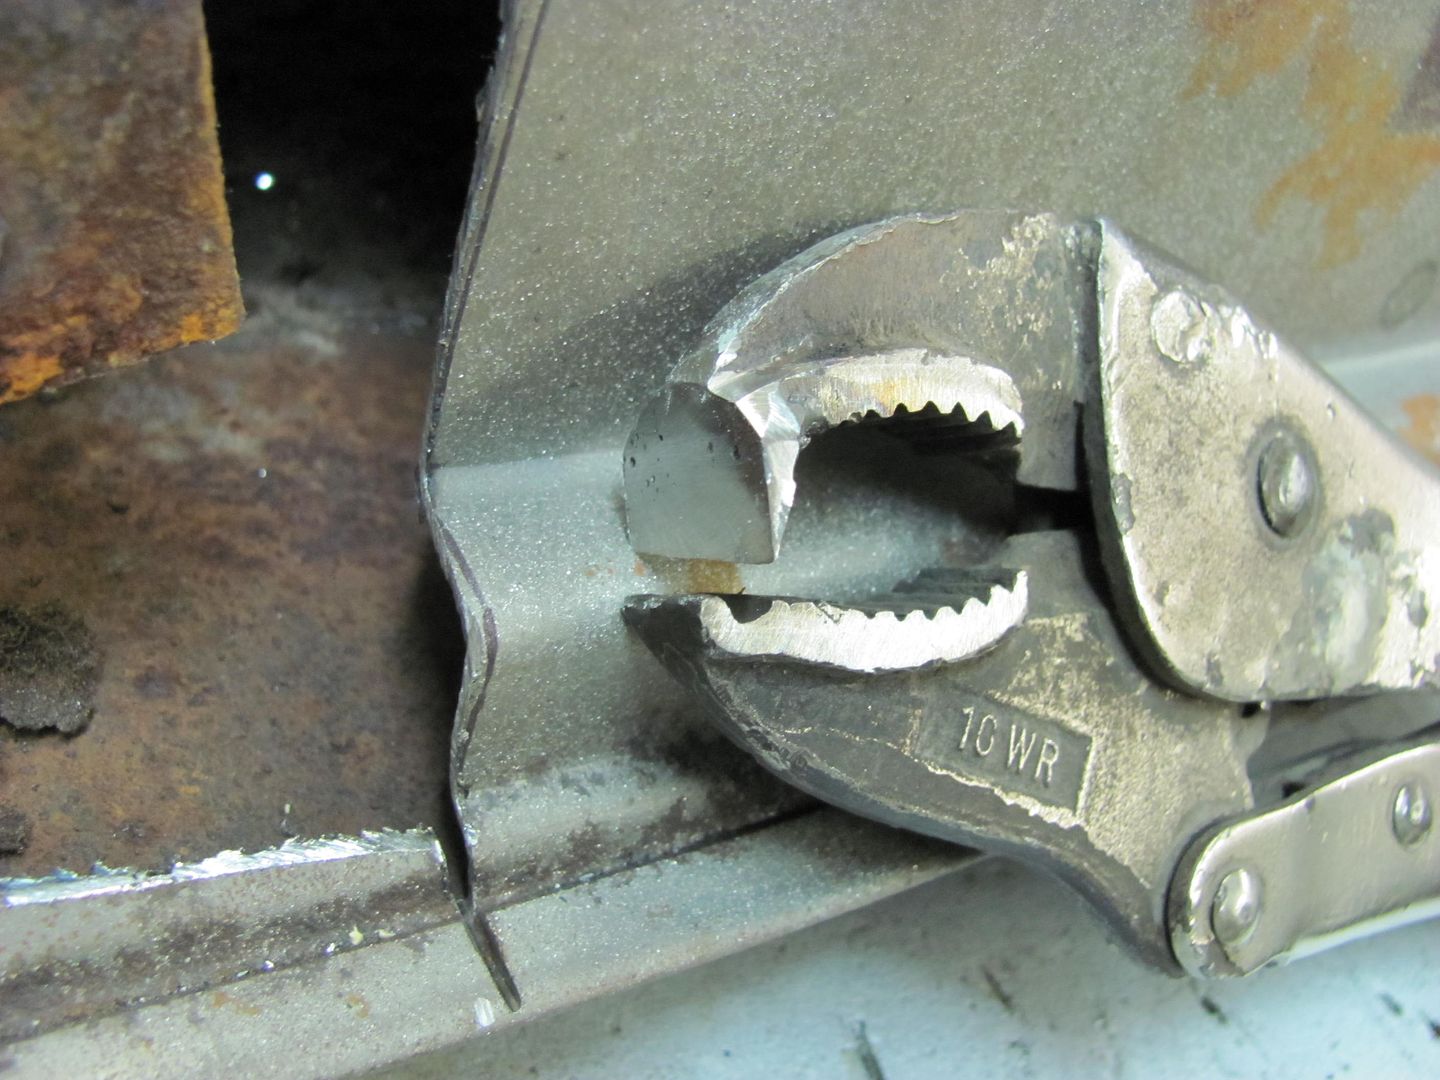
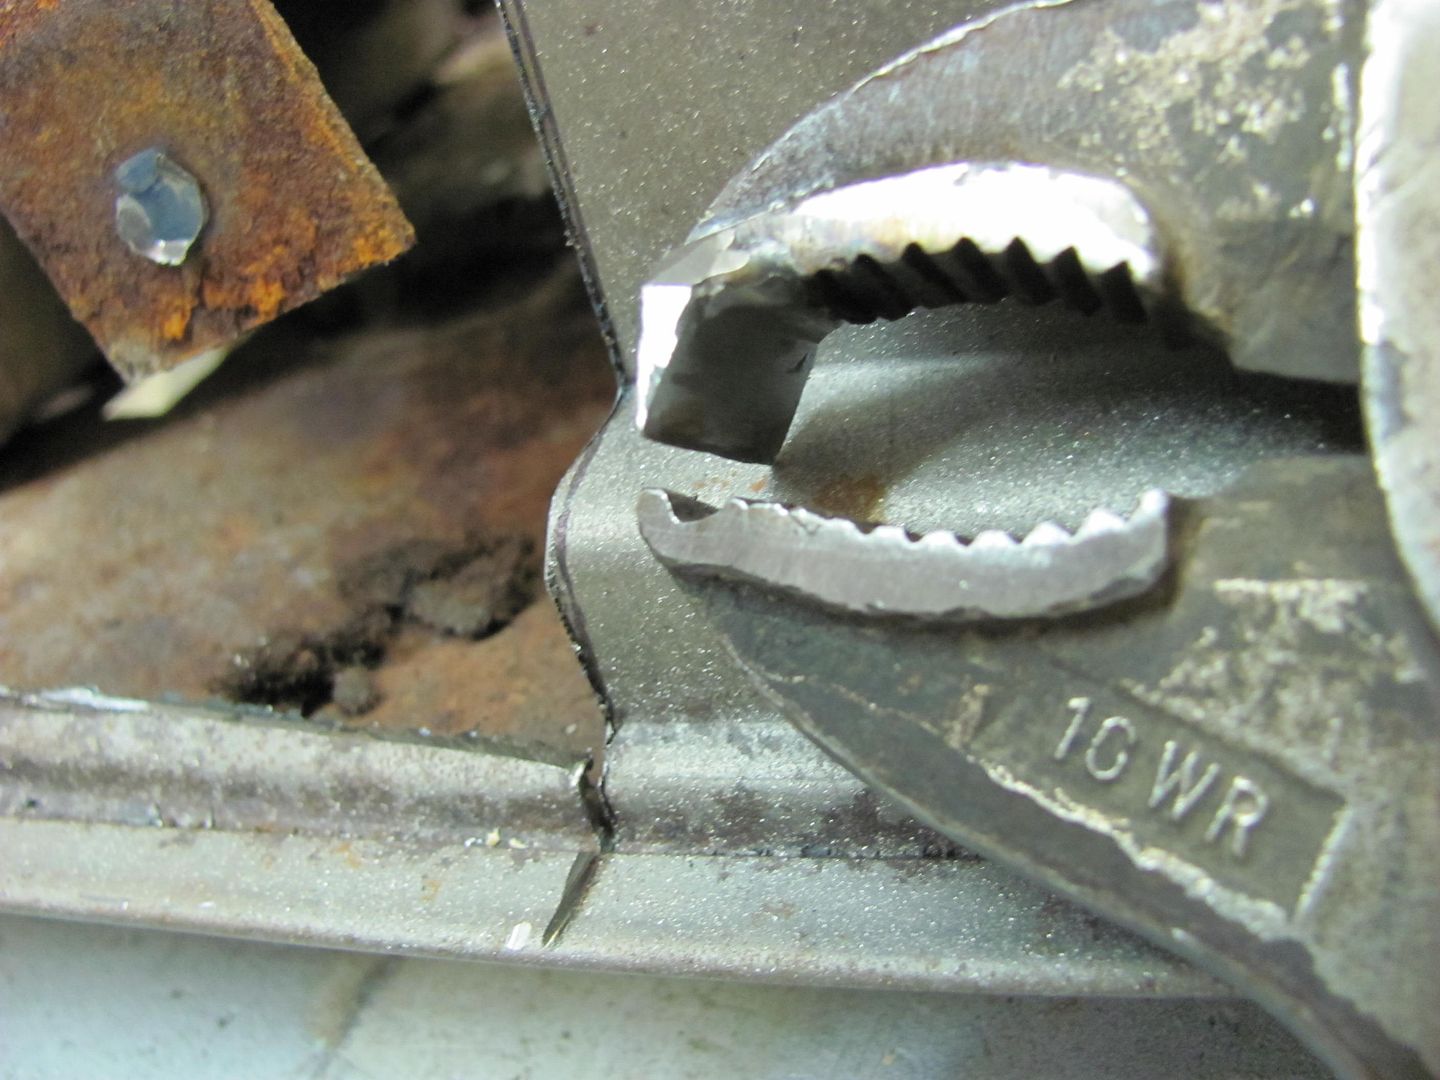
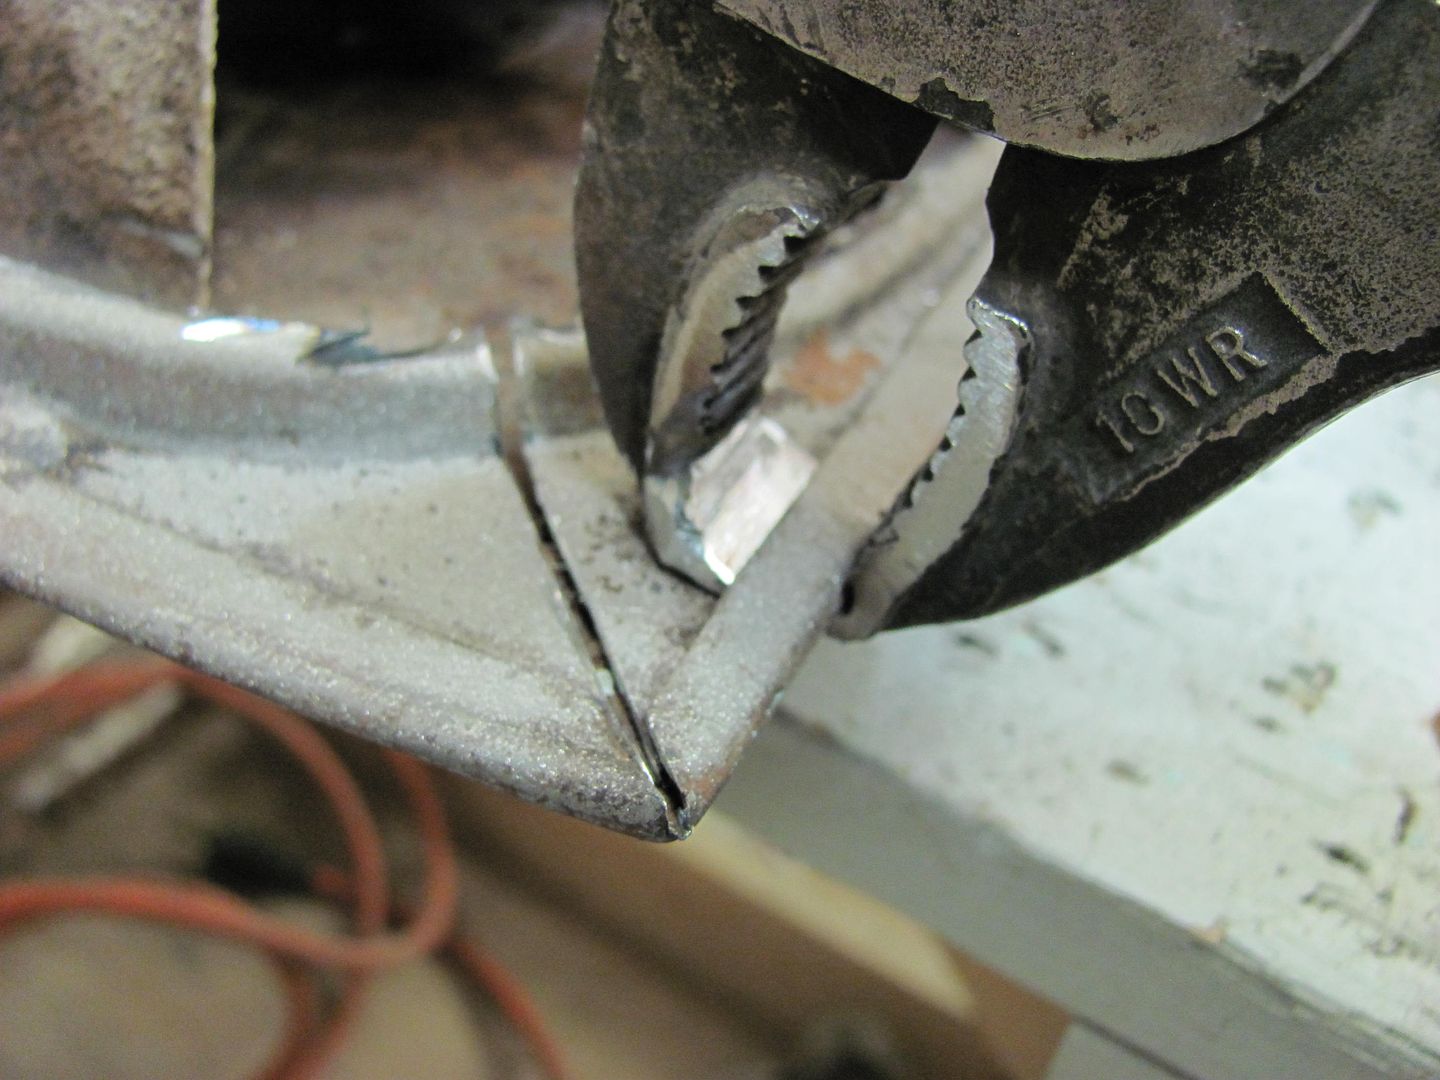
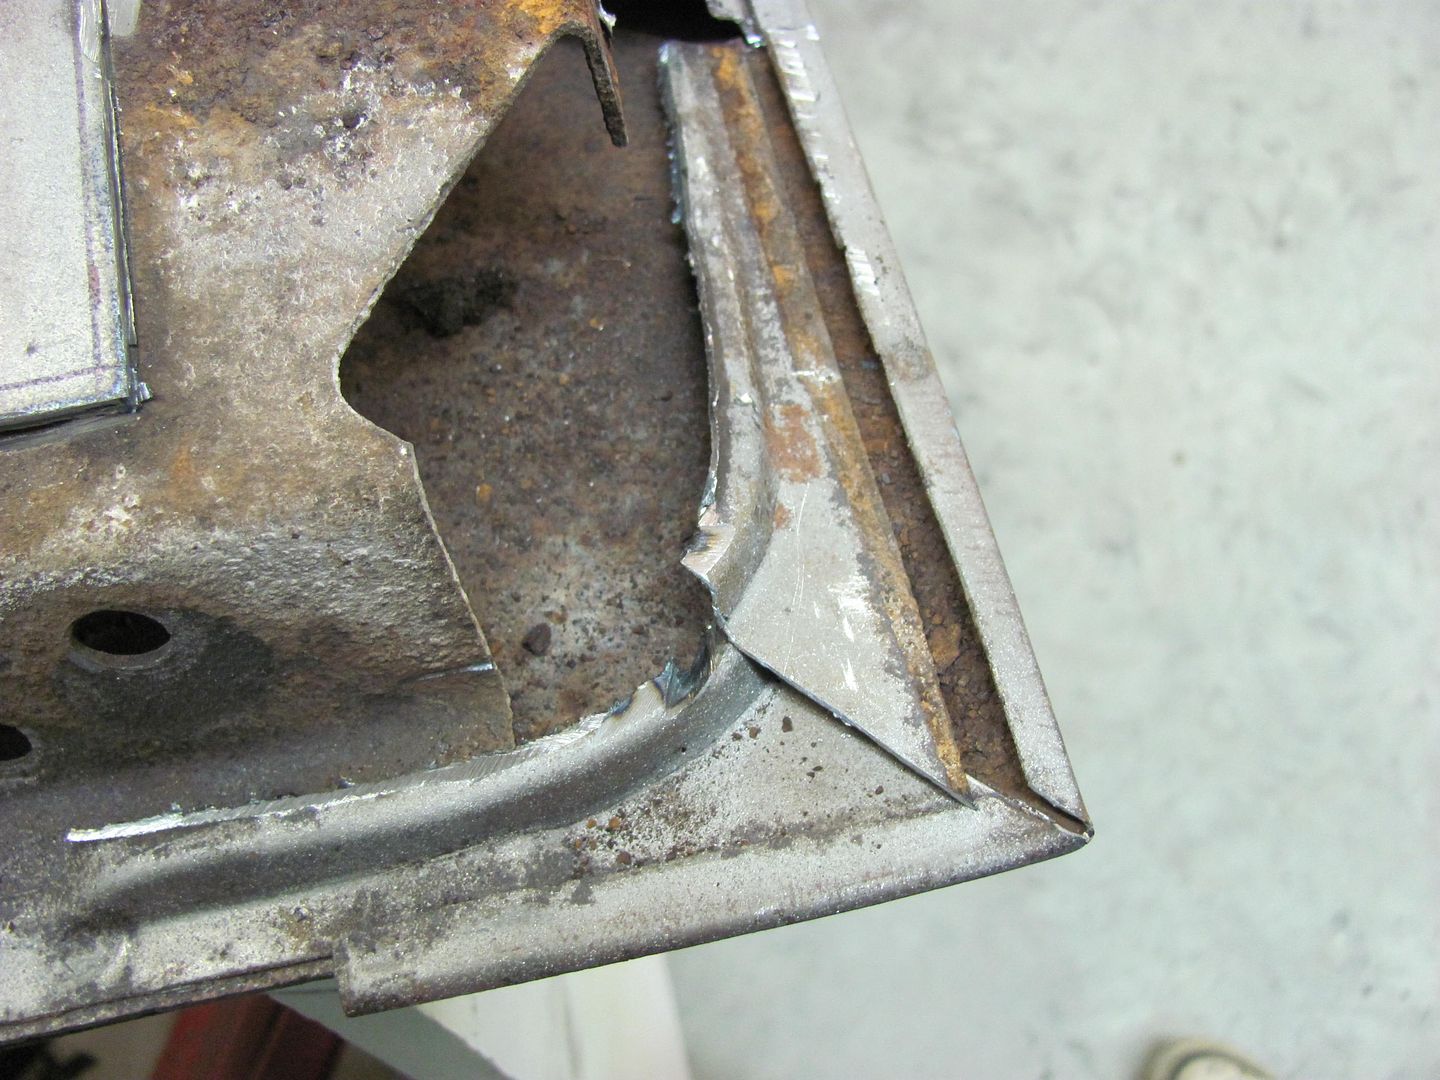
Starting at the corner, a diagonal slice is made in the inner panel so it will remove easier...
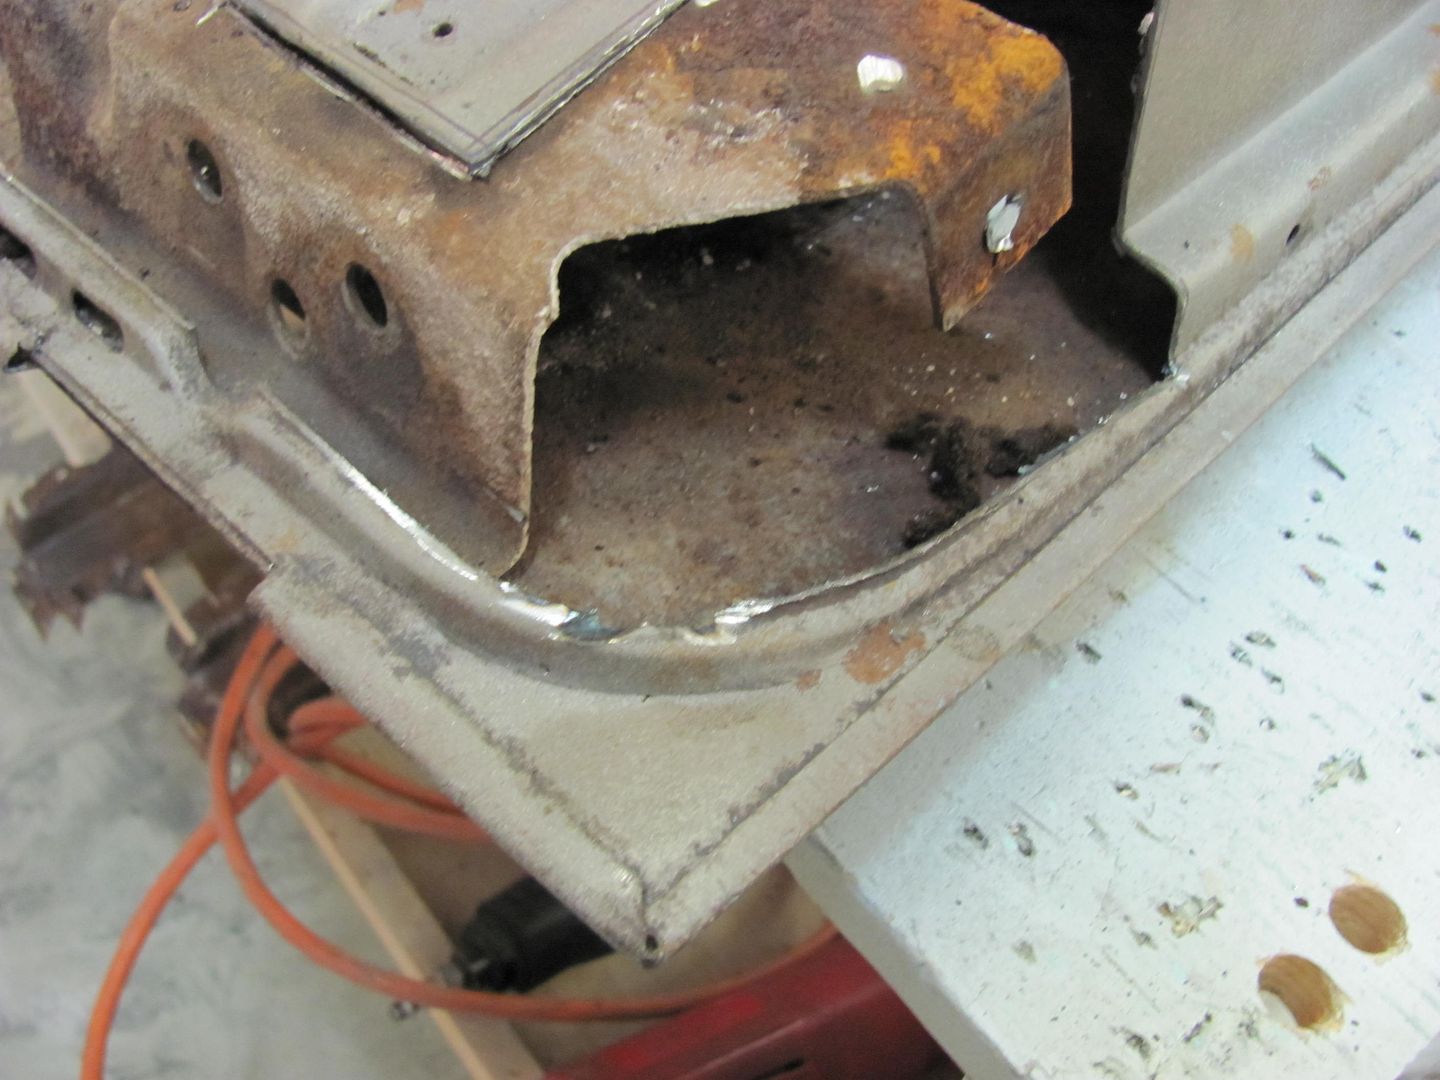
....and the tool is used to gently pry up on the flange of the tailgate skin.....
Robert
-
08-04-2012 04:32 PM #4
CHR Member
- Join Date
- Apr 2001
- Location
- Byron, Mi.
- Car Year, Make, Model: '88 Astro Van-BAD AST
- Posts
- 871
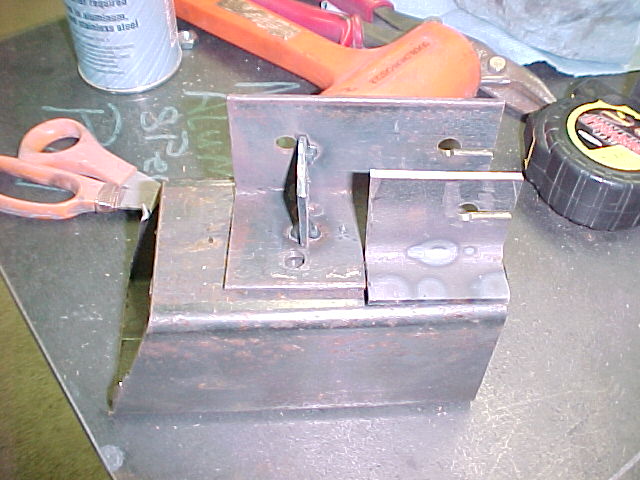
Due to all of the hole punching we were doing (my hands were aching after all of the holes I punched in the flanges for the vans rear tubs) we designed and built a little fixture to bolt my hand held hole puncher into. This clamps to the grinding table or the jig tables and sure does make 18ga. an easy job...
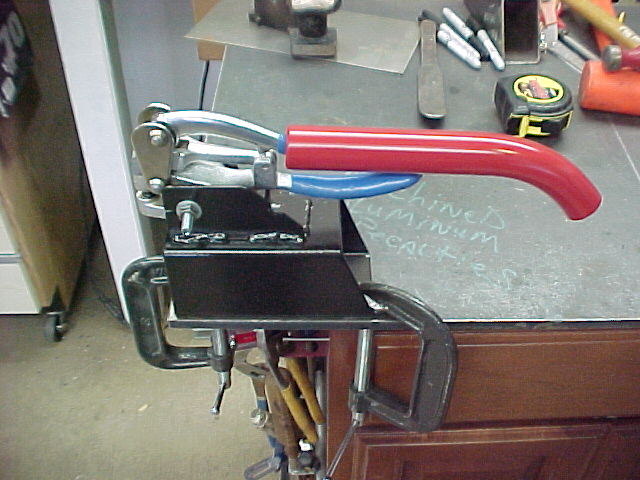

It's just some scrap 1/4" angle and plate and a 4 x 4 drop. The verticle plate under the handle keeps the punch from rotating.
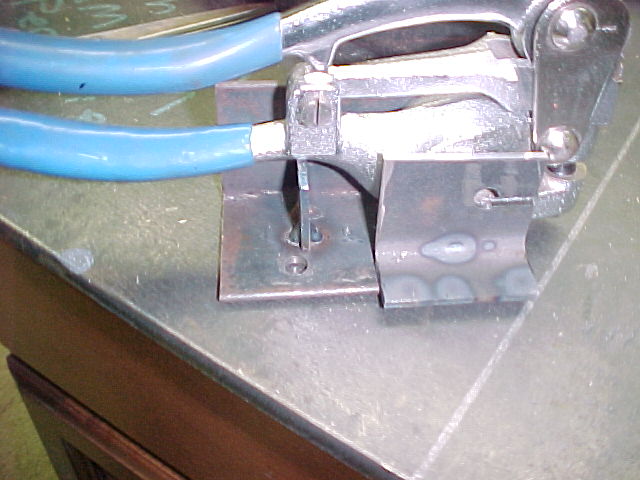
Set on the base
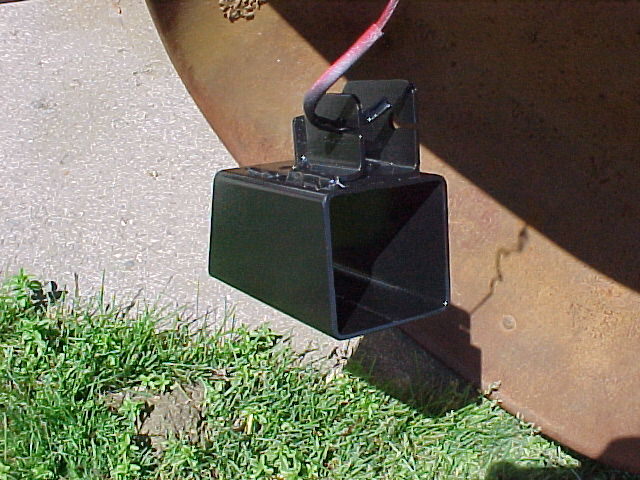
Welded up and primed with the Eastwood self-etching primer.

I sprayed the base with some of my "signature" Hammered Black from Rustoleum.
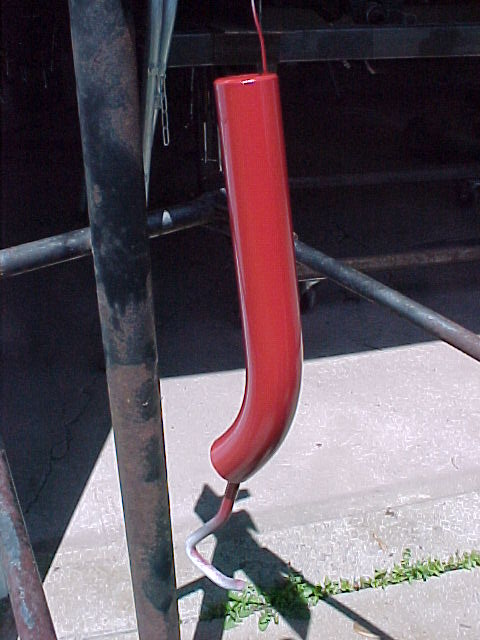
The handle is a left-over chunk of 1 1/4 tube (with a bend on it). I painted it red (for effect).
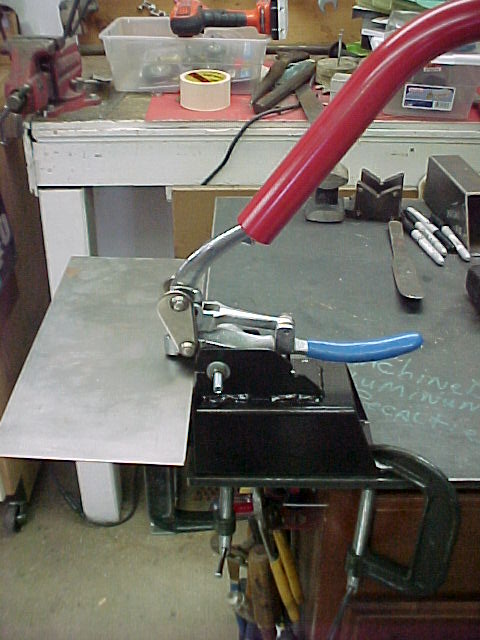
All set up and ready to go! This makes punching holes FUN!
If money is the root of all evil... Women must be the fertilizer...
Link to my BAD AST Build Thread:
http://www.clubhotrod.com/suspension...van-build.html
-
08-04-2012 04:36 PM #5
CHR Member
- Join Date
- Apr 2001
- Location
- Byron, Mi.
- Car Year, Make, Model: '88 Astro Van-BAD AST
- Posts
- 871
Come on Pat! Show 'em the "Green Monster"!... This is a beautiful build. Looks like he bought it from a supplier! Originally Posted by pat mccarthy

If money is the root of all evil... Women must be the fertilizer...
Link to my BAD AST Build Thread:
http://www.clubhotrod.com/suspension...van-build.html
-
08-04-2012 05:00 PM #6
CHR Member/Contributor
- Join Date
- Apr 2005
- Location
- bay city
- Posts
- 10,546
thanks i just paid the cleaning gal down the road to clean and wax it Originally Posted by astroracer
 no i am not kidding
Irish Diplomacy ..the ability to tell someone to go to Hell ,,So that they will look forward to to the trip
-
08-04-2012 06:29 PM #7
CHR Member
- Join Date
- Aug 2003
- Location
- CC
- Car Year, Make, Model: 70 Camaro Z-28 Now/40 Chevy Back Then
- Posts
- 4,306
I've posted these before over the years....
I built 2 of these for the floor jacks to pick the stomp shear up.
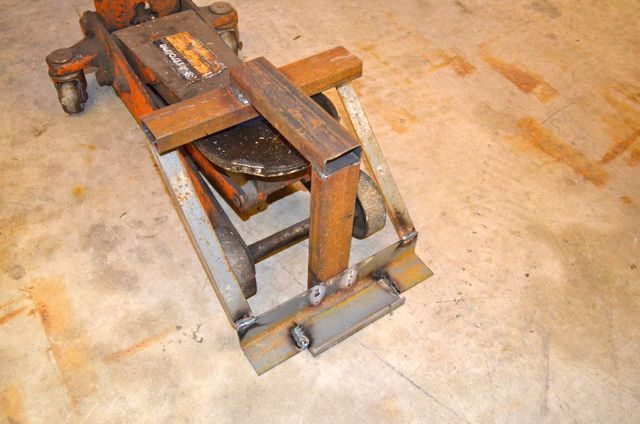
To slide the home built dolly under it.
Built a trailer load of tools to install signs.
Built a tool to round corners on signs
[IMG]http://img.photobucket.com/albums/v205/pro70z28/CatchCan2.jpg[/IM
"PLAN" your life like you will live to 120.
"LIVE" your life like you could die tomorrow.
John 3:16
>>>>>>
-
08-04-2012 06:32 PM #8
CHR Member
- Join Date
- Aug 2003
- Location
- CC
- Car Year, Make, Model: 70 Camaro Z-28 Now/40 Chevy Back Then
- Posts
- 4,306
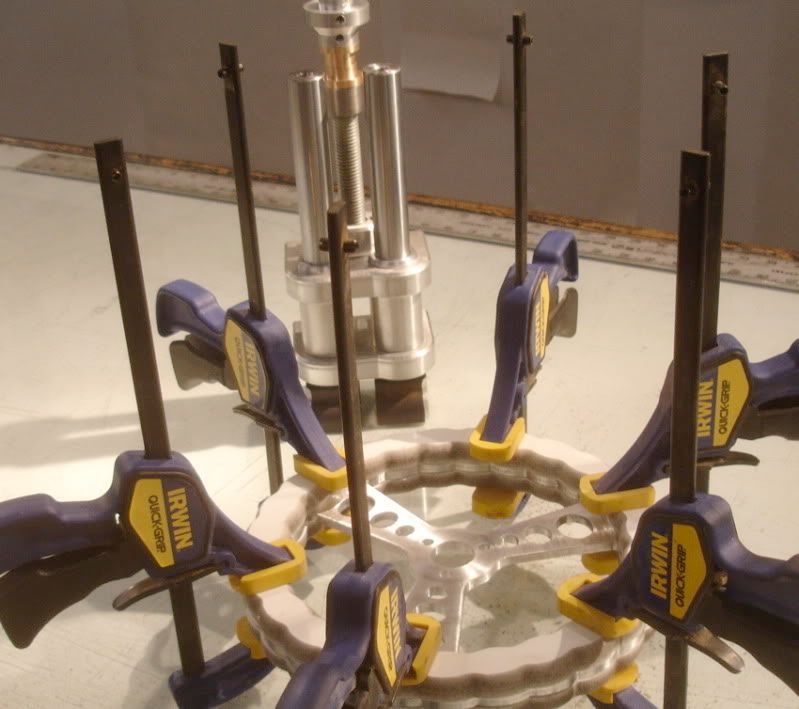
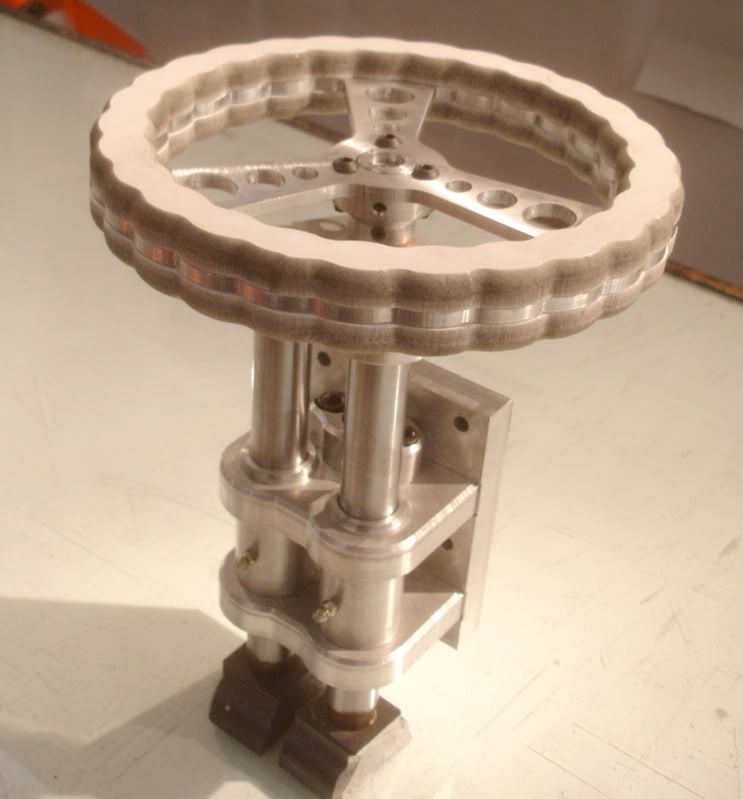
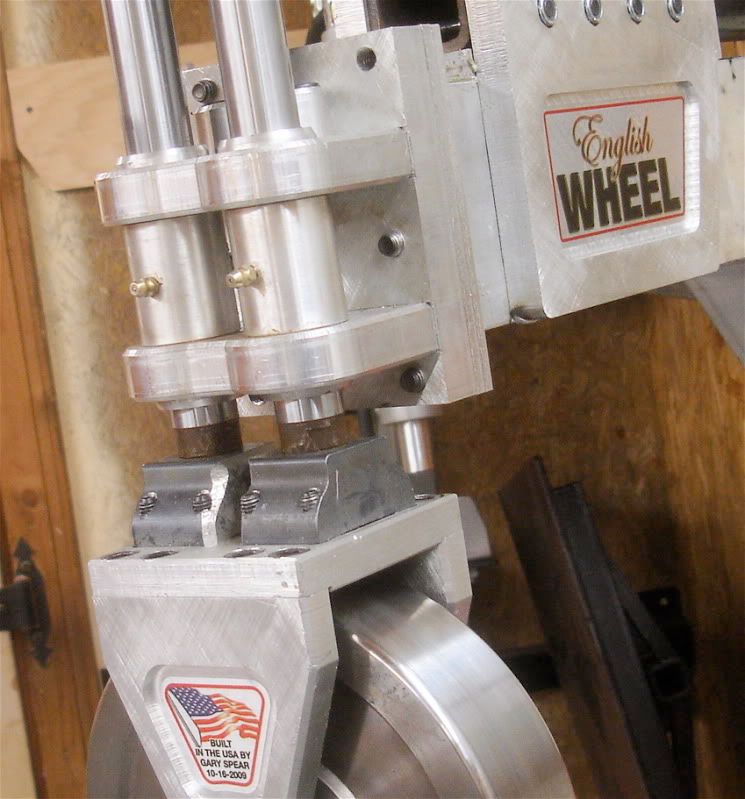
Built an English Wheel
"PLAN" your life like you will live to 120.
"LIVE" your life like you could die tomorrow.
John 3:16
>>>>>>
-
08-04-2012 06:36 PM #9
CHR Member
- Join Date
- Aug 2003
- Location
- CC
- Car Year, Make, Model: 70 Camaro Z-28 Now/40 Chevy Back Then
- Posts
- 4,306
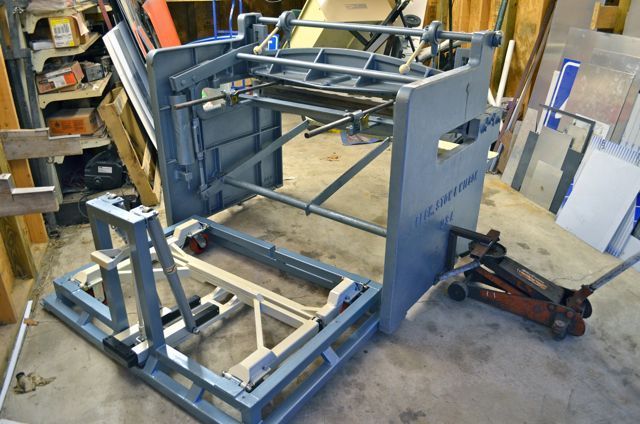
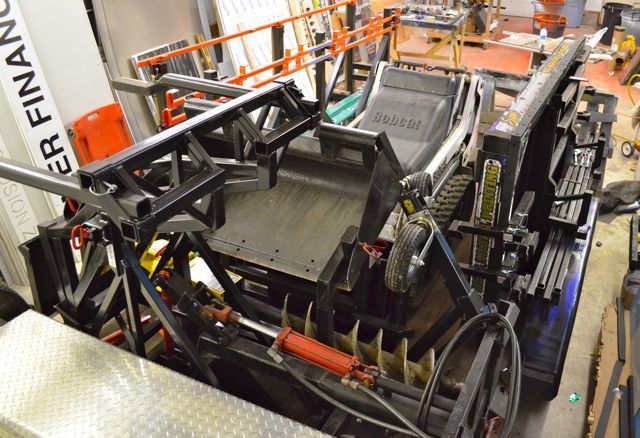
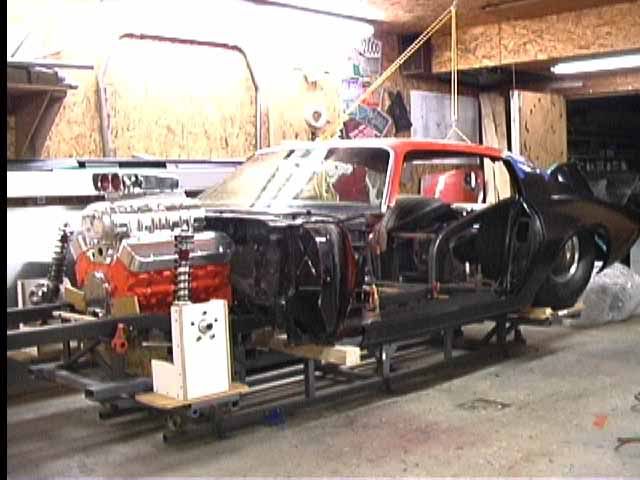
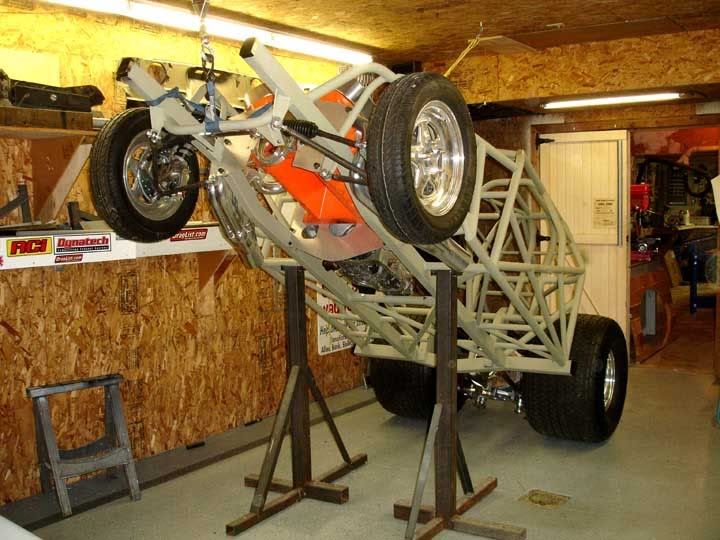
Built a chassis jig & Rotisserie .
"PLAN" your life like you will live to 120.
"LIVE" your life like you could die tomorrow.
John 3:16
>>>>>>
-
08-04-2012 06:56 PM #10
CHR Member/Contributor
- Join Date
- Dec 2006
- Location
- Woodstock
- Car Year, Make, Model: 34,stroker,32pu,2020 MustangGTpp2
- Posts
- 1,109
Great idea for removing door skins, I can see the built in damage control going on there. Well, thought out only the end user would have considered that.
A little leverage goes a long way punching holes. I like that one also, and the way you finished it nice touch. Pat I for one would be very interested in seeing the green monster. Pro70z28 that's good stuff, the english wheel and chassis jig .......... saweet !
I used metal shaping tools to kick things off as an example. Any tools used for body, engine, suppression, drive train building or repairs are up for show. Including grinding, polishing, parts cleaning, electrical and welding.Last edited by pepi; 08-04-2012 at 07:05 PM.
I have two brains, one is lost and the other is out looking for it
-
08-04-2012 08:04 PM #11
CHR Member/Contributor
- Join Date
- Apr 2005
- Location
- bay city
- Posts
- 10,546
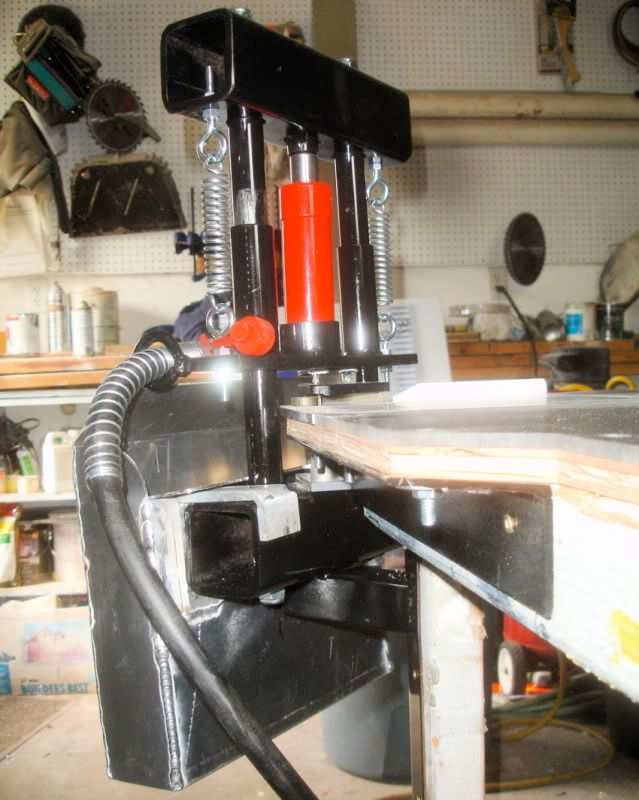
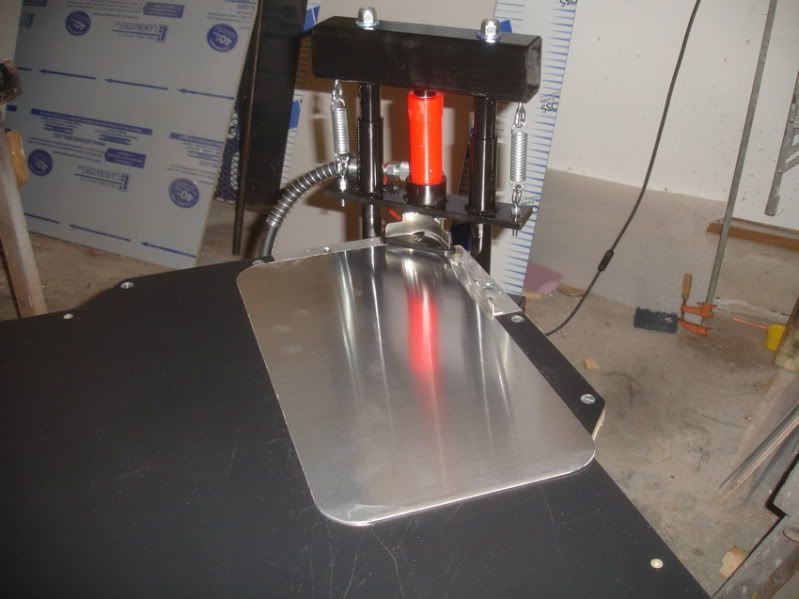
Attachment 54971Attachment 54972well i go to the shop snap some photos look s like i may have thined out some files here is the top off my T/A seat guide machine the drive was blown up when i pick it up for under $1200. the newer sunnen machine is the about same but they sell for $15000. used ,,,some have seen this .i made evey thing up other then belt and drive gears . the one pulley set up is a jesel belt drive now it like the newer sunnen machine with variable speed lets me cut heads for seats guide work and cut and form seats open heads up and recut chambers and bowl work
Last edited by pat mccarthy; 08-04-2012 at 08:30 PM.
Irish Diplomacy ..the ability to tell someone to go to Hell ,,So that they will look forward to to the trip
-
08-04-2012 09:16 PM #12
CHR Member/Contributor
- Join Date
- Apr 2005
- Location
- bay city
- Posts
- 10,546
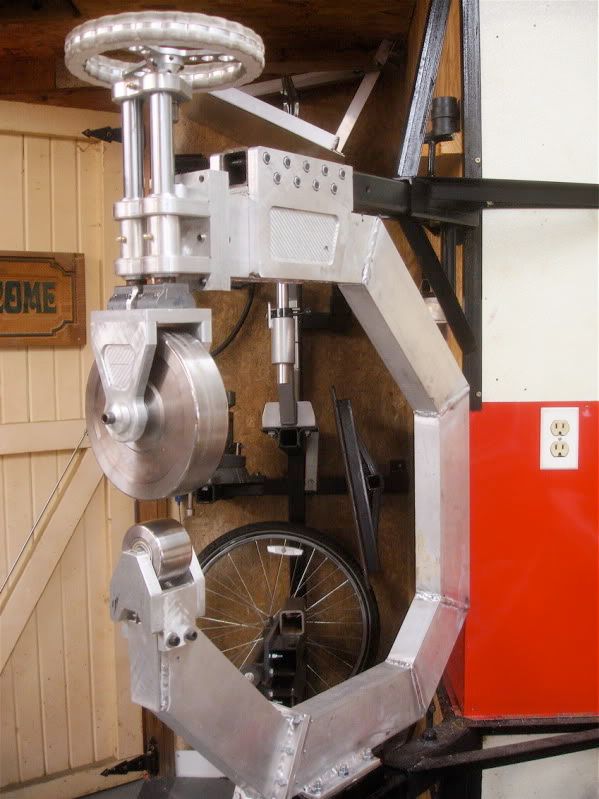
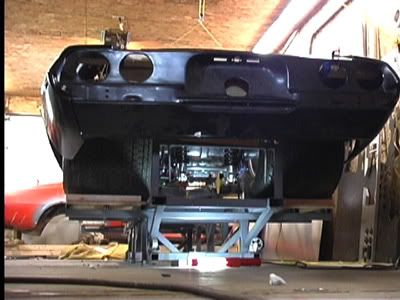
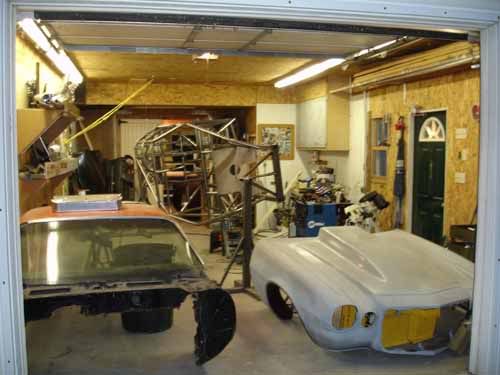
not many photos of it but here is the green monster .i made it to hone engine bores after i bore them or just a clean up a good used bore or opening up a bore less then .015 . it has honed evey thing from a lycoming jugs to many harley davsons jugs and many big bore v8 i lost count just this years it done over 70 bores easy. it very basic but been trouble free . machine was built from scratch . a used hone like this cost $5000. and up so i built this machine .i pick up a used a Dc motor and speed controller .the motor is in back of the head runs threw two gear drives for max tq .oil pump in the bottom of machine to pump honing oil. not really a copy of any machine other then the box size . you can see it in the back of this one photo it.s the green machine it is not hard to get bore finsh like the bottom photo
Last edited by pat mccarthy; 08-04-2012 at 09:25 PM.
Irish Diplomacy ..the ability to tell someone to go to Hell ,,So that they will look forward to to the trip
-
08-05-2012 04:50 AM #13
CHR Member/Contributor
- Join Date
- Dec 2006
- Location
- Woodstock
- Car Year, Make, Model: 34,stroker,32pu,2020 MustangGTpp2
- Posts
- 1,109
I remember that saw it in some other shots. That's a killer machine/tool especially that now I know it was hand made. That repair made on the T/A seat guide machine using the jesel belt drive parts. Better then factory, I am guessing in two ways, cost and availability. Necessity being the mother of an invention, certainly applies well done.I have two brains, one is lost and the other is out looking for it
-
08-05-2012 02:06 PM #14
CHR Member
- Join Date
- Jun 2008
- Location
- Leonardtown
- Car Year, Make, Model: Walking
- Posts
- 1,228
I came up with a ViseGrip tucking tool for shrinking a flange, trying to help someone online who needed to shrink a flange and didn't want to spend the coin for a lancaster style shrinker. Took some nice detailed photos, he duplicated the tool for under $20, and his fender repair on a IH COE turned out pretty nice... The tool works real well for consistency. I do have the Lancasters I bought from Kent White, but it depends on the situation now as to which I use...
The following is based on a metalshaping demo at OJ Higgins shop in Berryville VA, and we actually compared the ViseGrip tucking tool, heating & hammering, to shrinking the flange with a HF shrinker. One guess which was faster and more effective on an inch and a half flange.... Some of the pictures are from OJ's event, and I didn't get as many photos as I normally do with the hammers in my hands, so it is supplemented with some diagrams and previous pictures to better explain the tuck shrinking and comparison to Lancaster style machines.
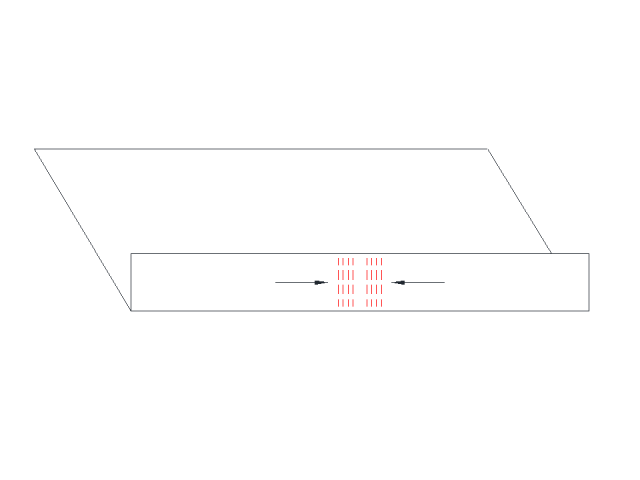
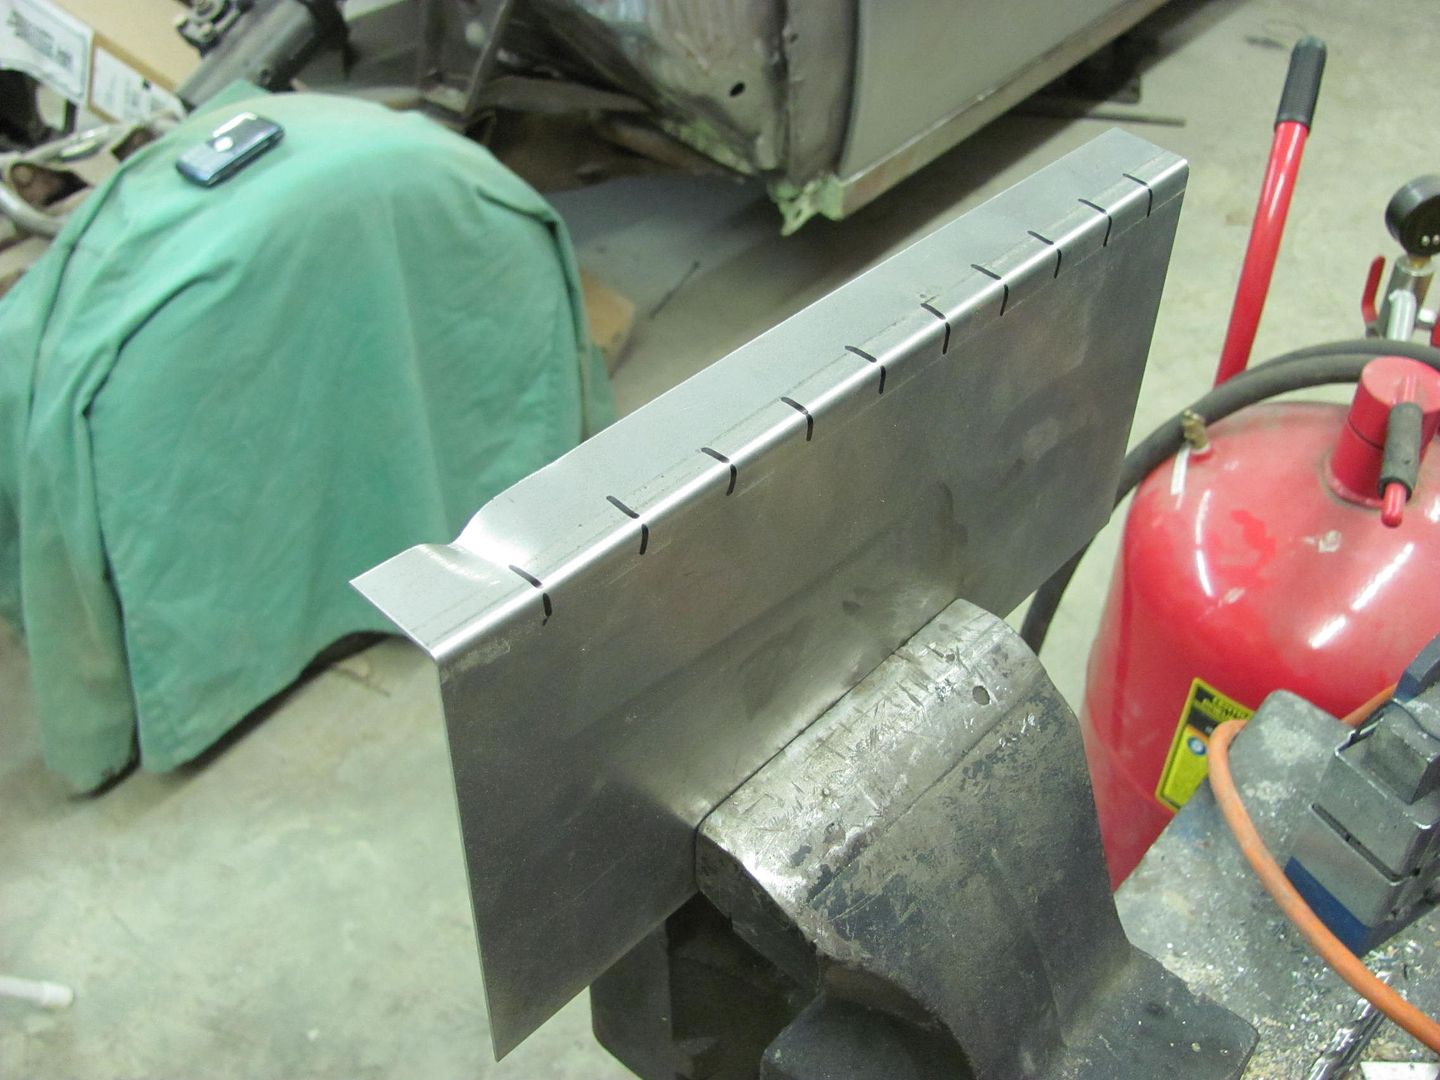
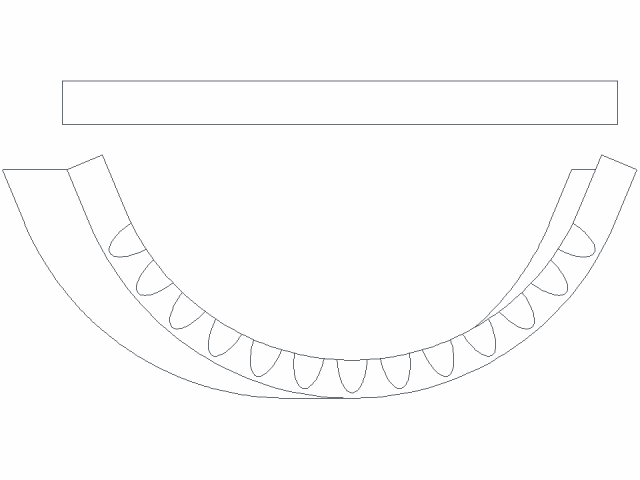
Part of the demo at OJ's was a body leading of two "hood halves". Prior to Tom showing the body lead demo, I needed to make some panels for him to work from. We decided that a curved surface, similar to the front end of a 38 Chevy and its hood halves, would be a better fixture for showing the need for flowing lead up a slight incline. I started with two equal sized panels, and bent a flange on the long edge. Then discussed some of the issues faced when shrinking a flange. For demonstration purposes, in the following example we have a 12" long panel with a 1-1/2" wide flange.

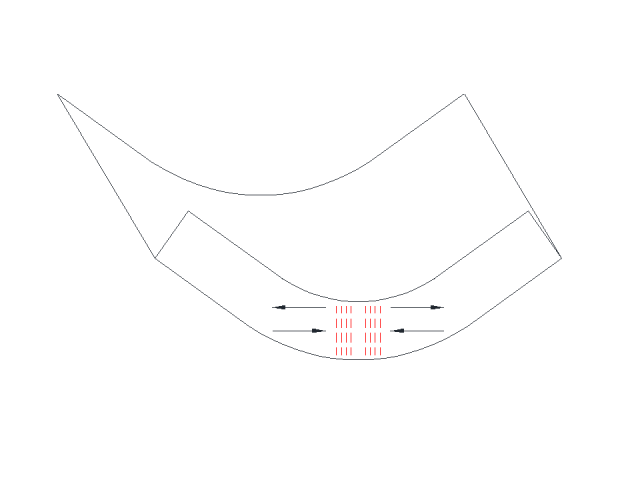
If we were to look at the same panel with a radius, formed by shrinking the flange, we would note dimensions similar to as follows:
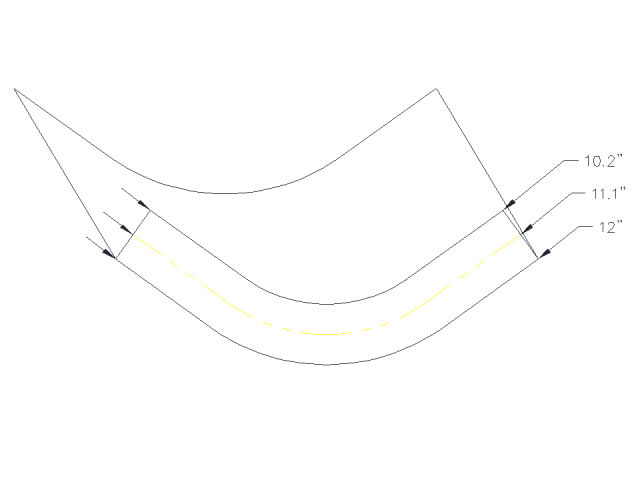
....where the 90 degree bend at the flange still retains its 12" length, the centerline of the flange in this case is shortened by almost an inch, and the outer edge of the flange shortened by almost another inch.
In working with the Lancaster/Eastwood style shrinker-stretcher machines, it is important to note that they are a linear device, the movement they introduce into the metal is in a straight line.
So that once a radius starts to form, and with the shrinking device still moving in a linear fashion, the outer edge of the flange will be put into tension as the centerline shrinks. Anyone who has used these devices will have seen this as the machine starts to lose its effectiveness.
To counter this effect, we need to shrink the outer edge of the flange more than the inner. By simply alternating the depth of the shrink as shown, you can provide more shrink to the outer edge and the device will become more effective.
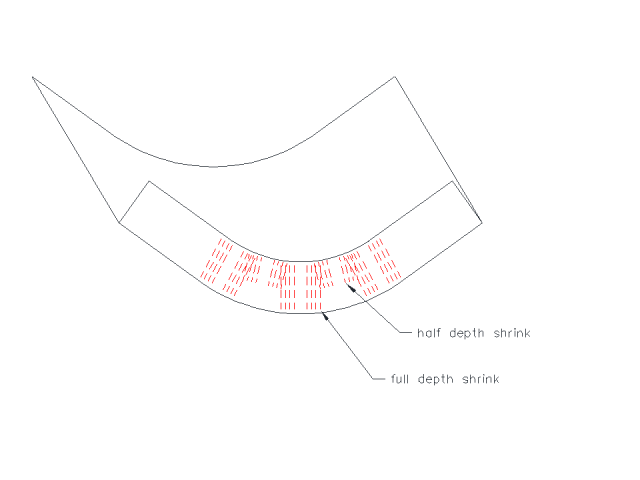
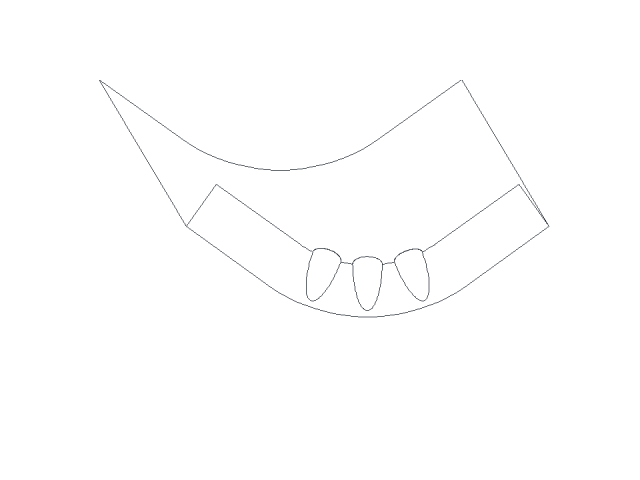
Another method of shrinking is with the use of tucks. Looking at their shape, the tuck has a wider "gather" at the edge of the flange as compared to the inside bend of the flange, so this eliminates some of the tension issues seen in the mechanical shrinker.
Where the demos this past weekend were supposed to concentrate on using only hand tools so that the participants could readily duplicate the results without the need for a major purchase, we did find the use of the Shrinker a good comparison, and by chance the tuck shrinking did prove to be faster and more effective.
For the tuck shrinking, one can use tucking forks, rounded jaw pliers (by design or modification) or special designed devices. As an example, here is a set of tucking forks I made out of some scrap metal and 5/8 bolts turned down.
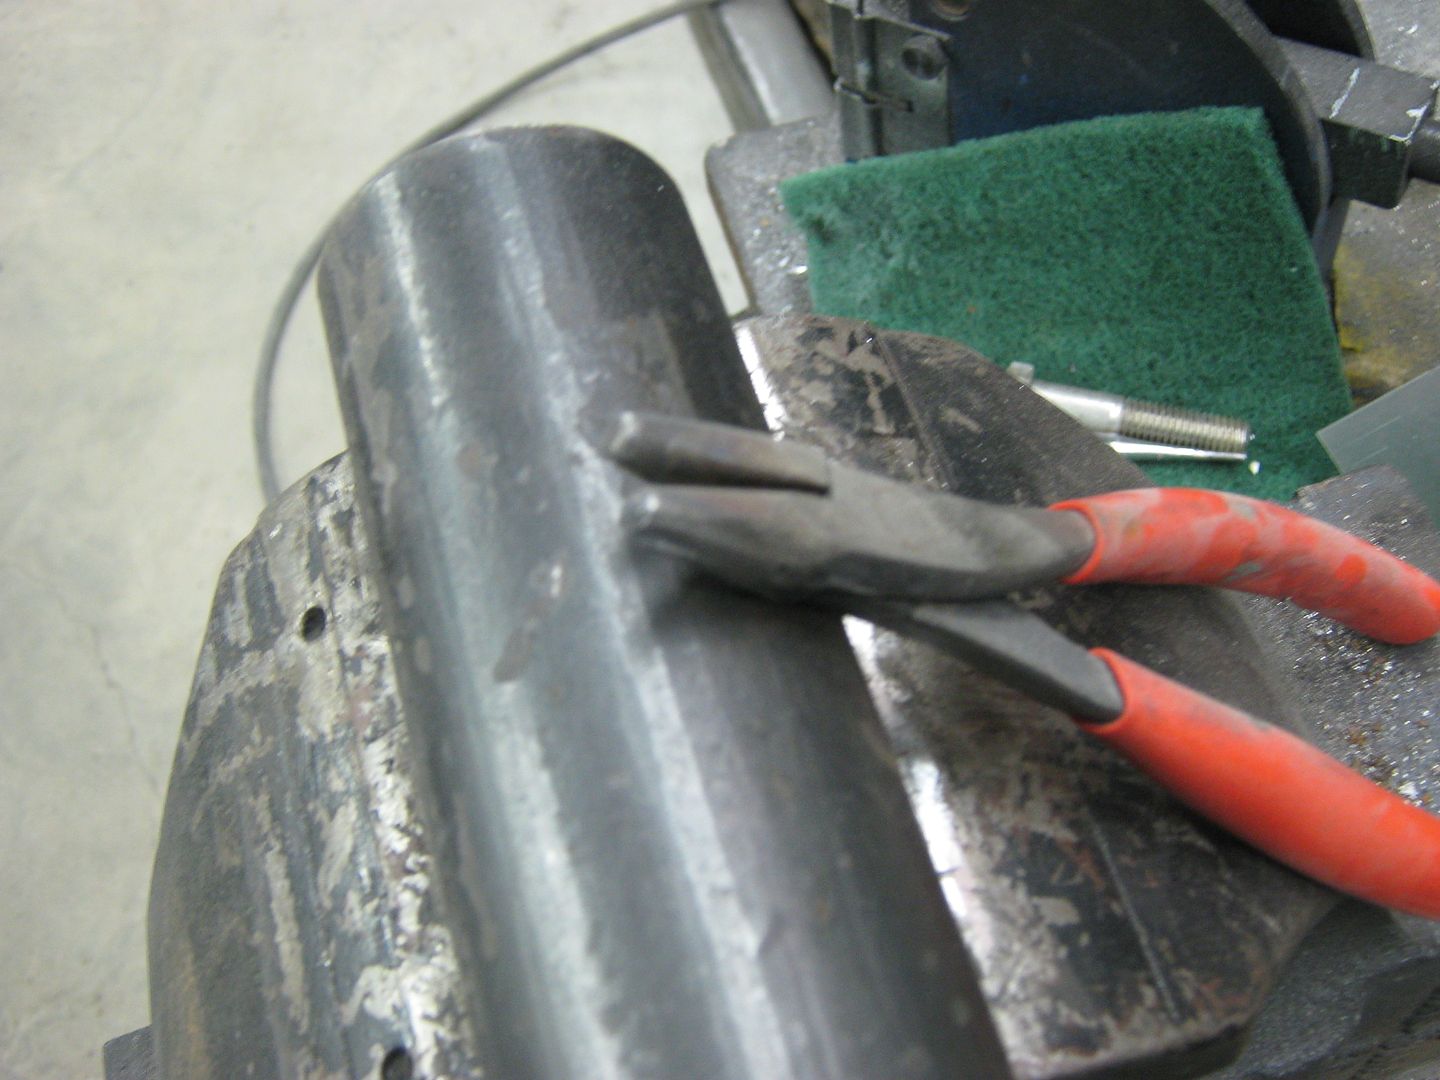
And a pair made from needle nose pliers..
Probably the biggest challenge with their use is producing consistent tucks. To produce a flowing, consistent radius, we should start with consistent tucks, both in size and the spacing between them.
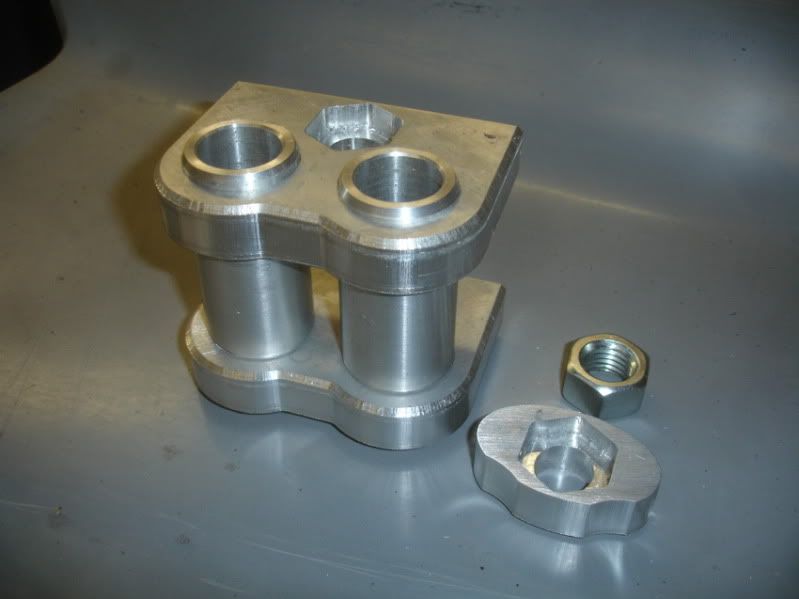
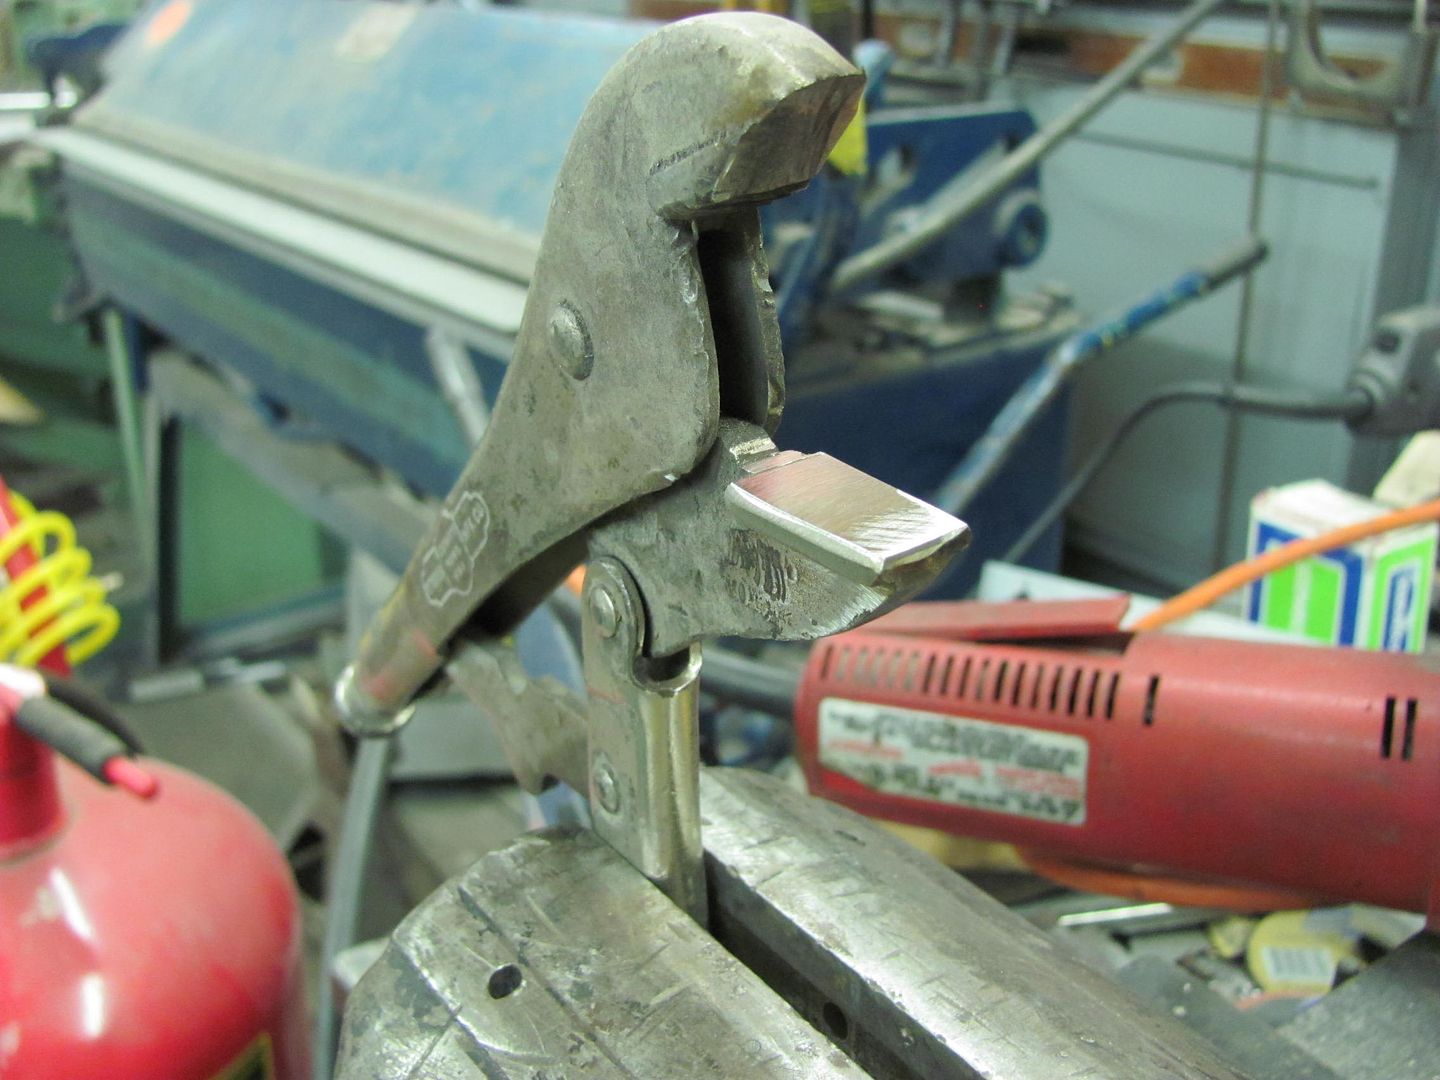
I decided to make a pair of tucking pliers out of Vice Grips, as the jaw adjustment on them would prove to give repeatable sized tucks.
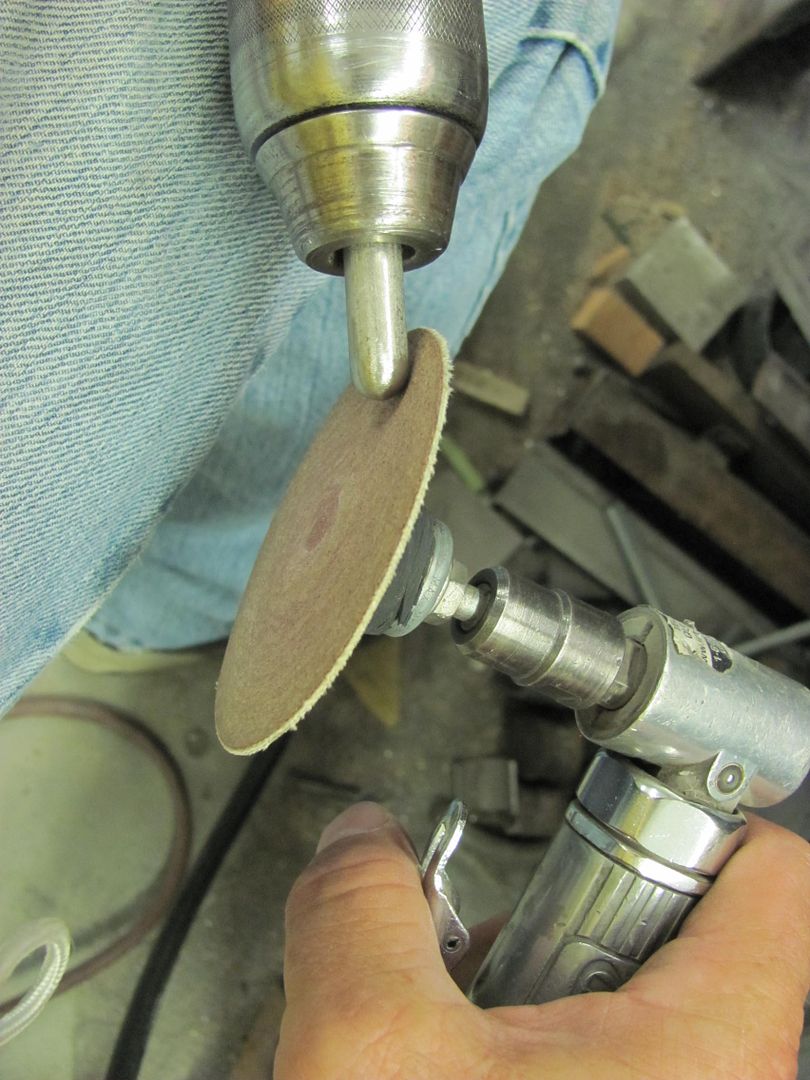
We'll start off by finding a pair of vise grips suitable for the job, which in this case means the jaw serrations are starting to wear and round off and won't grip much of anything else. Finish what has started by removing the serrations to produce a nice flat jaw on the bottom, and cut the top one off at about 30 degrees from its original position.
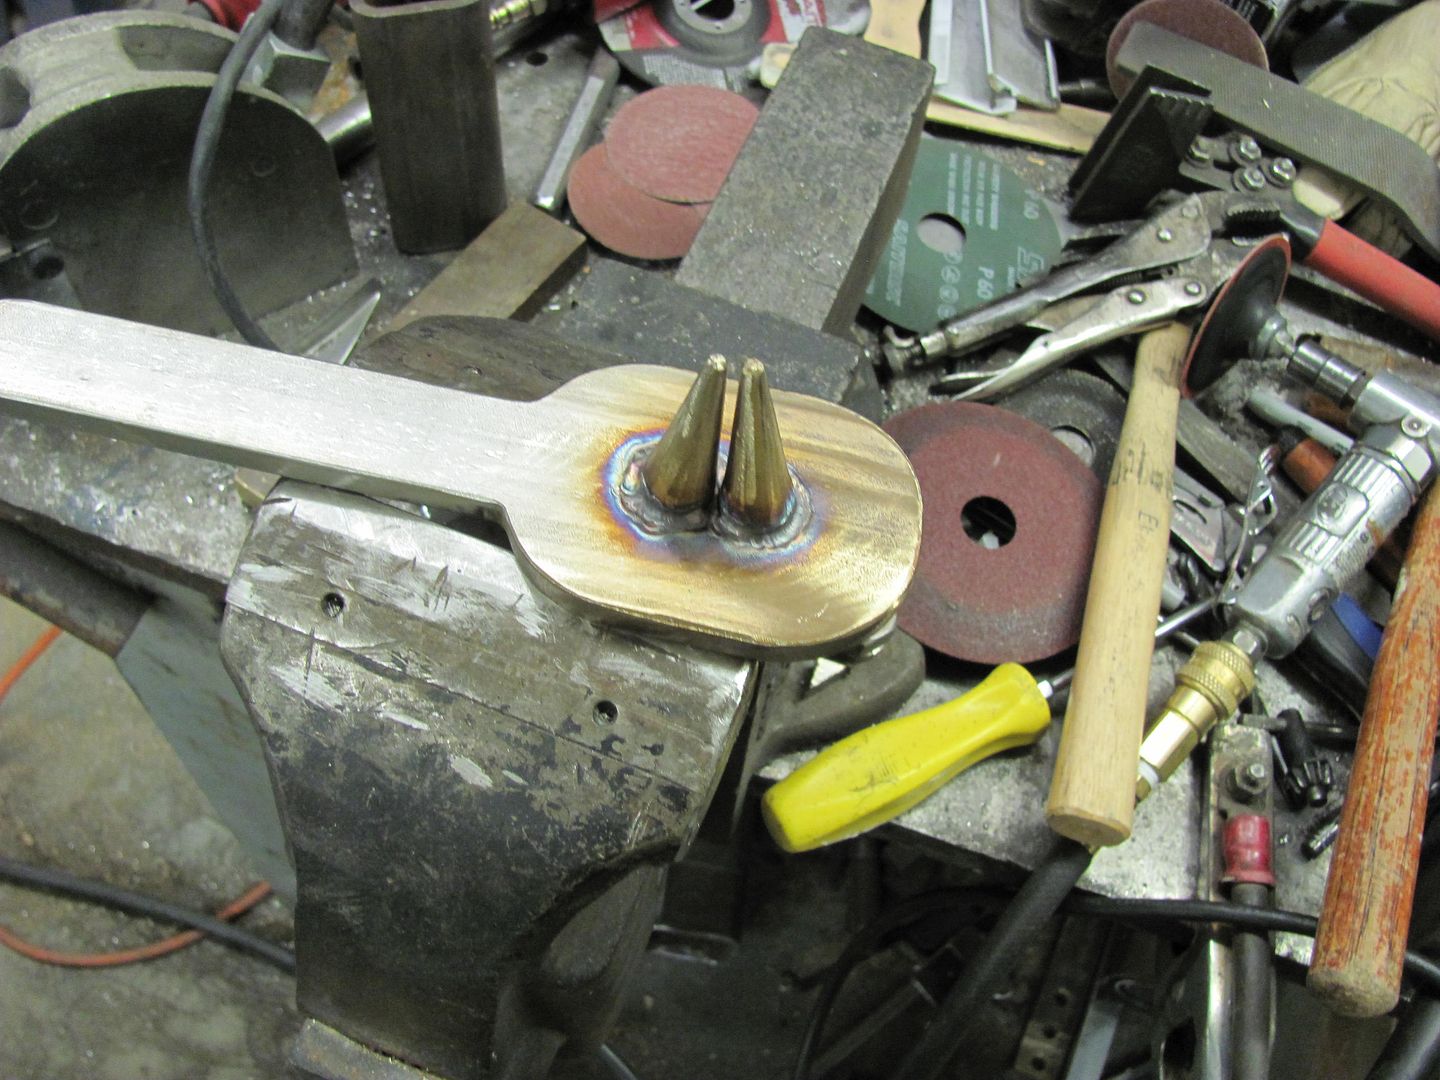
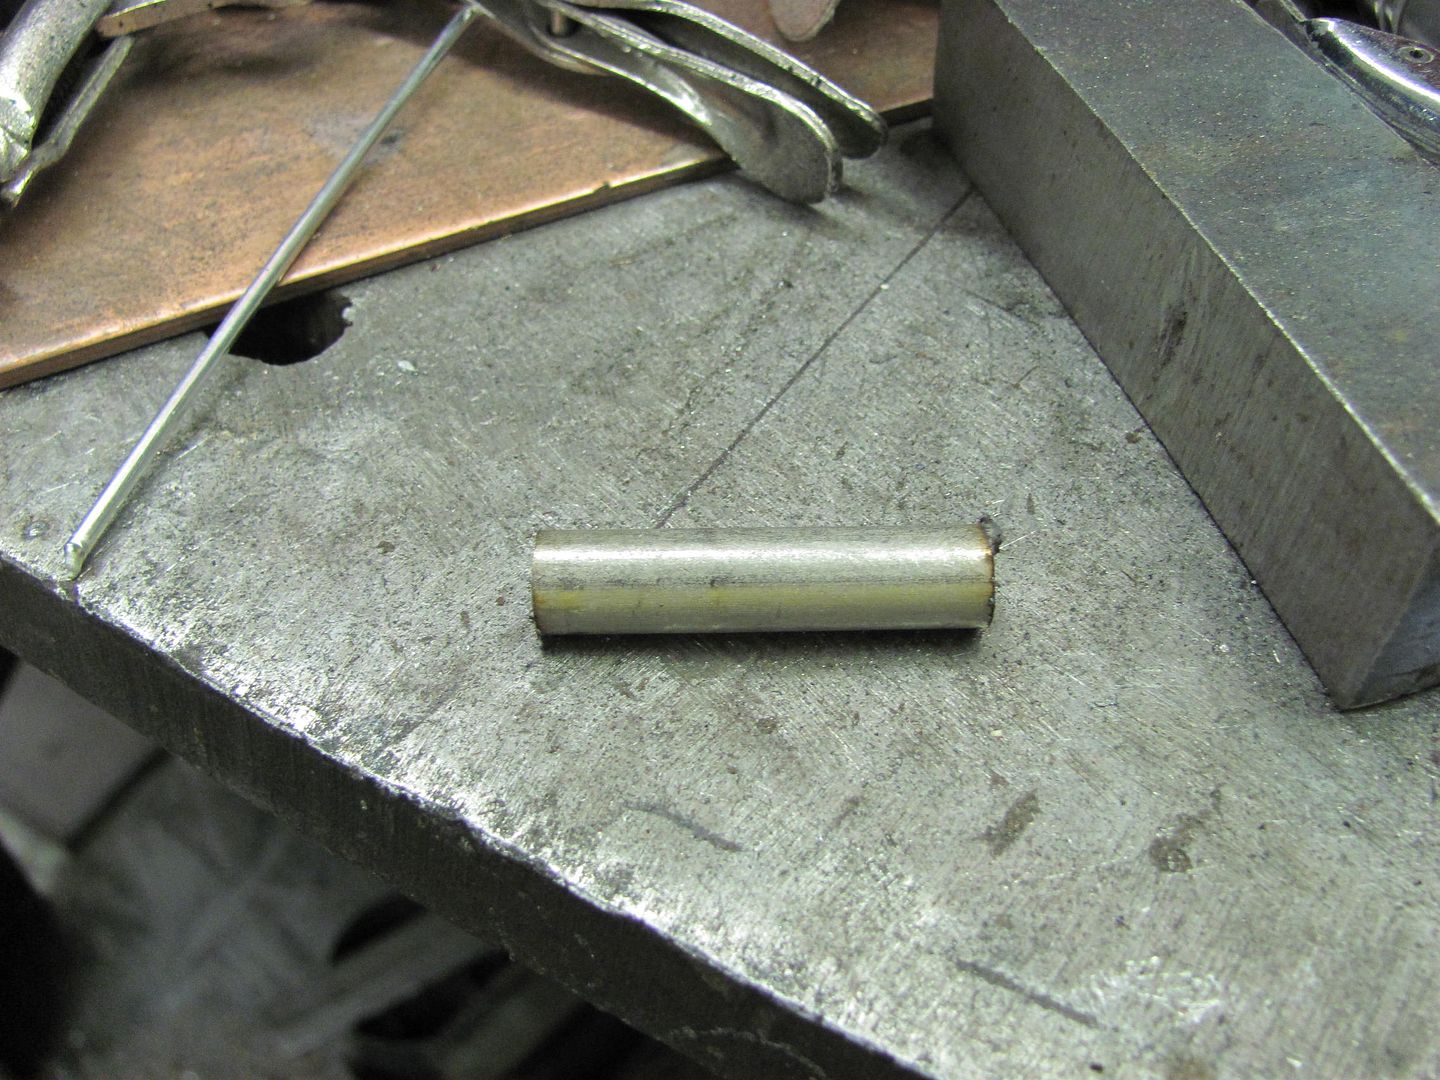
I had some extra long shouldered 3/8 bolts, perfect round stock for the job. Three of them were cut off to 1-1/2" length.
Here's my economy model lathe made by Dewalt...
To set the spacing for the "fingers" the first is clamped in the vise grip jaw, centered.
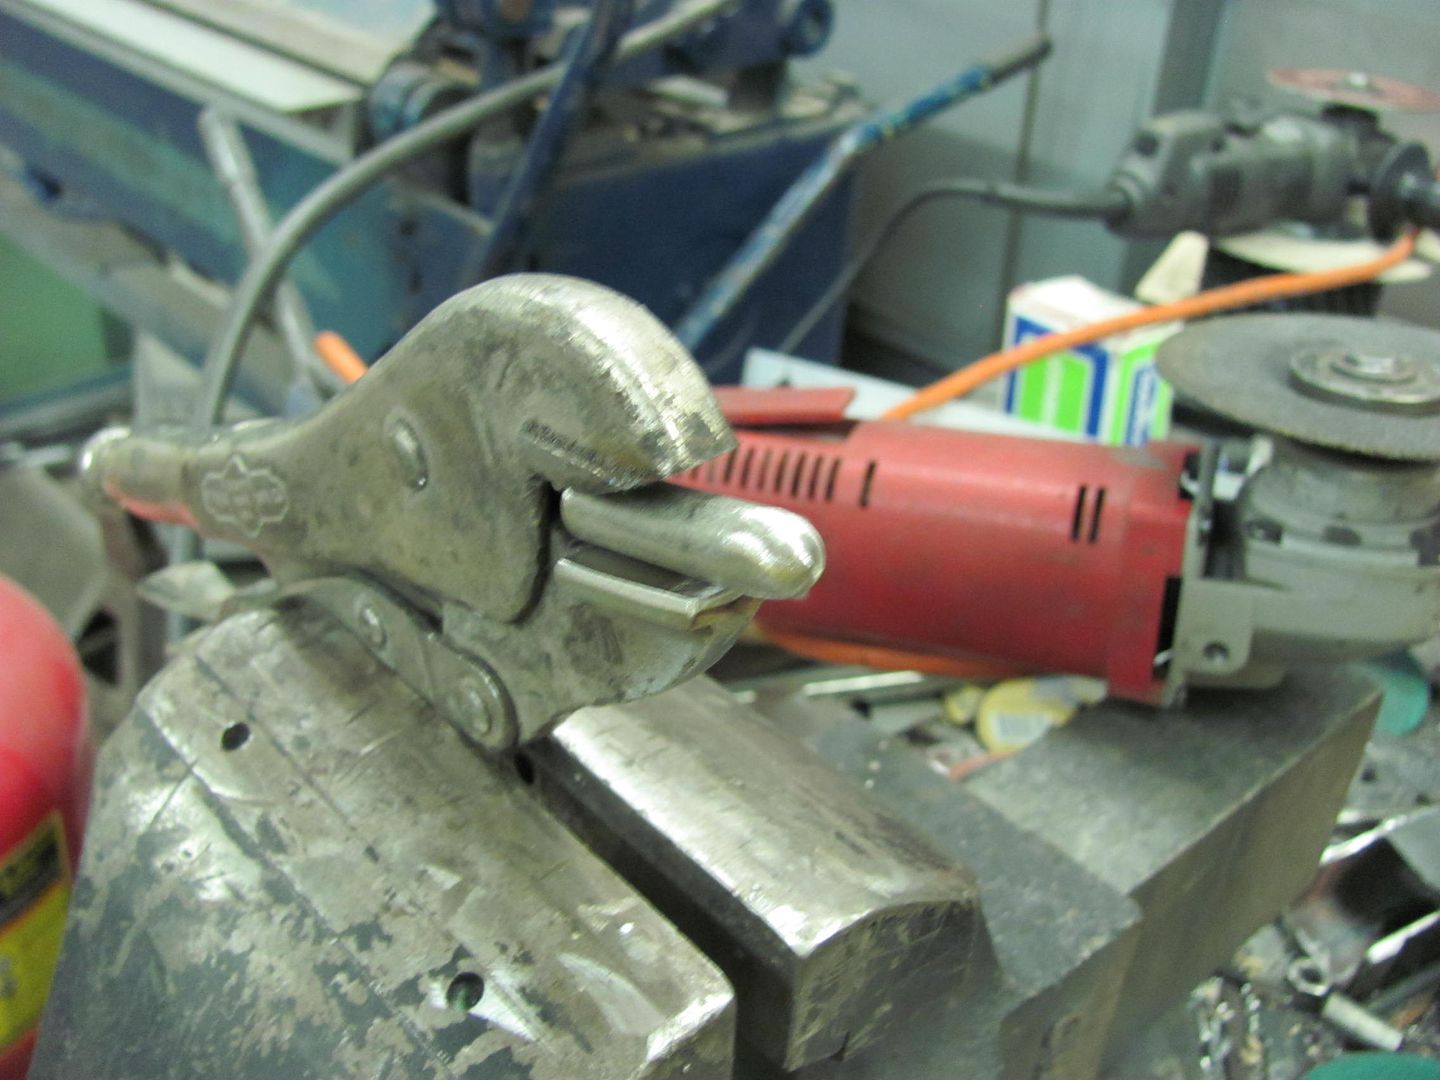
The outer is placed next to it and then welded down the outside, center finger removed, and then welded down inside. Here we should leave a slight gap of your sheet metal thickness to prevent any binding, which will allow a deeper tuck.
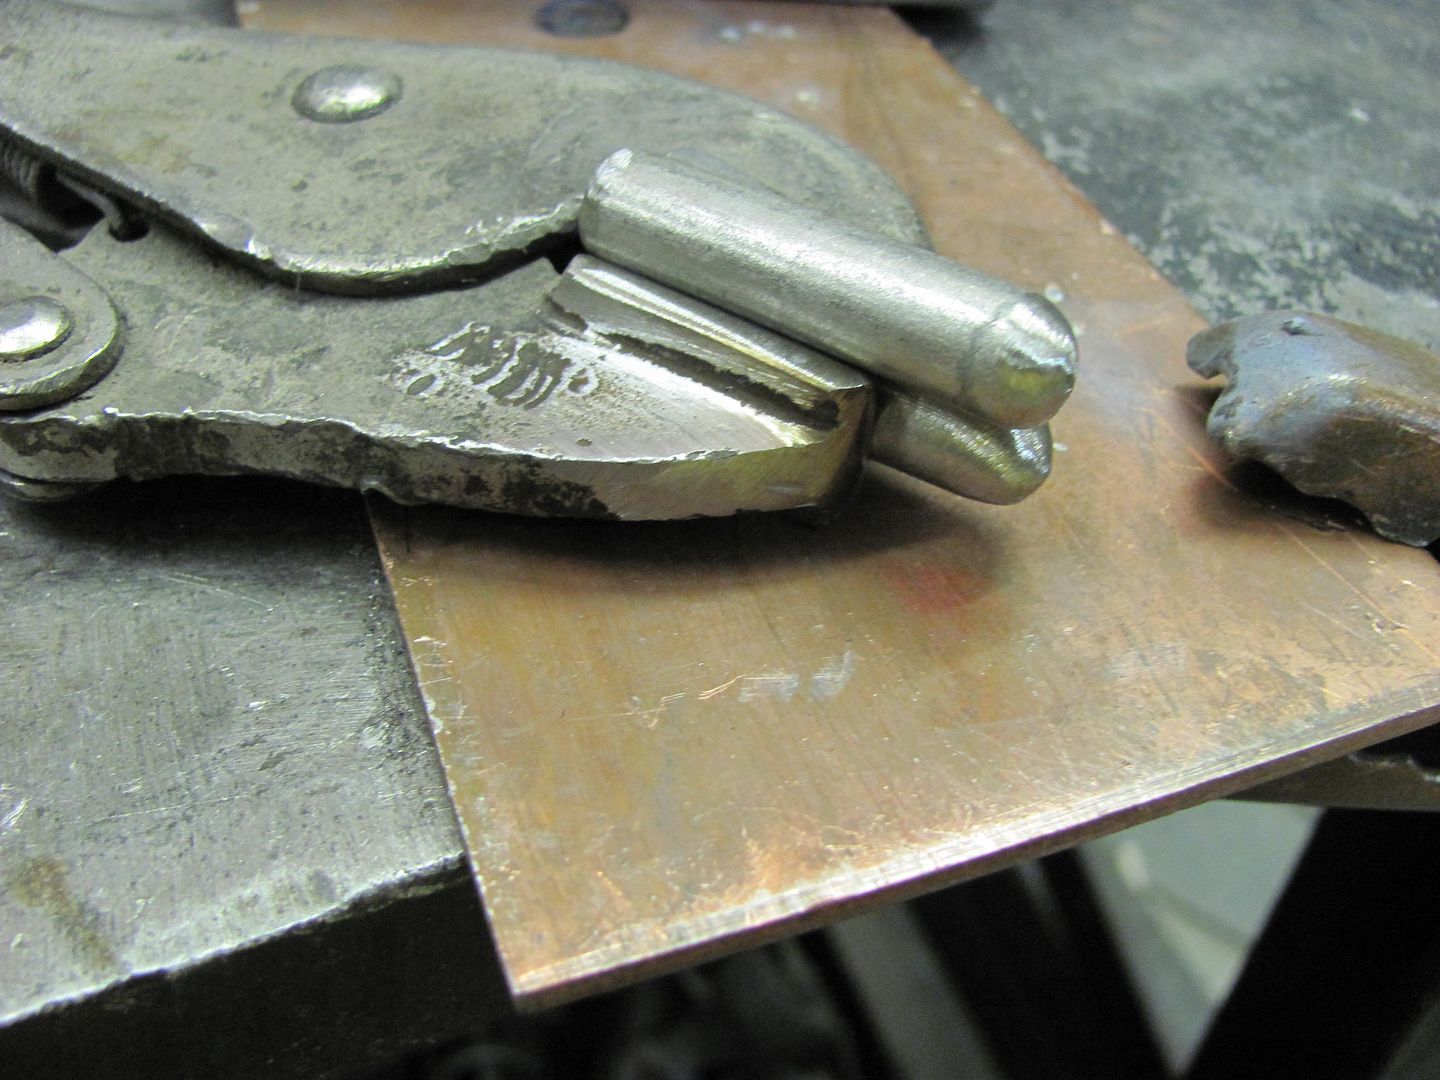
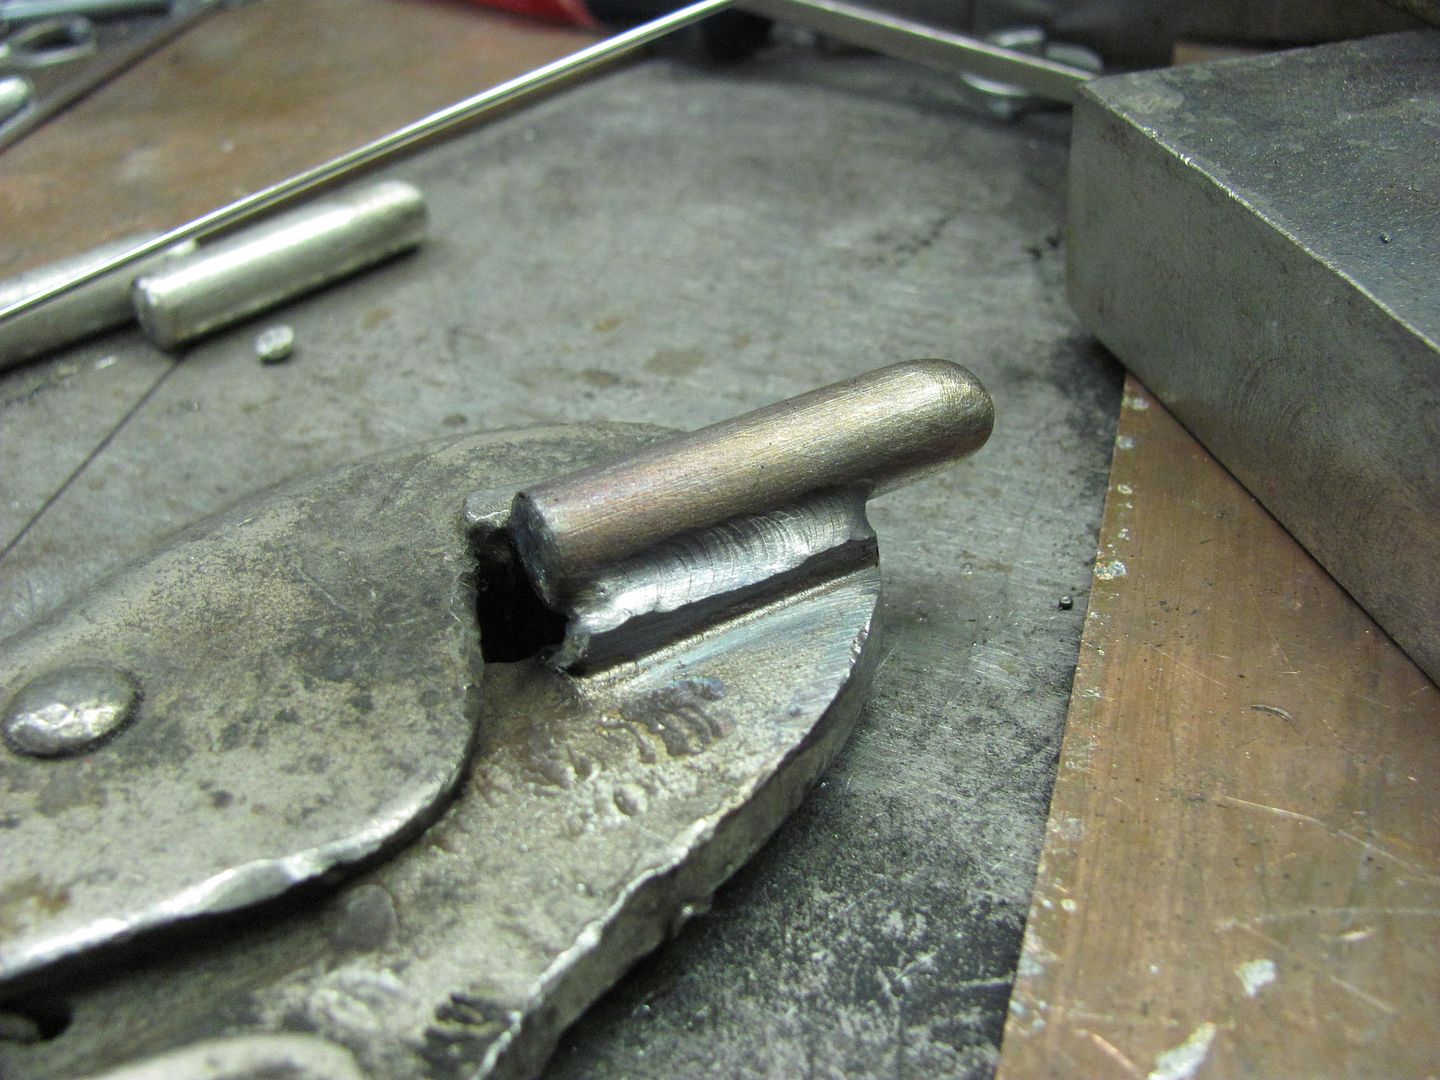
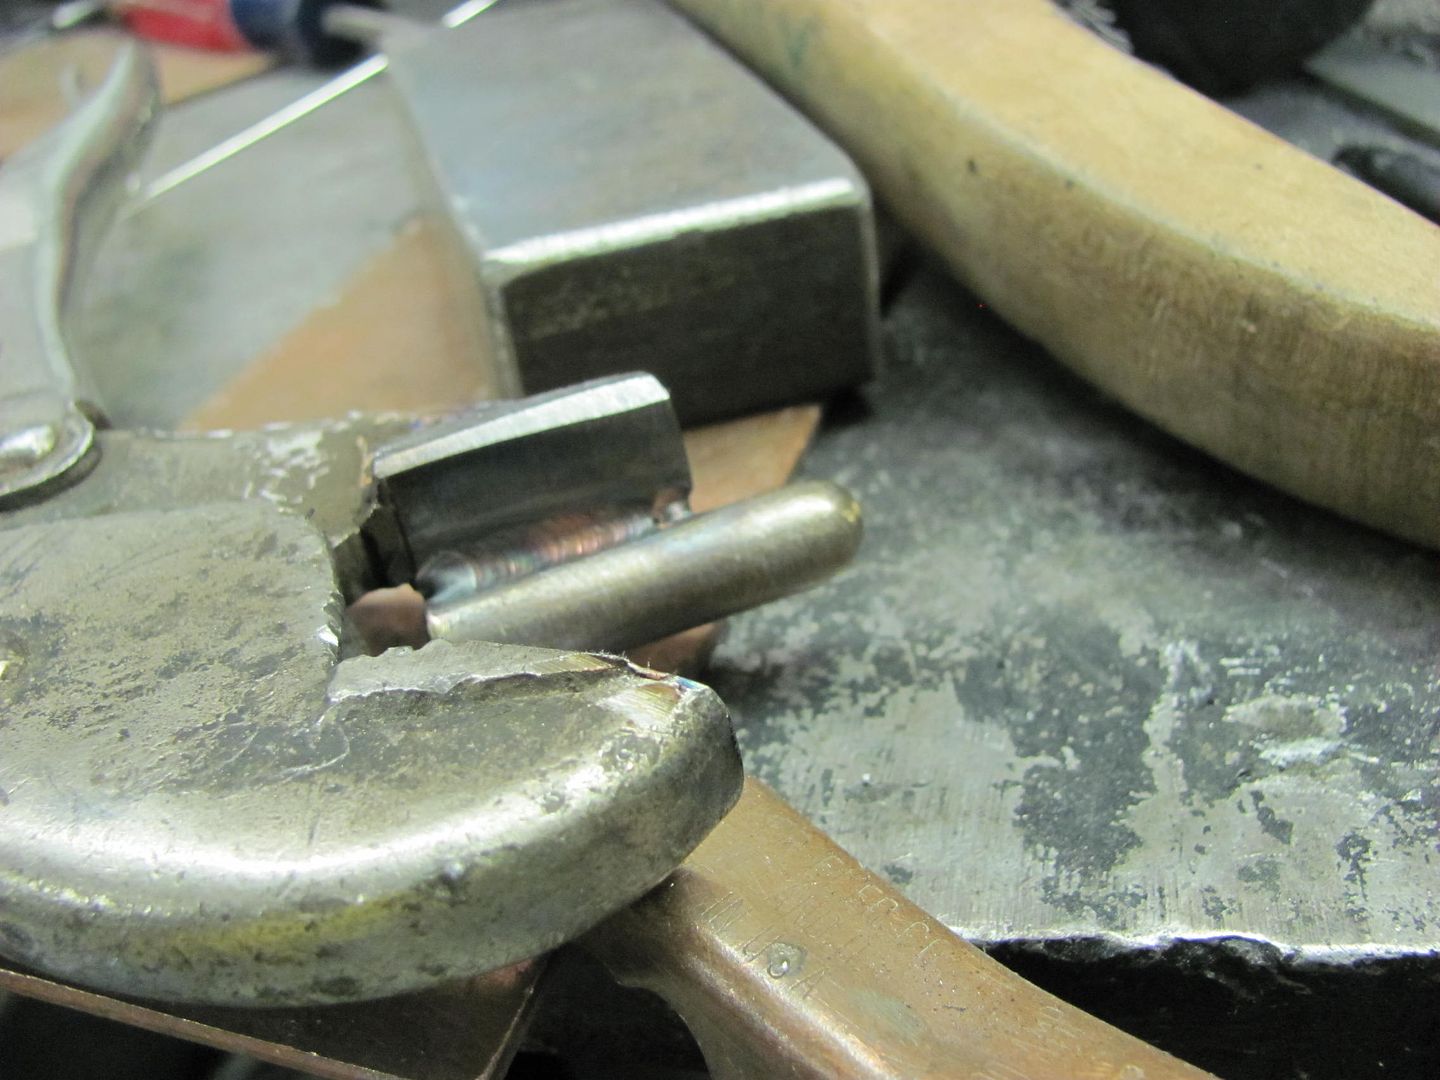
Repeat for opposite side, then weld center finger.
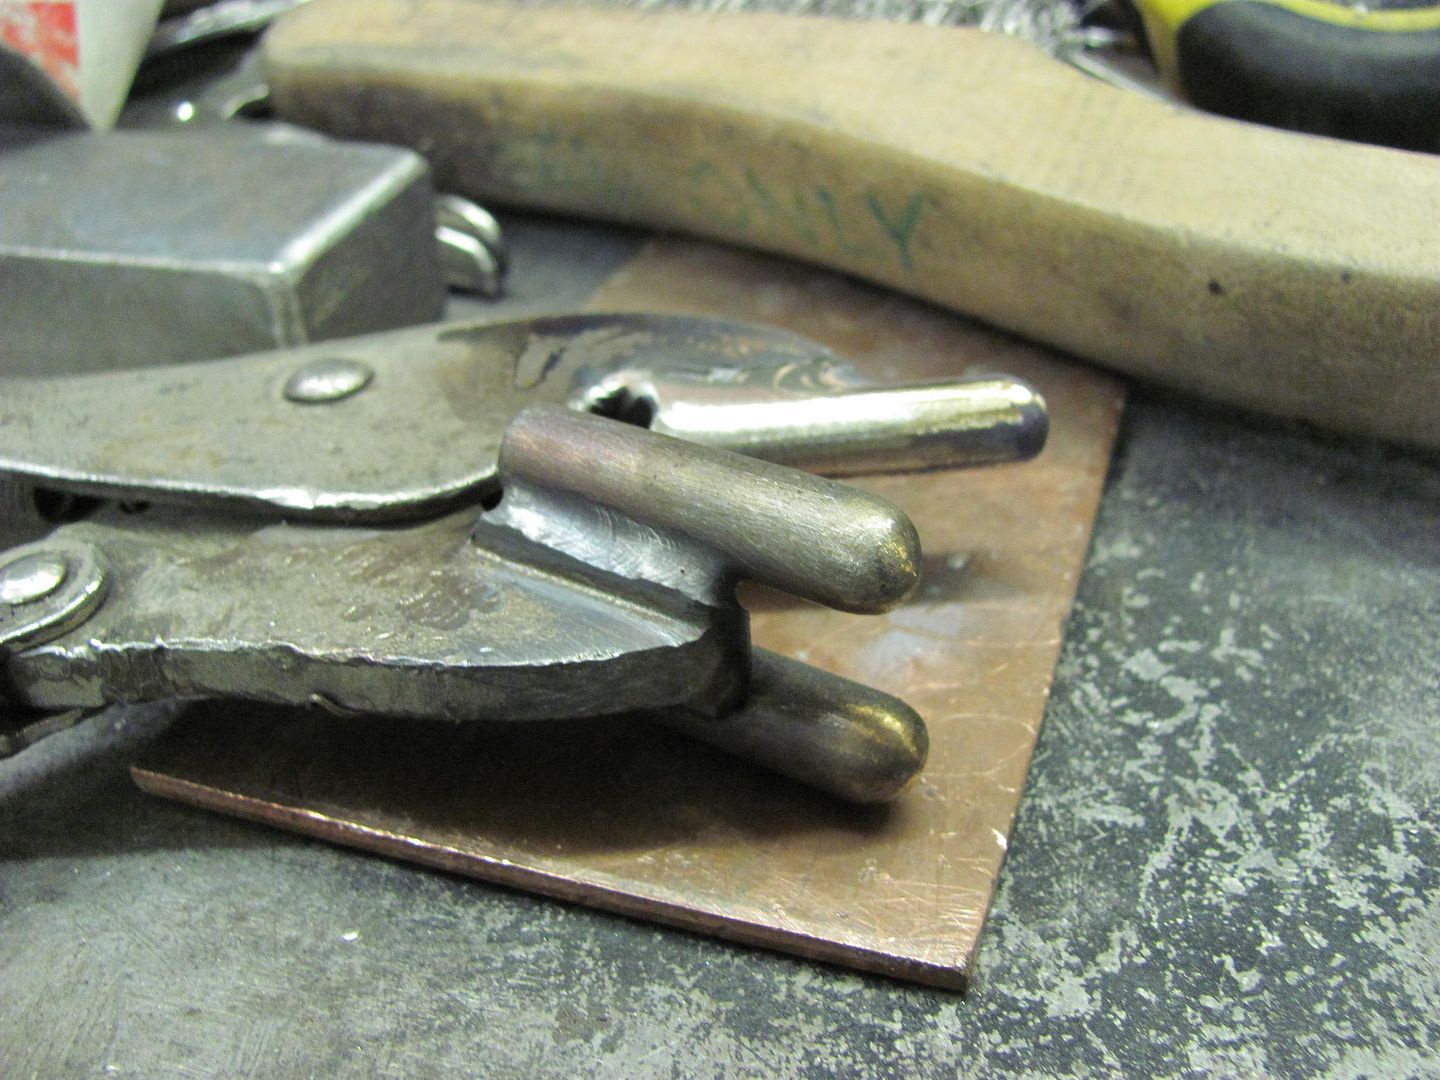
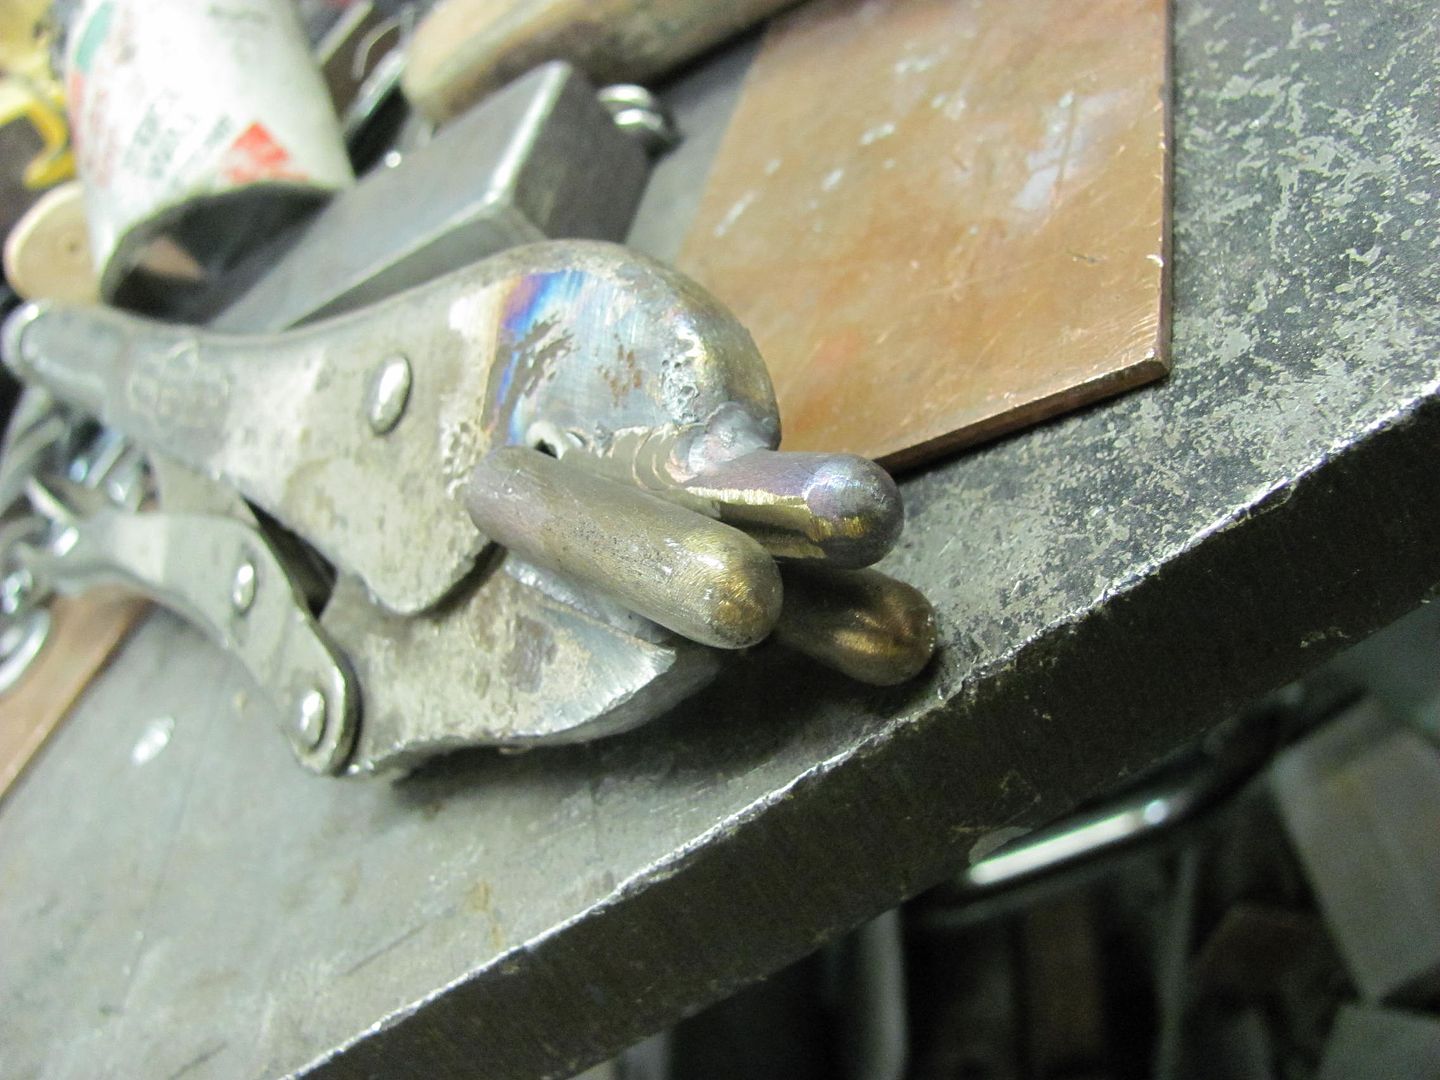
Note in the above picture the 30 degree cut of the upper jaw positions the center finger at an angle compared to the bottom fingers. It is this angle that will help to form the tuck's shape.
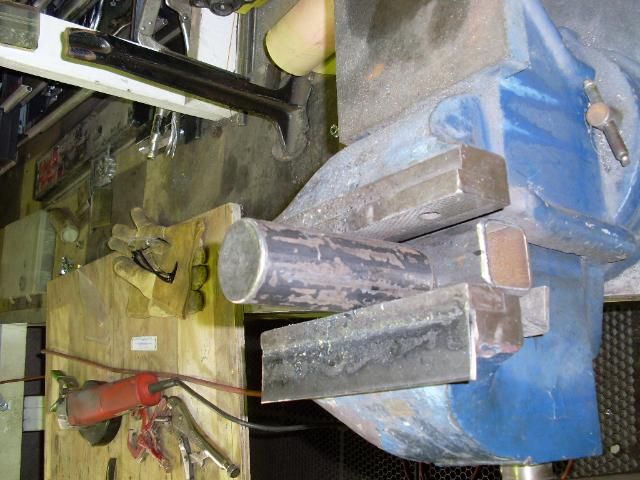
Of course I took my favorite anvil along to the meet, here clamped in the vise..
Again our object in this case is consistency, so equally spaced marks are placed on the flange, identical tucks made at each mark, and you can see the consistent radius along the panel.

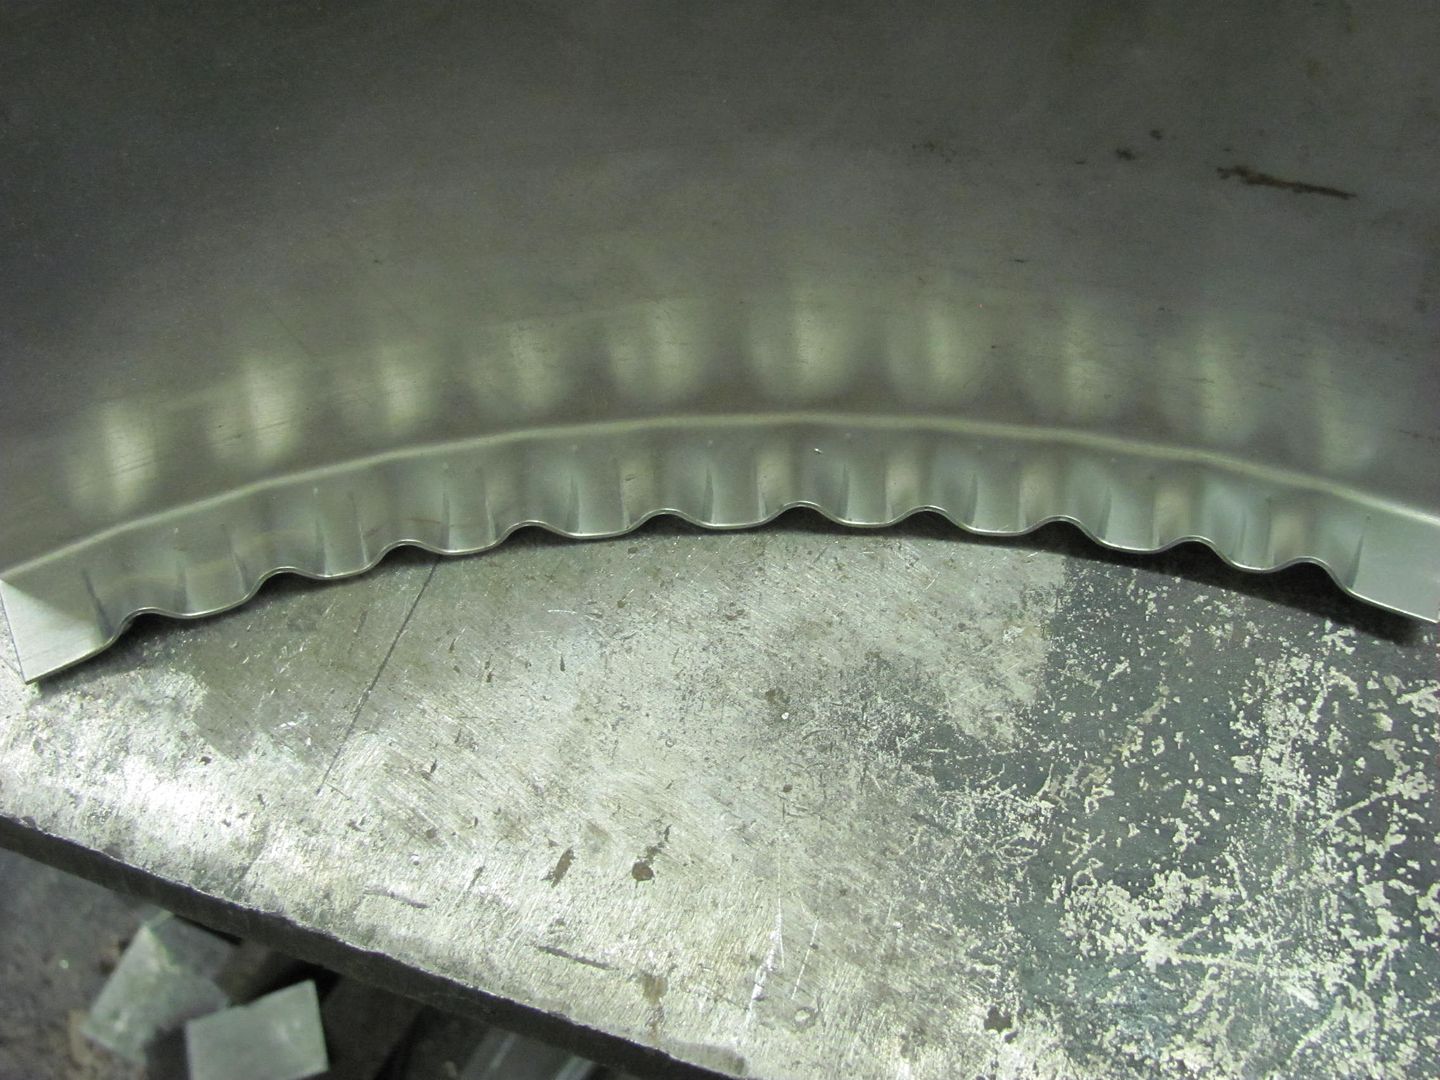
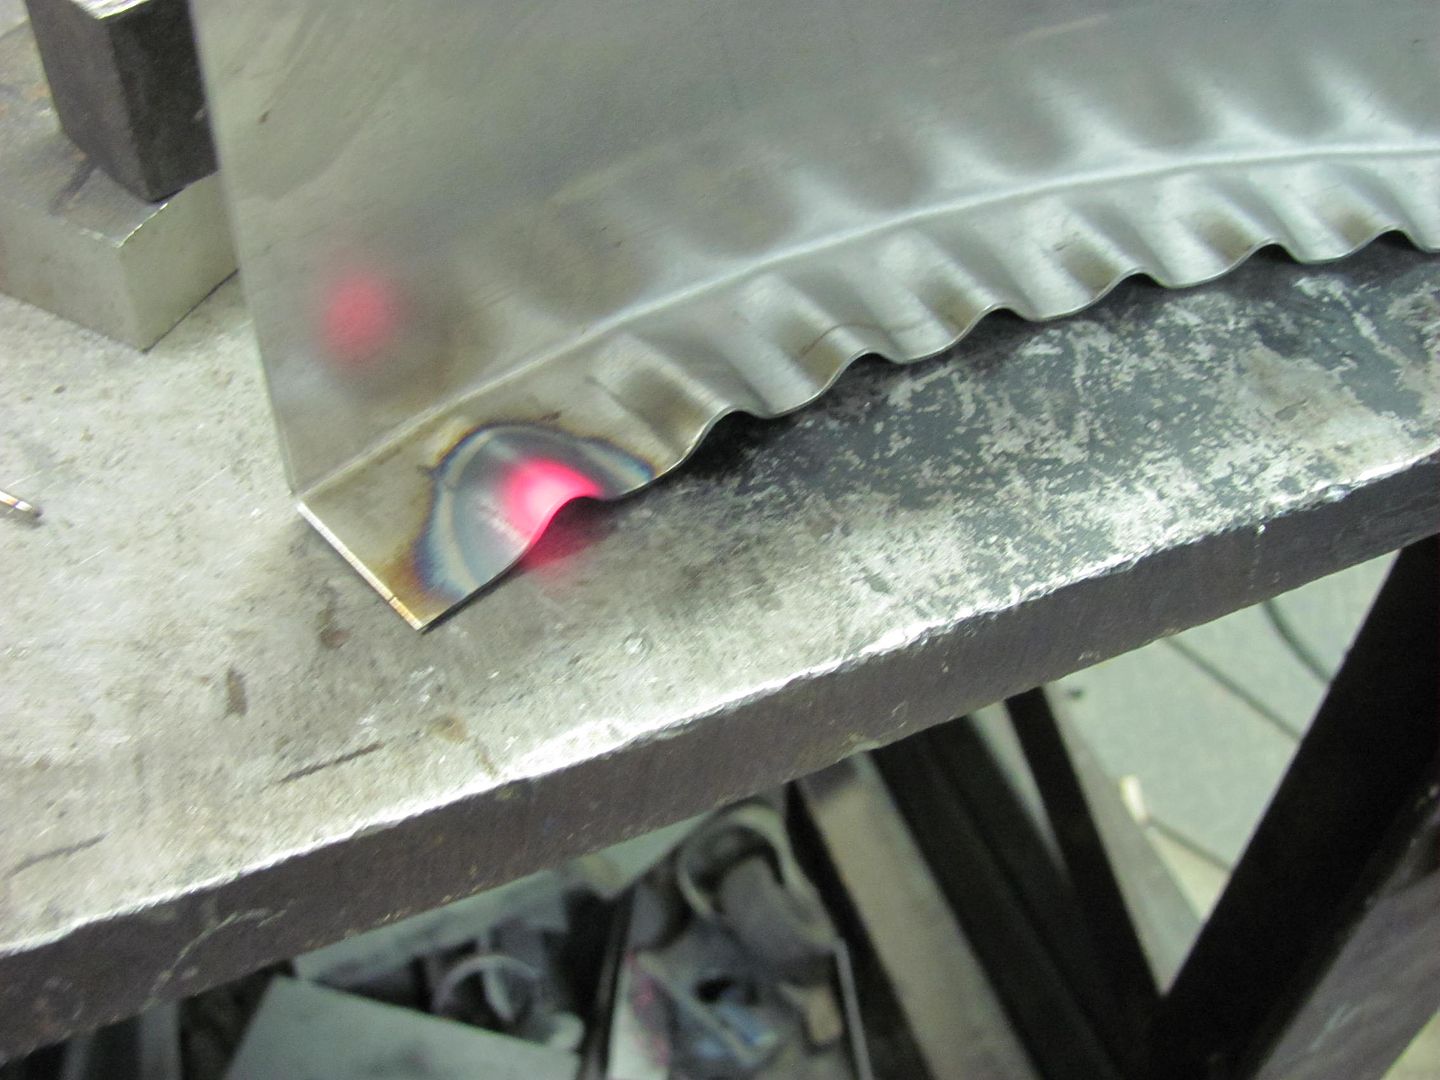
I use a O/A torch to heat the tucks prior to hammering them flat. Others prefer to not use heat, and can capture the tuck and flatten it very effectively without it. I am still working on this proficiency, so in the meantime, I use heat. We're looking for something like this, prior to hammering.
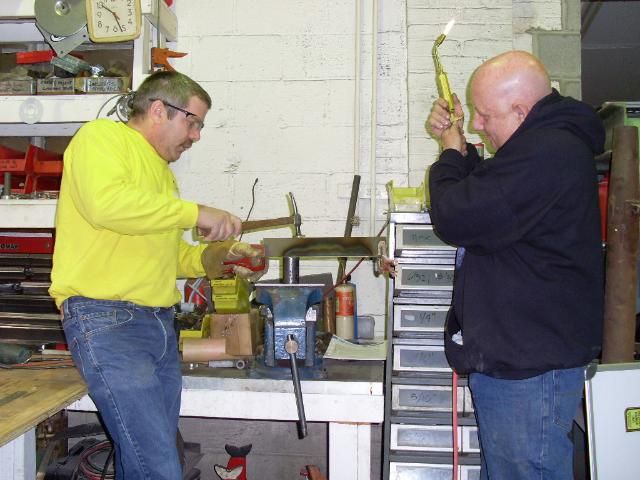
Here OJ assists with torch duties...
Another point to mention is that the hammering action tends to also spread the tuck back apart if not captured effectively. Where the picture above doesn't show it well, a good means of overcoming this would be to clamp a strap of metal across the ends of the newly formed radius prior to hammering, similar to this:
Then the hammering force will be more effective in flattening the tuck back into itself.

Once each piece was completed separately, the flanges were aligned back to back and the two pieces tacked together. Each had an identical radius, for a good fit. Consistency pays off!

Robert
-
08-05-2012 06:37 PM #15
CHR Member
- Join Date
- Aug 2003
- Location
- CC
- Car Year, Make, Model: 70 Camaro Z-28 Now/40 Chevy Back Then
- Posts
- 4,306
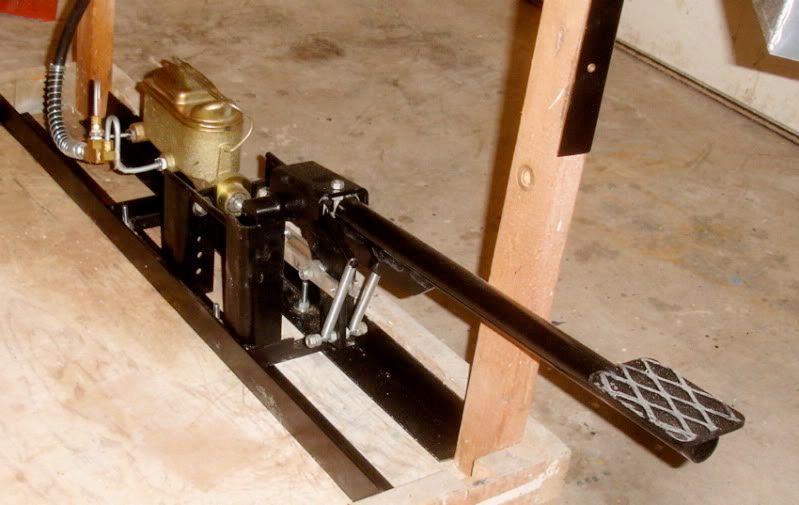
We're replacing Jeff's 6 speed manual trans with the Rossler 210 out of my "Z" to go do some racing in the next couple weeks. I made up a quick trans adapter for the floor jack tonight to get it hoisted in place. Nothing fancy but it's functional.

Last edited by pro70z28; 08-05-2012 at 06:42 PM.
"PLAN" your life like you will live to 120.
"LIVE" your life like you could die tomorrow.
John 3:16
>>>>>>
 Reply With Quote

Posting Permissions
- You may not post new threads
- You may not post replies
- You may not post attachments
- You may not edit your posts

Turn out the lights, the party's over THIS PLACE IS DEAD!
Dead!