


 126Likes

Results 1 to 15 of 151
 LinkBack URL
 About LinkBacks
-
11-30-2016 05:16 PM #1
 CHR Member

- Join Date
- May 2015
- Location
- South East
- Posts
- 318
Resto-Mod Micro Car w/Sport Bike Power
Because two on-going projects was just not enough.
[IMG]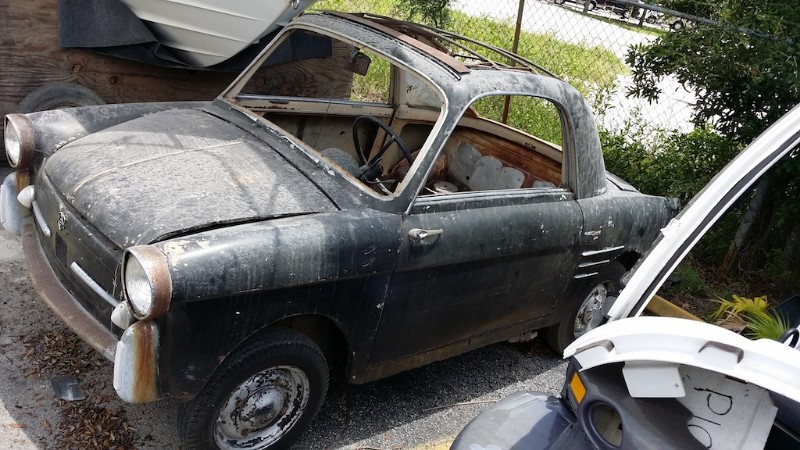 20140808_134430 by Ben Modified, on Flickr[/IMG]
I have been collecting parts for a while now. The project is a 1959 Italian car..an Autobianchi Bianchina. It features a foot print of approx. 4 feet wide by 9 feet long with Suicide Doors and a Cloth Ragtop and is similar to a Fiat 500. It was originally powered by a 2cyl 15hp Fiat 500 drivetrain. That setup is long gone as is the transaxle, the floor and most of the glass. as a previous owner converted the car into some sort of golf cart-ish vehicle. The rusty steel floor was cut out and replaced with a flat aluminum structure which was then screwed and riveted to the rusty rocker panels and various other rusty spots. A Cushman Truckster rear axle was then bolted directly (no suspension) to the underside of the car. The front brakes were disconnected and the master cylinder removed. An aluminum threaded rod was attached to the brake pedal which was then run under the drivers boat seat and on to the parking brake mechanism of the cushman rear end. Since the rear axle is far too narrow to fit properly, some adaptors were made to space the wheels out.
[IMG]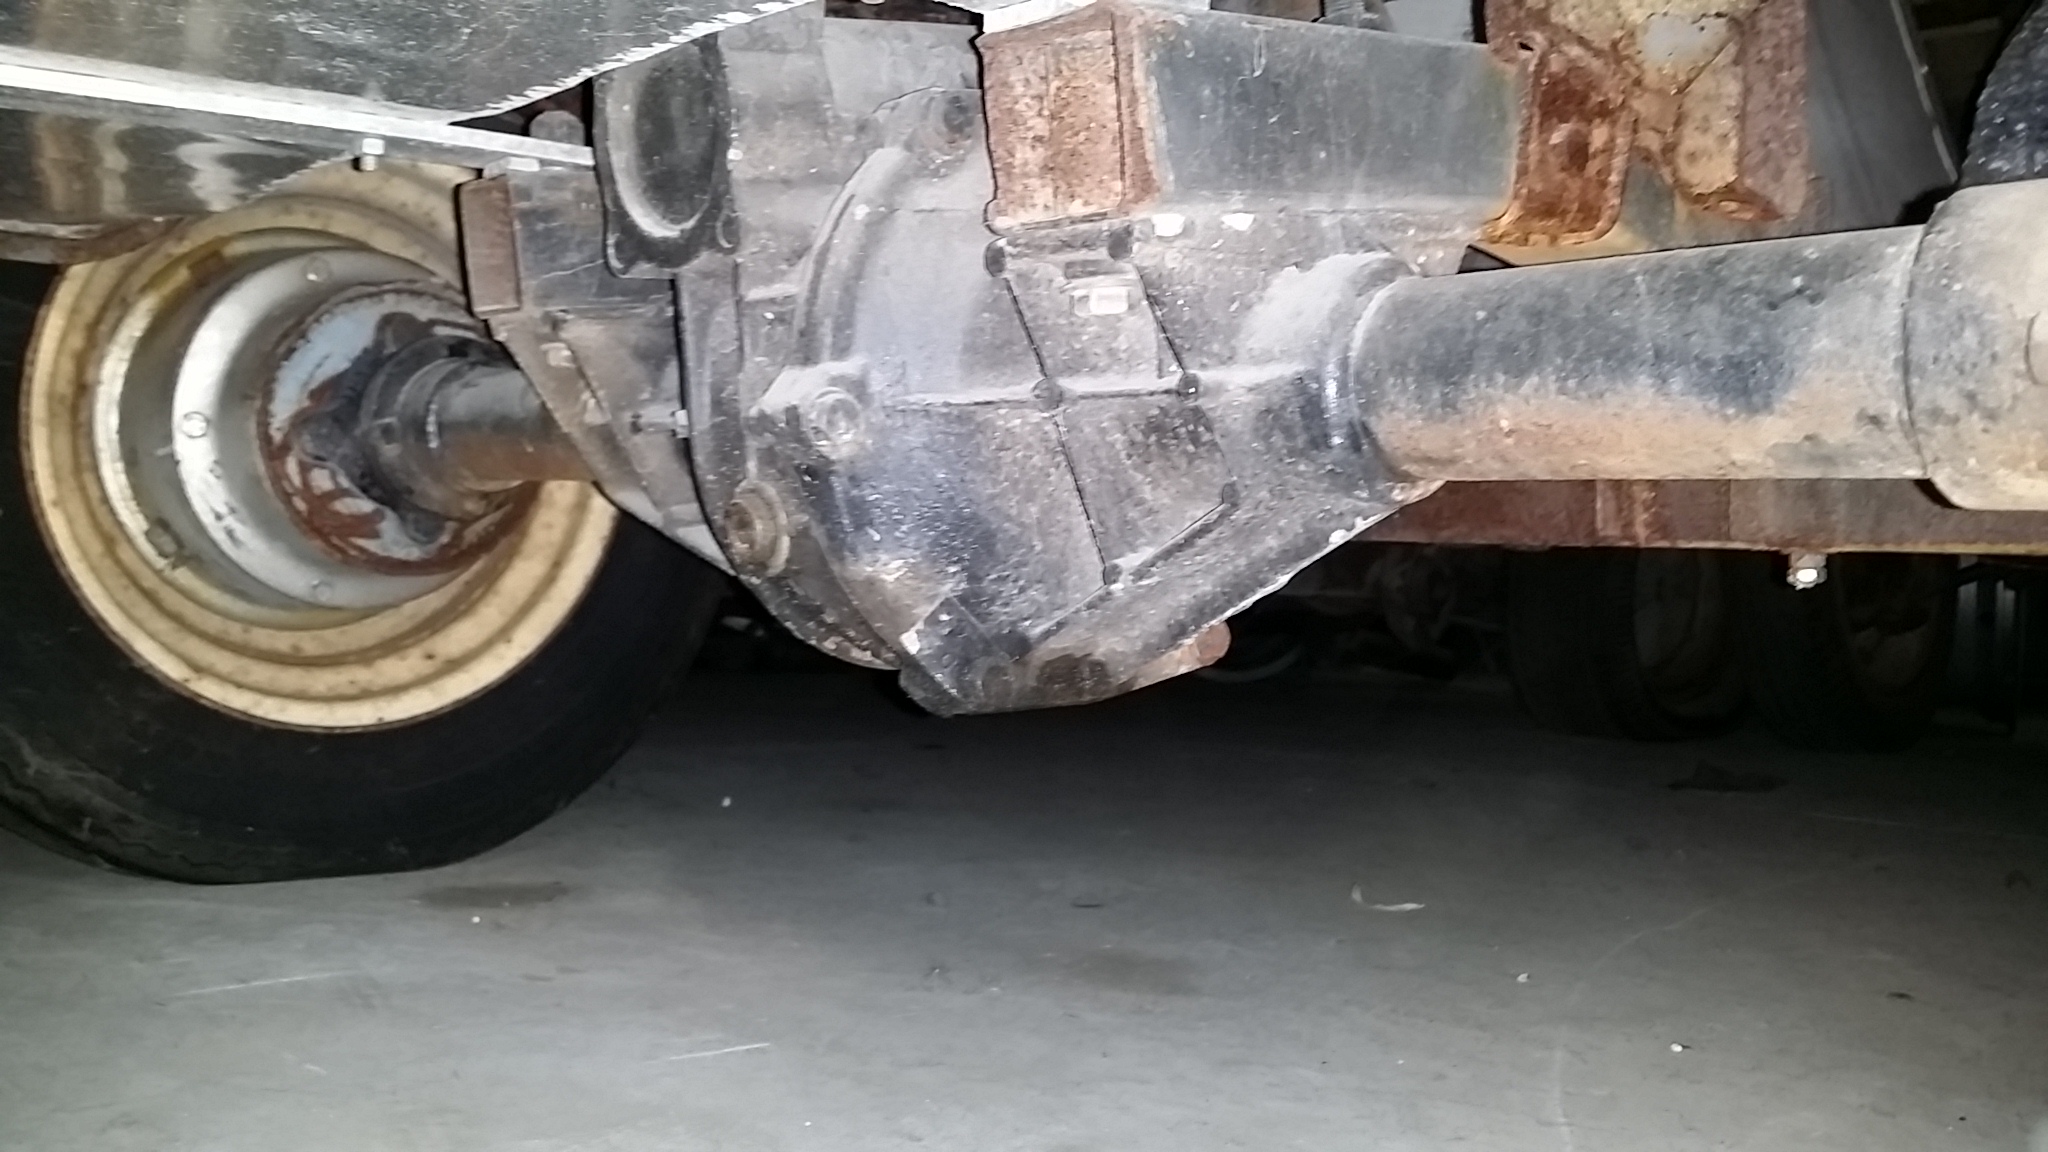 20161120_144625 by Ben Modified, on Flickr[/IMG]
[IMG] 20161120_144615 by Ben Modified, on Flickr[/IMG]
Complete with gate hinges on the deck lid
[IMG]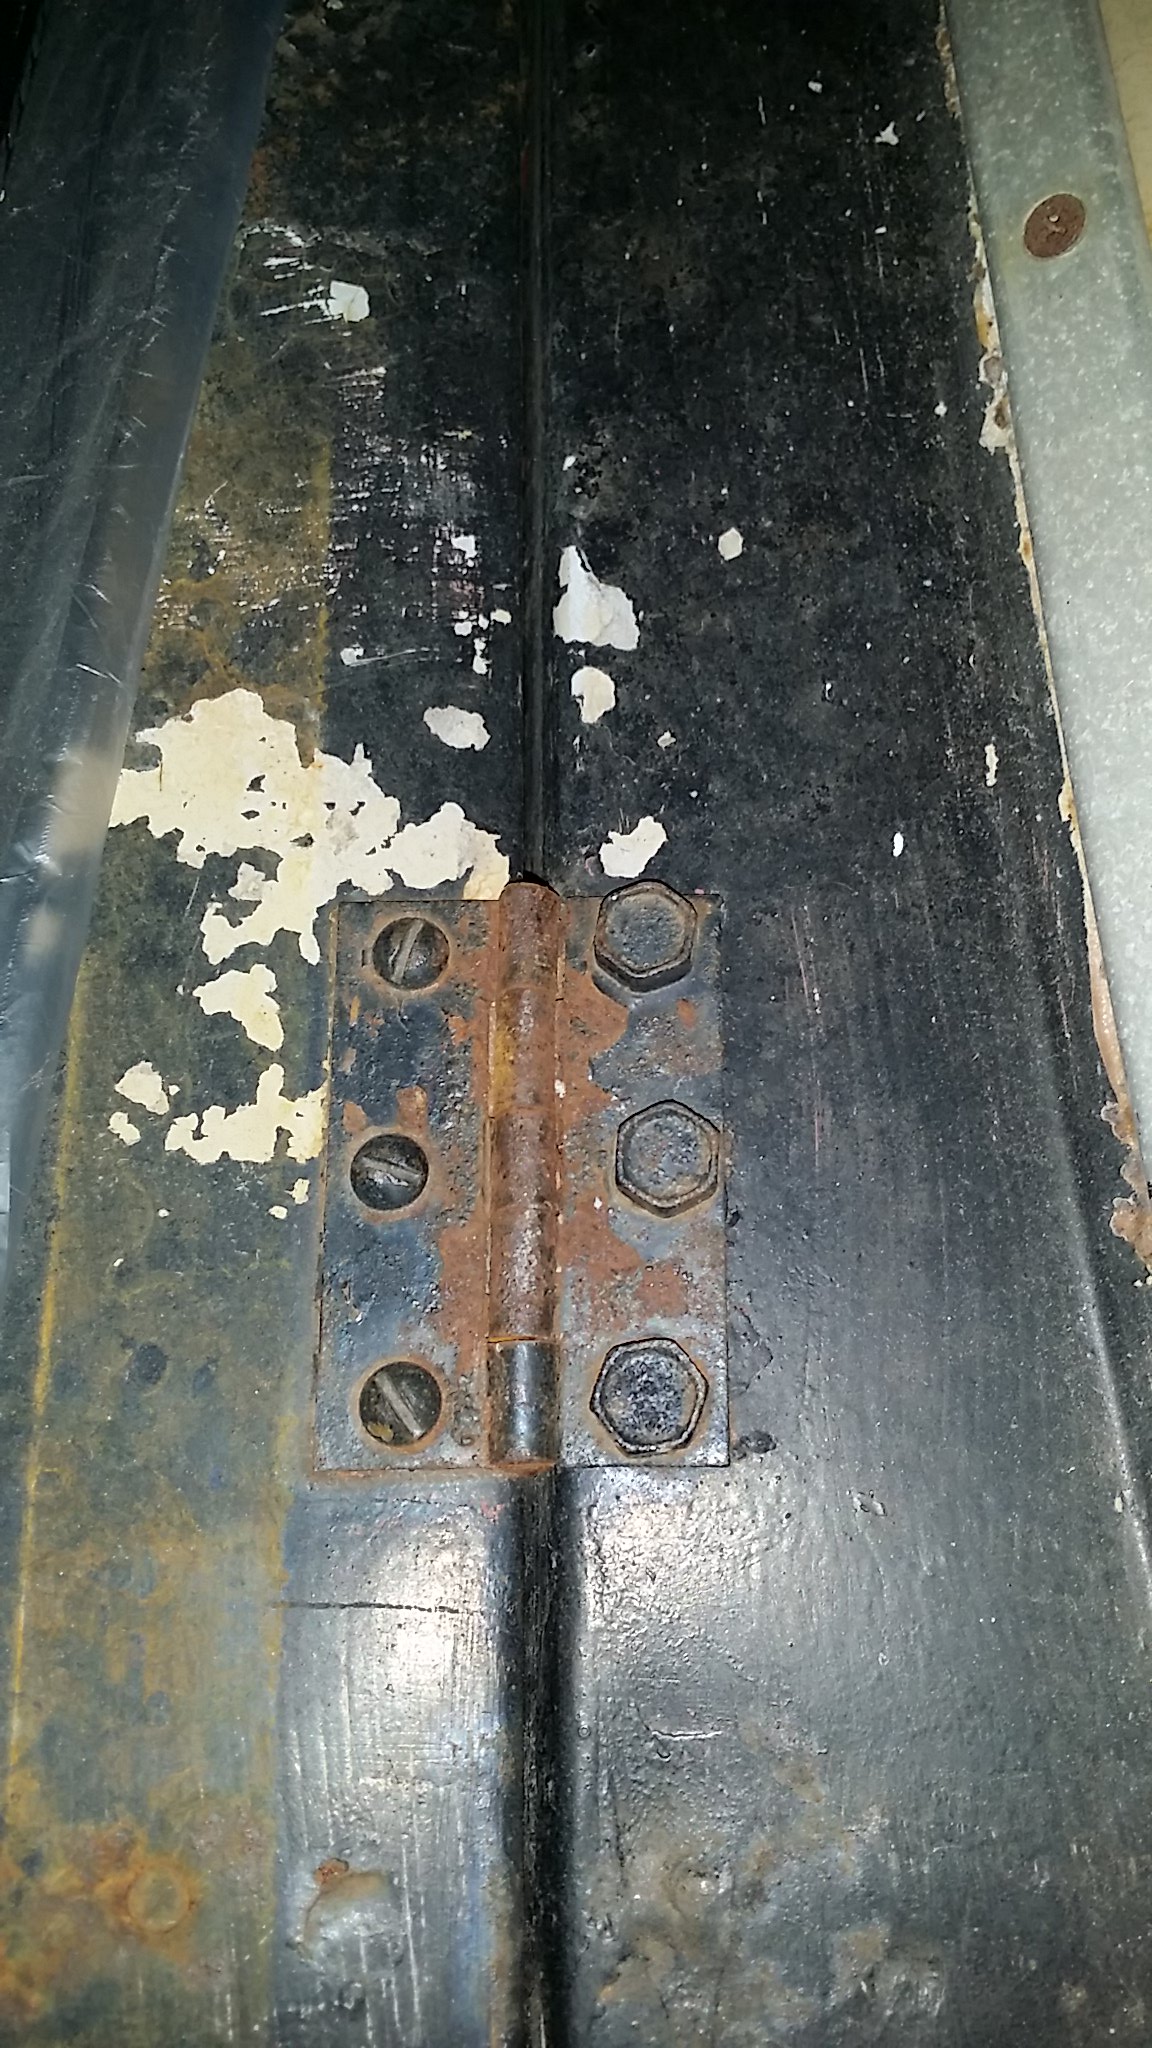 20161120_145329 by Ben Modified, on Flickr[/IMG]
It does not appear that the car ever ran in its present configuration as there is no evidence that any sort of motor was installed.
My plan, which of course is subject to change, is to use narrowed Miata subframes with stock Miata suspension connected by a tube frame and powered by a Hayabusa or similar engine. I have not decided on whether to use a differential with the motor turned sideways or a chain with the motor in its normal position. There is sufficient space for both. I am inclined to go with the chain drive as I am going to try to keep the weight under 1400 lbs. The chain drive would be set up as a spool (less civilized but lighter and cheaper) or with an enclosed Limited Slip Differential. The aftermarket lsd's that I have found are pricey, so I am looking at some junkyard pieces that can be modified to hold oil without the carrier. If any of you have performed this modification, I would like to hear about your experiences. The subframes will need to be narrowed about 13 inches and likely be trimmed significantly after the tube frame is in place for additional weight savings.
I picked up complete subframes and suspension/brakes along with 4 steel wheels/tires and a mini spare yesterday and carted them home in the back of my Scion xB along with a floor jack, 4 jackstands and tools
[IMG]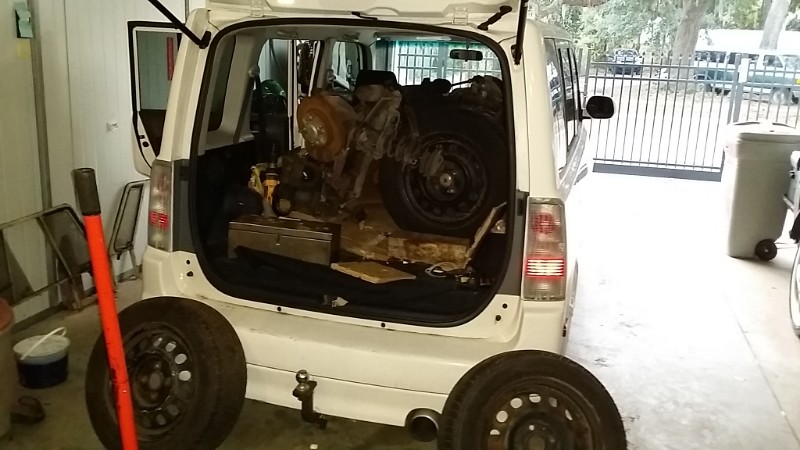 20161118_171450 by Ben Modified, on Flickr[/IMG]
I plan to use an electric reverse, similar to the one that I have on my V8 Daihatsu Hijet (Build at http://www.BenModified.com)
[IMG]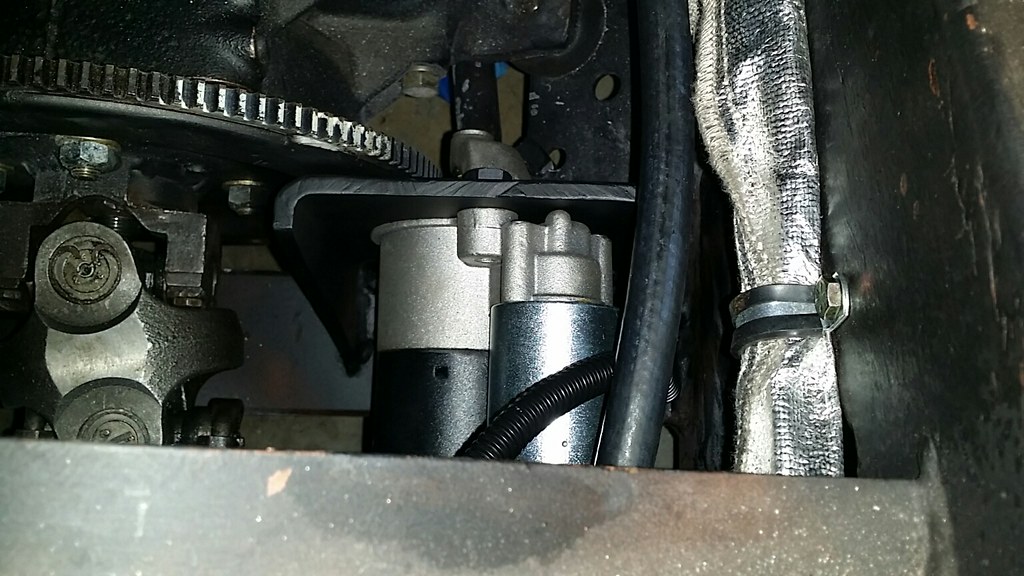 20151031_143856_resized by Ben Modified, on Flickr[/IMG]
which uses a flexplate and starter from a late model Ford Taurus. It was affordable, works very well and has been very reliable. I also plan to use the original hubcaps from the Daihatsu which I plan to adapt to the steel Miata wheels for a retro / sleeper look with short side wall tires to maintain stock overall tire diameter
[IMG]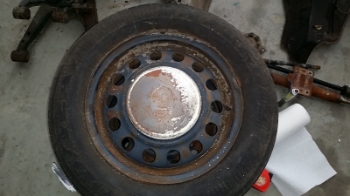 20161120_144940 by Ben Modified, on Flickr[/IMG]
I have also accumulated a new windshield, rubber gasket, a new cloth top and various reproduction chrome trim pieces. Currently in search of a wrecked superbike for the donor drivetrain.Last edited by Ben Modified; 12-06-2016 at 06:53 PM.
-
Advertising

- Google Adsense
- REGISTERED USERS DO NOT SEE THIS AD
-
11-30-2016 05:37 PM #2
CHR Member
- Join Date
- Sep 2007
- Location
- New Bedford
- Car Year, Make, Model: 34 Ford 3W Coupe Replica
- Posts
- 14,754
Another amazing piece of work. I can't wait to see this one come together..
-
11-30-2016 05:58 PM #3
CHR Member
- Join Date
- Oct 2007
- Location
- Petaluma
- Car Year, Make, Model: 48 Ford F1
- Posts
- 9,795
Coooooool!"  "No matter where you go, there you are!" Steve.
-
12-01-2016 05:19 PM #4
CHR Member
- Join Date
- May 2015
- Location
- South East
- Posts
- 318
I have made some good progress. Both subframes are now 13" narrower. The suspension components are reinstalled and I am starting to square the subframes orientation to each other. Temp clamped in place with some heavy angle iron.
Rear
[IMG]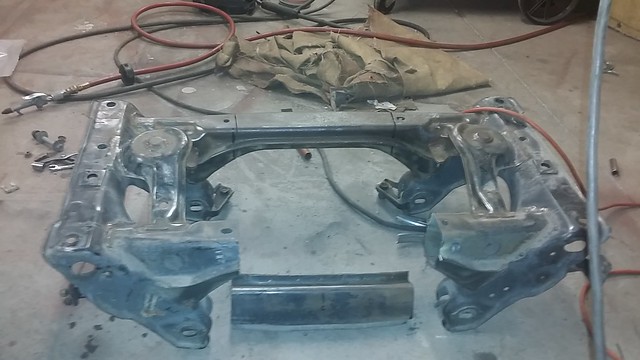 20161125_132044 by Ben Modified, on Flickr[/IMG]
[IMG] 20161125_155136 by Ben Modified, on Flickr[/IMG]
Front
[IMG]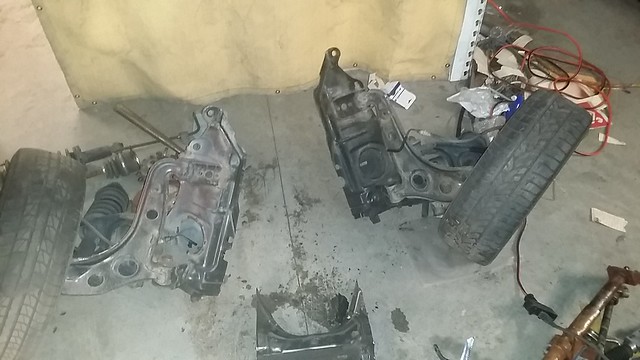 20161130_084826 by Ben Modified, on Flickr[/IMG]
[IMG] 20161130_100656 by Ben Modified, on Flickr[/IMG]
[IMG] 20161130_110304 by Ben Modified, on Flickr[/IMG]
[IMG] 20161201_160600_resized by Ben Modified, on Flickr[/IMG]
http://www.BenModified.com
-
12-02-2016 05:55 AM #5
CHR Member
- Join Date
- Mar 2007
- Location
- festus
- Car Year, Make, Model: 48 Plymouth, 48,54 Heap
- Posts
- 3,407
Man, this is far out! Very cool ideas you have going here.1 Corinthians 1:27
-
12-04-2016 05:03 PM #6
CHR Member
- Join Date
- May 2015
- Location
- South East
- Posts
- 318
Thanks! Originally Posted by falconvan

Got and modified a limited slip diff from a miata
[IMG]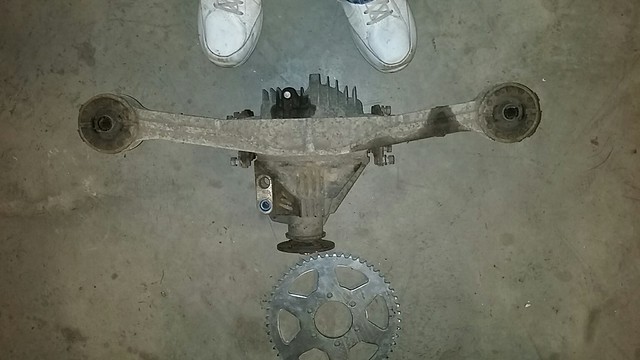 20161203_165850_resized_1 by Ben Modified, on Flickr[/IMG]
Cut off the mounts
[IMG]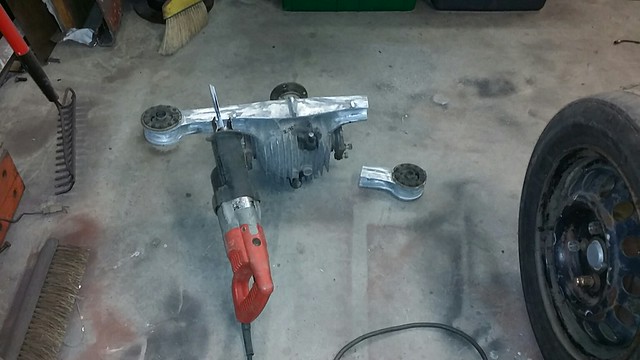 20161204_075128_resized_1 by Ben Modified, on Flickr[/IMG]
Relocated 13" closer together. Much more aluminum was removed after this photo
[IMG] 20161204_093953_resized_1 by Ben Modified, on Flickr[/IMG]
Blurry photo shows new location. The leftover bits will be used as gussets for more strength.
[IMG]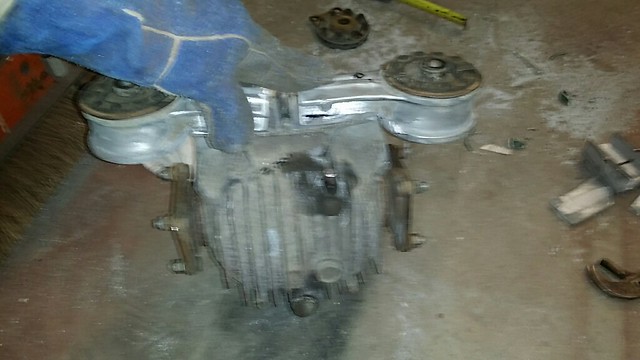 20161204_163503_resized by Ben Modified, on Flickr[/IMG]
Underside view of the diff in place. Just needs to be welded up now. Will need to make a rubber mount for the nose.
[IMG] 20161204_163653_resized by Ben Modified, on Flickr[/IMG]
Also got the parking brake handle and cables
[IMG]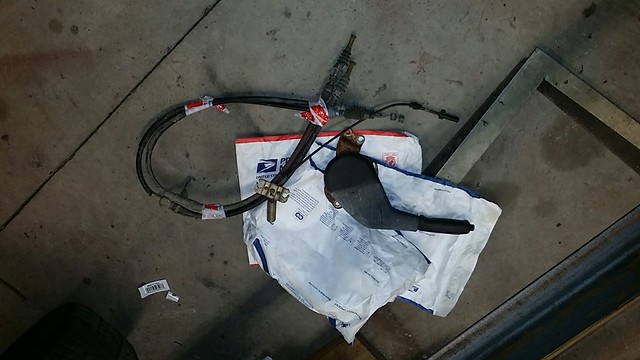 20161203_165857_resized_1 by Ben Modified, on Flickr[/IMG]
http://www.BenModified.com
-
12-04-2016 06:09 PM #7
CHR Member
- Join Date
- Oct 2007
- Location
- Petaluma
- Car Year, Make, Model: 48 Ford F1
- Posts
- 9,795
cool modification to your project!" "No matter where you go, there you are!" Steve.
-
12-06-2016 06:37 PM #8
CHR Member
- Join Date
- May 2015
- Location
- South East
- Posts
- 318
The first bit of welding is done on the diff mounts. Next, cut out gussets from the scraps, fill in the middle and weld in
[IMG]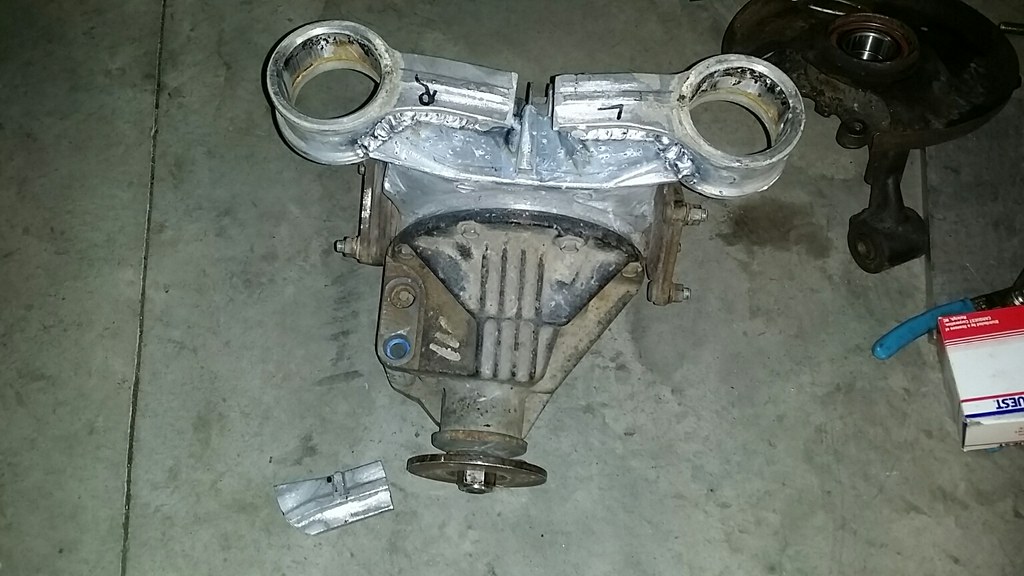 20161206_173247_resized_1 by Ben Modified, on Flickr[/IMG]
Turns out the wheel bearing in the replacement upright was really bad. It was obviously a car that had spent some winters on salty roads. Swapped it out with the help of a friends bearing press.
[IMG] 20161206_173253_resized_1 by Ben Modified, on Flickr[/IMG]
I dug the Bianchina out of storage today.
[IMG]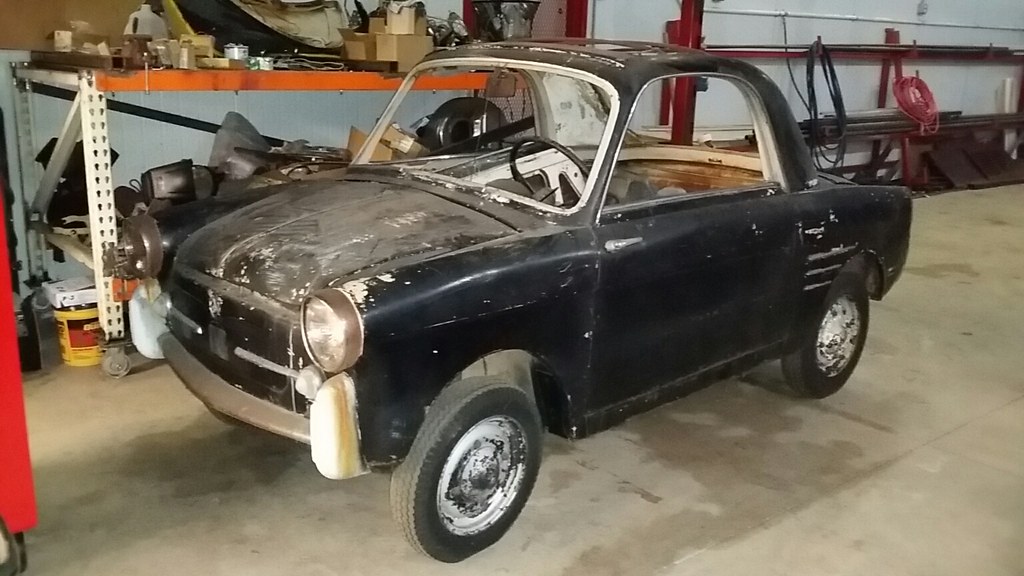 20161206_172729_resized_1 by Ben Modified, on Flickr[/IMG]
Under the hood
[IMG]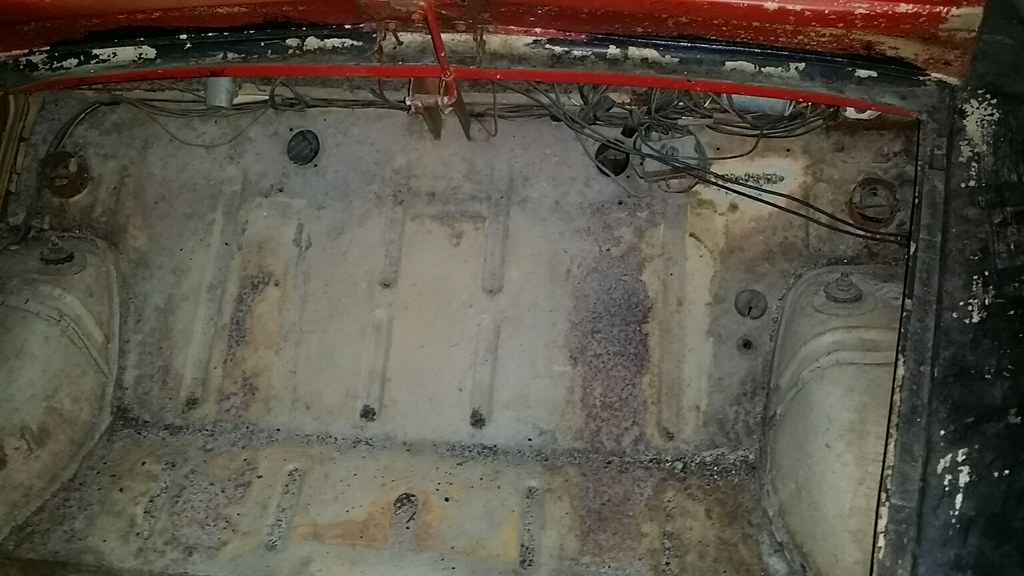 20161206_172718_resized_1 by Ben Modified, on Flickr[/IMG]
[IMG]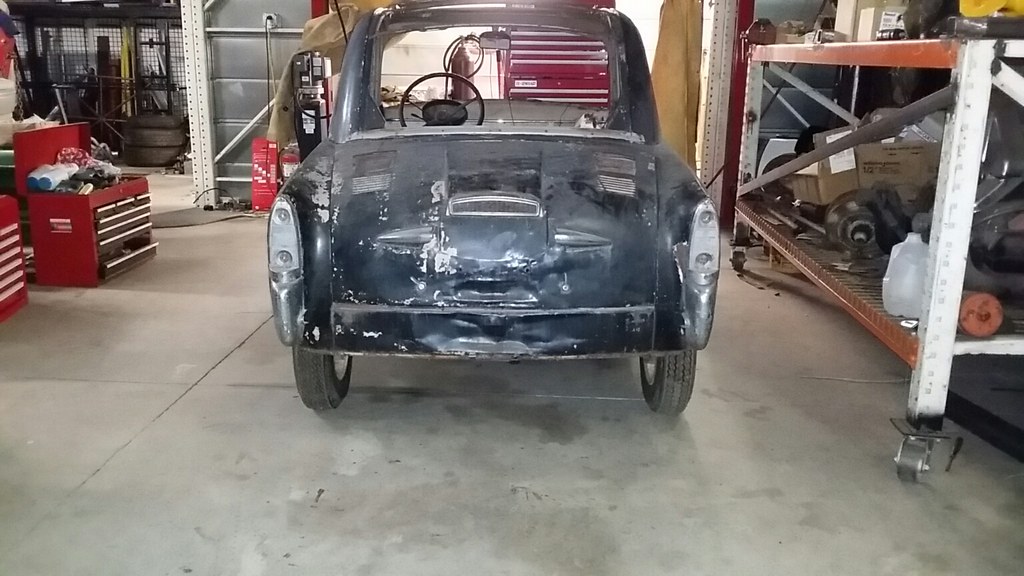 20161206_172706_resized_1 by Ben Modified, on Flickr[/IMG]
With the mid engine setup the car should have a good sized trunk.
[IMG] 20161206_172654_resized_1 by Ben Modified, on Flickr[/IMG]
I dug this out too, so I took a few photos.
A project for another day. 1970 Subaru 360 Van. Top is chopped 8 inches and will have narrowed vw bug suspension with phone dial turbo porsche wheels. The front wheel arches will be moved as far forward as possible with a rake to the stance. VW or bike powered most likely.
[IMG] 20161206_114408_resized_1 by Ben Modified, on Flickr[/IMG]
[IMG]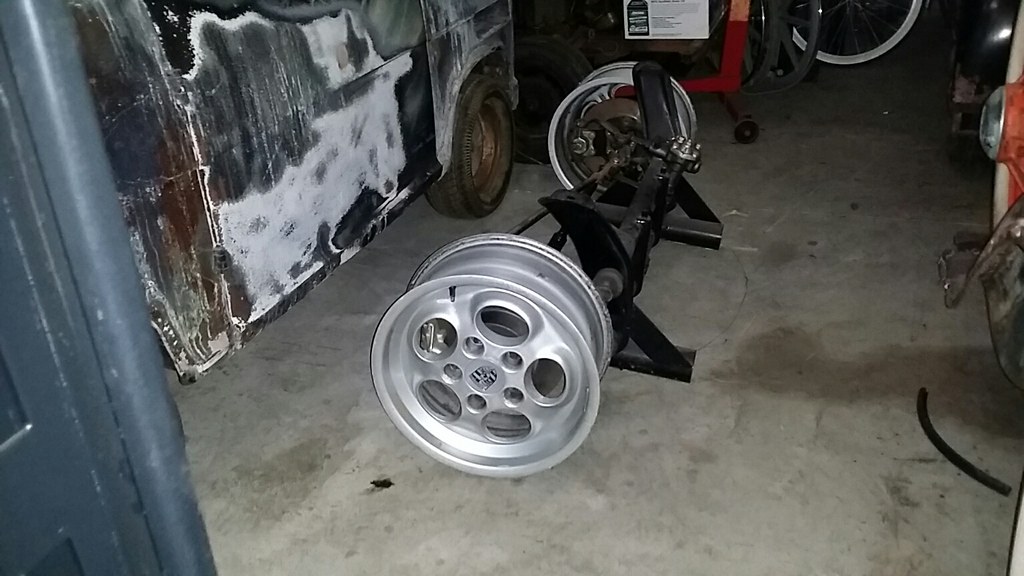 20161206_114435_resized_1 by Ben Modified, on Flickr[/IMG]
http://www.BenModified.com
-
12-06-2016 07:45 PM #9
CHR Member
- Join Date
- May 2003
- Location
- Zephyrhills, Florida, USA
- Car Year, Make, Model: '32 Henway
- Posts
- 12,423
Ben, I applaud your ingenuity and your skill at building one-off projects, but I don't think you understand how badly this new project is going to handle. I went through the drill when I built a full custom Independent Front Suspension system from scratch several years ago. You don't know what you don't know.
.PLANET EARTH, INSANE ASYLUM FOR THE UNIVERSE.
-
12-07-2016 02:55 AM #10
CHR Member
- Join Date
- May 2015
- Location
- South East
- Posts
- 318
Posted Part 1 on YouTube
https://www.youtube.com/watch?v=ReDBW4OX_gU
-
12-07-2016 03:31 PM #11
CHR Member
- Join Date
- Sep 2007
- Location
- New Bedford
- Car Year, Make, Model: 34 Ford 3W Coupe Replica
- Posts
- 14,754
Thanks for the update and video Ben.
As always, way cool!
-
12-07-2016 05:03 PM #12
CHR Member
- Join Date
- May 2015
- Location
- South East
- Posts
- 318
Thanks! Originally Posted by 34_40
Modified differential housing mounts are gusseted and welded in.
[IMG] 20161207_172937_resized_1 by Ben Modified, on Flickr[/IMG]
http://www.BenModified.com
-
12-07-2016 05:45 PM #13
CHR Member
- Join Date
- Nov 2016
- Location
- rocklin
- Posts
- 656
you are truly a mad scientist! you must have a lot of time your hands.
-
12-08-2016 02:30 AM #14
CHR Member
- Join Date
- May 2015
- Location
- South East
- Posts
- 318
Thanks! Re: time, I suffer from early onset OMS (old man syndrome). Usually up and working by 4 am. Originally Posted by v8nutz
-
12-08-2016 02:38 AM #15
CHR Member
- Join Date
- May 2015
- Location
- South East
- Posts
- 318
I do have some experience with setting up custom suspension so I am not too worried. Being that I am using stock components only narrowed, my focus is on the proper width and placement of the steering rack to minimize bump steer. My plan is run the front suspension thru its travel range once I get the two subframes clamped together prior to it installing the body for a clear view of what is going on. Any other suggestions? Originally Posted by techinspector1
 Reply With Quote

Posting Permissions
- You may not post new threads
- You may not post replies
- You may not post attachments
- You may not edit your posts

Even though I know he won't see this, I still want to wish a Happy Birthday to my best friend, Richard Moore aka techinspector1
Happy Birthday techinspector1