


 113Likes
Thread: Grandkids Coaster Car build.
Results 1 to 15 of 127
 LinkBack URL
 About LinkBacks
Threaded View
-
07-28-2012 04:00 AM #11
 CHR Member

- Join Date
- Mar 2003
- Location
- SW Arizona
- Car Year, Make, Model: 68 Ply Valiant, 83 El Camino
- Posts
- 3,872
I spent a fair amount of time working on the car during the week getting it to the point where I want to be tomorrow when Cade comes over. Most of the work involved cutting, grinding and welding which he’s still a little young for and being as Sunday time is limited I figured this will help keep the project moving and his interest higher than spending 2 or 3 Sundays just watching Grandpa work. The rest of the build should mostly consist of bolting things together so there will still be lots for him to do.
I used the templates Cade and I cut and got the filler panels made and welded in and the body is now all welded together into one piece. We’re in our monsoon season right now with a lot of humidity and getting rain about every day, so after I ground the welds down a bit I hit those areas with a light coat of primer. Then with all the different colors of metal and the primer splotches, I just went ahead and put a thin coat of primer over everything so I could better tell how the proportions looked (once the weather dries out I’ll sand blast it all down to bare metal and we can do some body work).
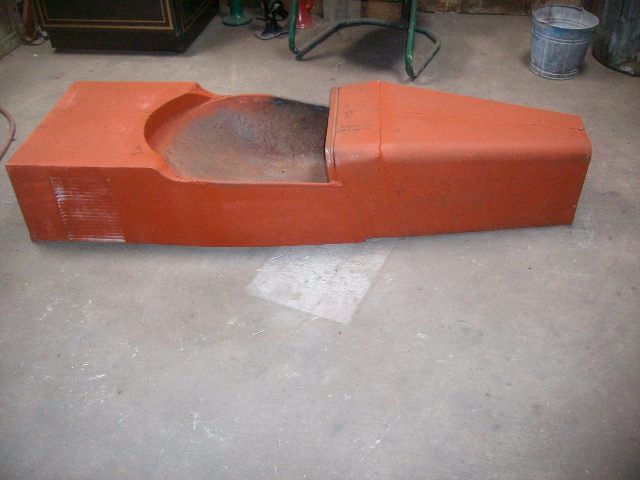
I was getting curious about the weight of the car with an all steel body so I set the body up nose down on the scales I have in the shop. It weighed in at 50 pounds so far. To give me something to compare it to I looked up what a soap box derby car weighs and found out they average about 150 pounds so I guess we aren’t really in too bad of shape there.
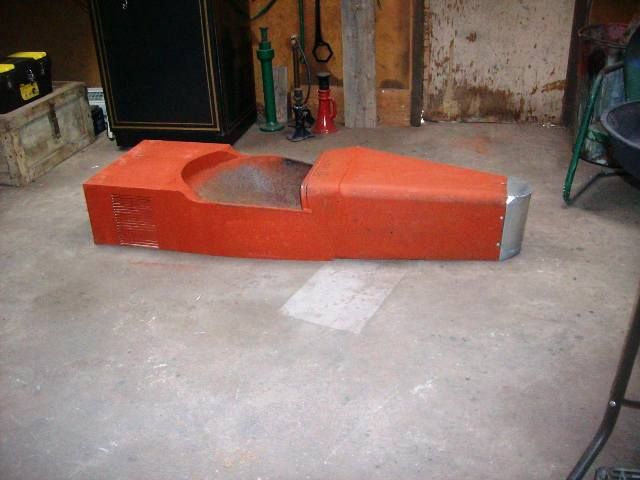
Overall I think we’re on the right track, but the nose could stand to be a bit longer and I really wanted to it to be rounded rather than flat. I decided to go ahead and make a second attempt at a nose piece.
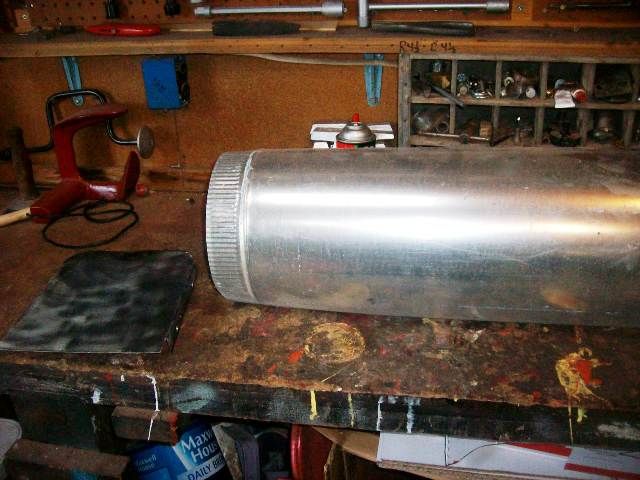
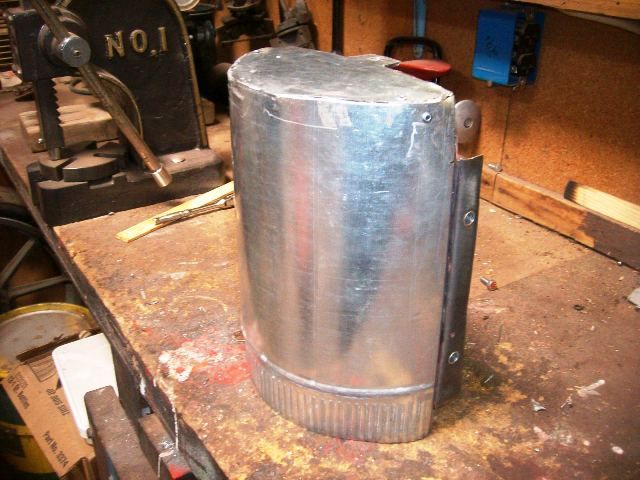
This time I started with a piece of left over stove pipe. I wanted something that was galvanized so we could leave it silver for some contrast when we got around to painting the rest of the car. I pulled the front body plate, did some measuring and trimming and finally came up with this. It’s not perfect, but not bad either. We’ll see what Cade thinks of it tomorrow.

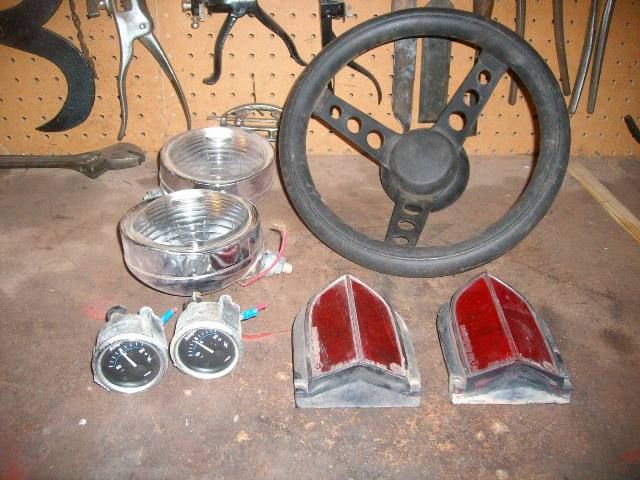
I really want to keep this a low out of pocket $$ project so Cade gets an idea about improvising with what you have on hand (and because I’m basically cheap). Last weekend we raided my storage shed for a few odds and ends that will eventually go on the car. Our “shopping spree” netted the steering wheel, a pair of headlights, a couple of gauges for the dash, and a pair of reflectors for taillights.
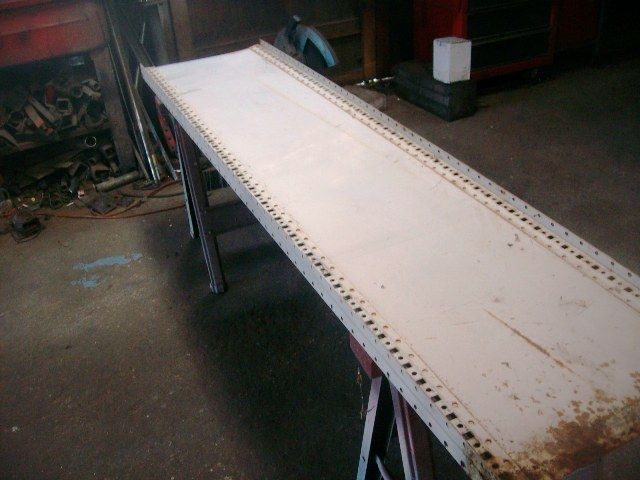
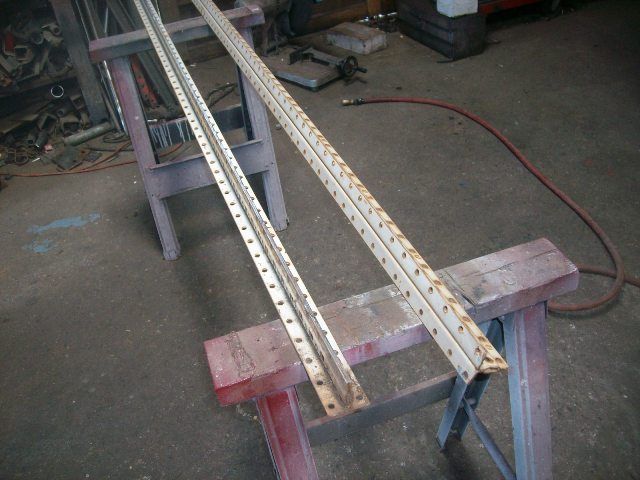
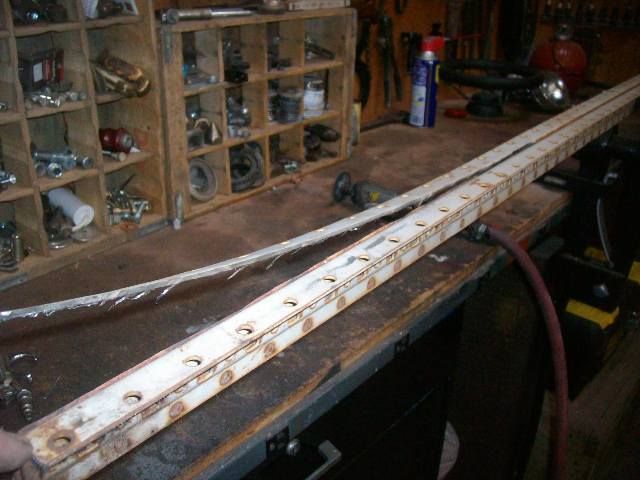
In keeping with low dollar theme, several years ago I picked up a couple of these side panels from a heavy duty shelving unit. The center sheetmetal is some real nice 22 gauge steel that I have been using for things like custom dash inserts and patch panels. I pretty much finished up using one of the sides for this project and while I was cutting out the pieces I realized I had found the frame rails. So I trimmed off one of the flanges to changing them from a “T” to “L”.
So that’s where we are until Cade comes over tomorrow.
.Last edited by Mike P; 07-28-2012 at 04:08 AM.
I've NEVER seen a car come from the factory that couldn't be improved..... 

 Reply With Quote
Posting Permissions
- You may not post new threads
- You may not post replies
- You may not post attachments
- You may not edit your posts

I'm happy to see it back up, sure hope it lasts.
Back online