


Thread: Brent's Ford GT MKIV Build


Results 1 to 15 of 44
 LinkBack URL
 About LinkBacks
-
03-04-2010 05:59 PM #1
 CHR Member/Admin

- Join Date
- Apr 2001
- Location
- Olympia
- Car Year, Make, Model: 1964 Shelby 427 Cobra rep
- Posts
- 434
My Social Networking

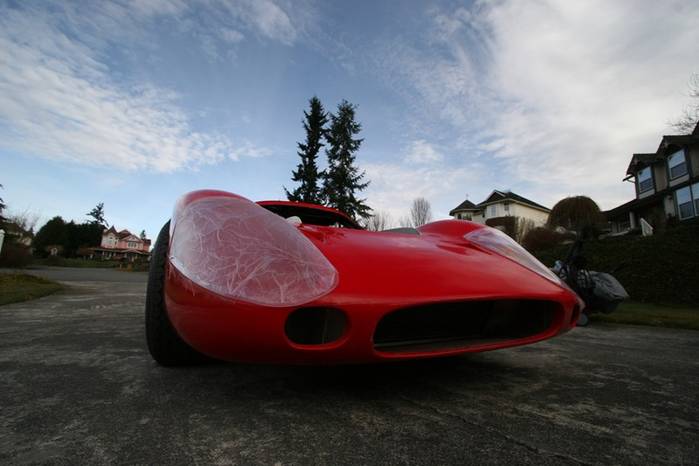
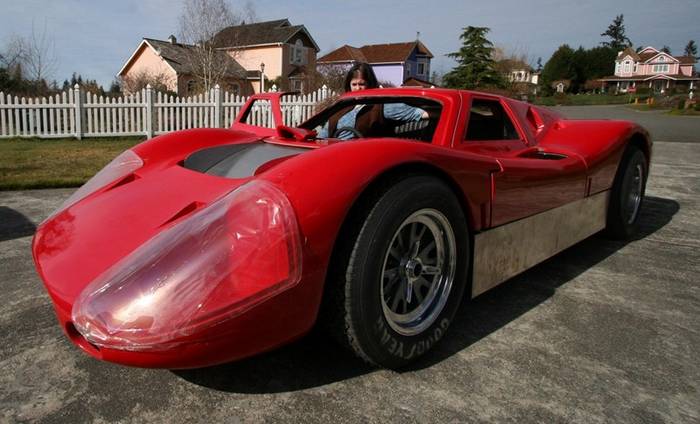
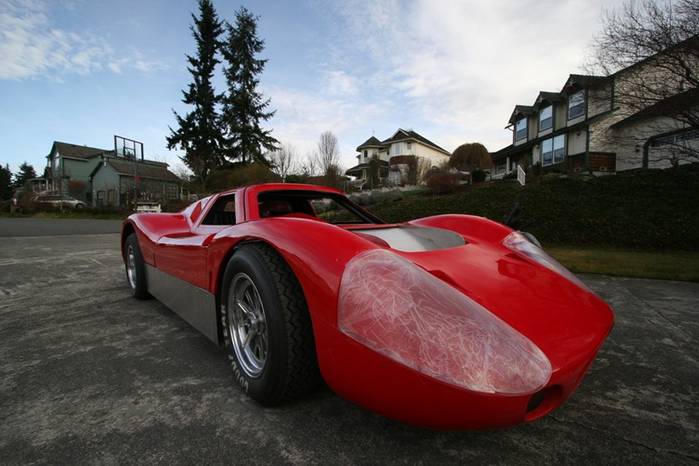
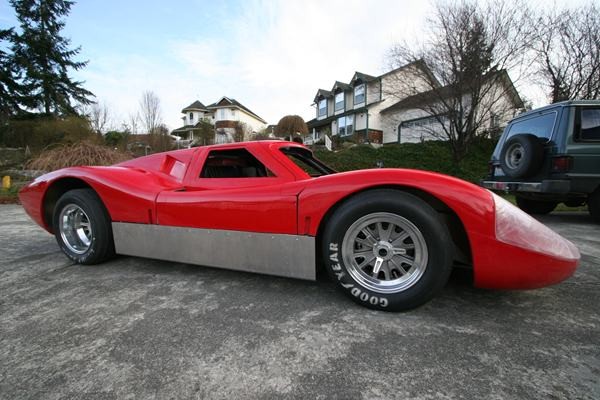
Brent's Ford GT MKIV Build
Well, about the middle of last year I made the decision, along with my better half, that I need something to get me away from the puter every once in a while, plus the winters around here just make me crazy. Always enjoy the GT's and figured I would try something a little different.....An RCR MKIV. It's a pretty wild looking ride, isn't very practical, and that's just the way I like it.
It arrived just last week and while I haven't had much time to spend on it, I have tinkered for several hours.
Here's the basic specs:- RCR MKIV Kit
- Keith Craft 482
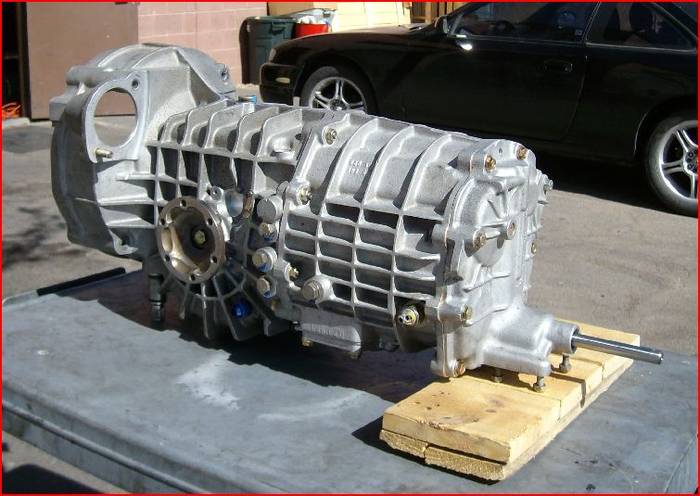
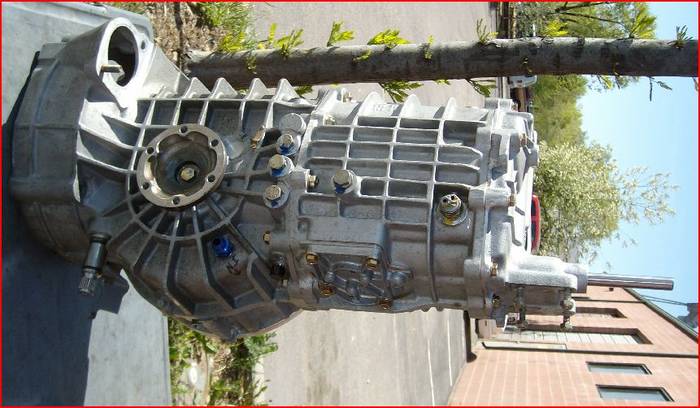
- Porsche 930 Transaxle
- Bluestreaks all around (STICKY!)
- Vintage Wheel Halibrand replicas....Wish the original style wheels were available, but not such luck at this time.
- Wilwood brakes
- Right hand drive, just to keep things interesting!
This is going to be one hell of a project and it will be interesting to see if I can spare the time...It is fun to tinker though!!
Here's some pics so far (more in my MKIV Albulm Brent Mills Album - Club Cobra Photo Gallery ) :
Starting to pull her apart....It's hard to take her from a rolling chassis to completely disabled, but it has to be done.
I'll post more when I have updates worthy of doing so.
By the way, this is what I hope to end up with (color, stripes, meatballs, etc).

Brent Mills
Club Hot Rod
www.clubchopper.com
www.clubcobra.com
www.usafiat500.com
-
Advertising

- Google Adsense
- REGISTERED USERS DO NOT SEE THIS AD
-
03-04-2010 06:00 PM #2
CHR Member/Admin
- Join Date
- Apr 2001
- Location
- Olympia
- Car Year, Make, Model: 1964 Shelby 427 Cobra rep
- Posts
- 434
My Social Networking
Well, making some progress this weekend...Boy, did the time fly by today!
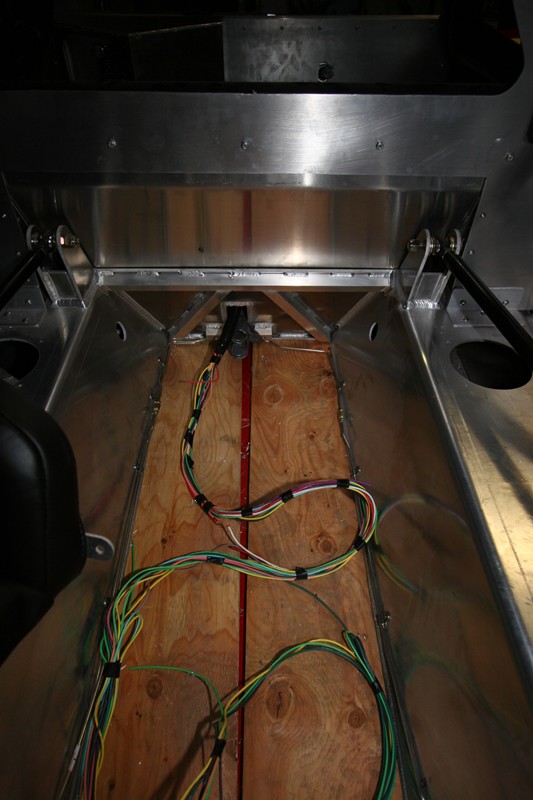
Brake lines are mostly done (really didn't have to do much there). Pedal assembly complete. Started running the wiring today....So far, what I know for sure about wiring, is that I am going to have a lot of questions down the road. I stink at wiring and always have.
That said, the easy part of the wiring is out of the way. Because the wiring harness is for front engine cars, there's some work to do to pull get the front and rear harnesses in order...Easy, just time consuming.
Wire ran to front and back down the spine with nice grommets. Tried getting the holes as far forward as I could with a 90 degree drill adaptor in hand. Not enough room for a standard drill get in that far forward of the access panel.
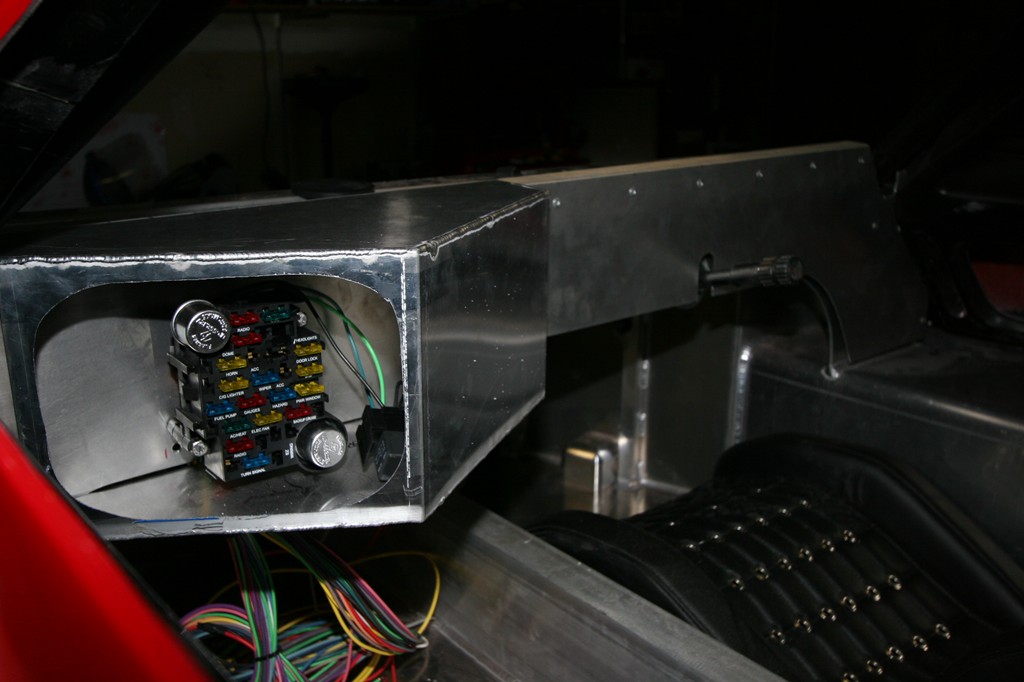
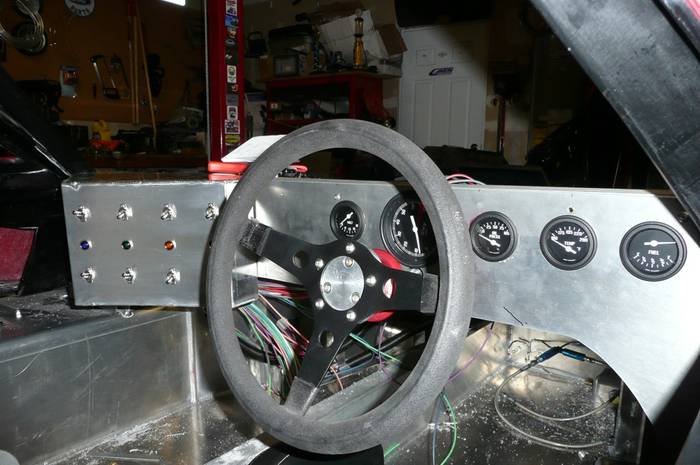
Decided to mount the fuse box behind the switch panel. Some original cars seem to have the fuses either behind a panel (similar to what I have done) or the old school fuses actually mounted and exposed on the front of the panel. I really like that look as it is of a raw look, and will probably make a "for appearances" only version. It's nice to have the new style fuse box actually doing the work. I didn't want to cut into the nicely done dash, but what the hey. Nice thing is that I'll have plenty of room to take car of the switch panel from the back side should it need attention.
Brent Mills
Club Hot Rod
www.clubchopper.com
www.clubcobra.com
www.usafiat500.com
-
03-04-2010 06:00 PM #3
CHR Member/Admin
- Join Date
- Apr 2001
- Location
- Olympia
- Car Year, Make, Model: 1964 Shelby 427 Cobra rep
- Posts
- 434
My Social Networking
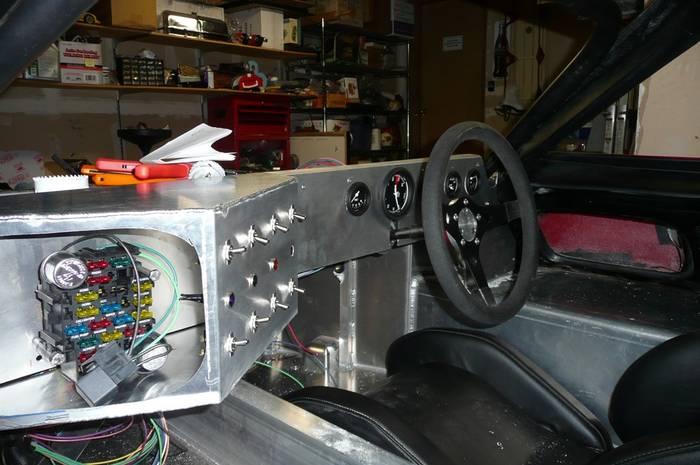
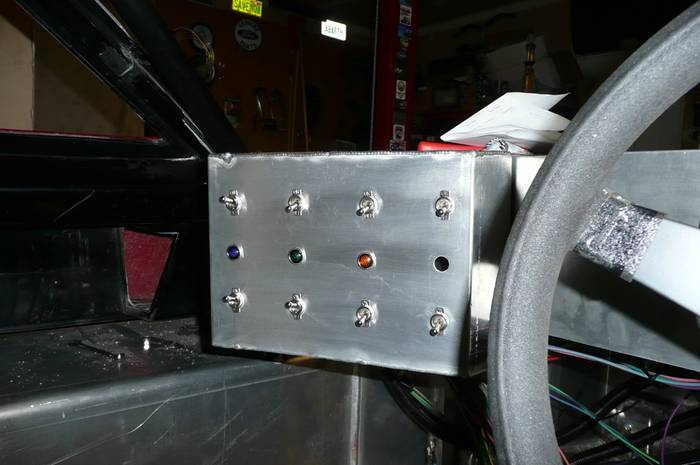
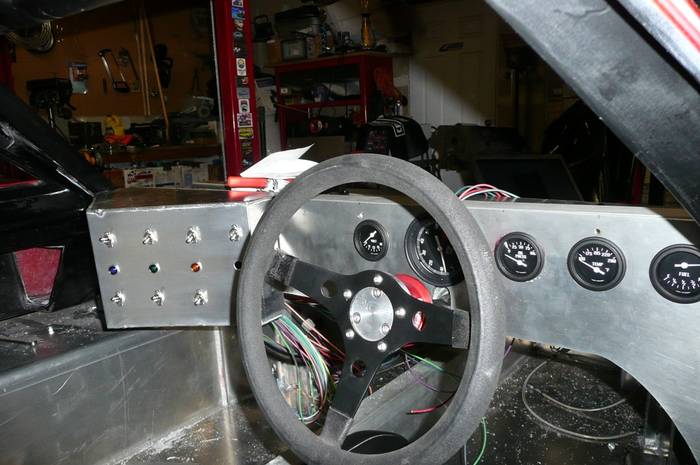
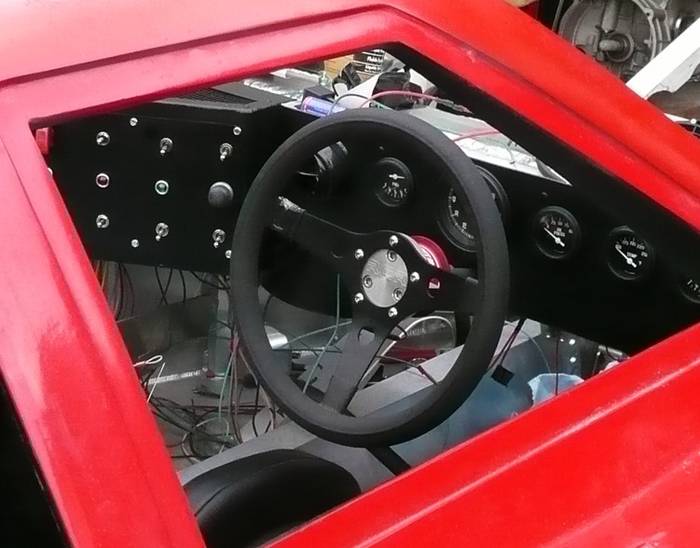
Just a little more progress. I spent a fair bit of time working on getting the holes in the dash and the cross member of the chassis...I have determined that I need a plasma cutter. Hole saws, a rasper, and jig saw. Damn that was a lot of work for not much to show.
Dash is coming together, but the wiring stuff still scares the crap out of me. I think I have things fairly well figured out, but I'm sure I'll run into a lot of little issues.
Here's a few shots of how things will look.
Brent Mills
Club Hot Rod
www.clubchopper.com
www.clubcobra.com
www.usafiat500.com
-
03-04-2010 06:01 PM #4
CHR Member/Admin
- Join Date
- Apr 2001
- Location
- Olympia
- Car Year, Make, Model: 1964 Shelby 427 Cobra rep
- Posts
- 434
My Social Networking
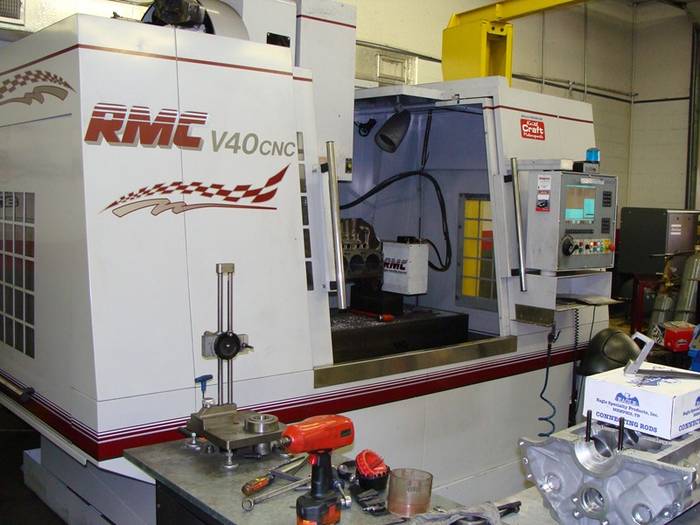
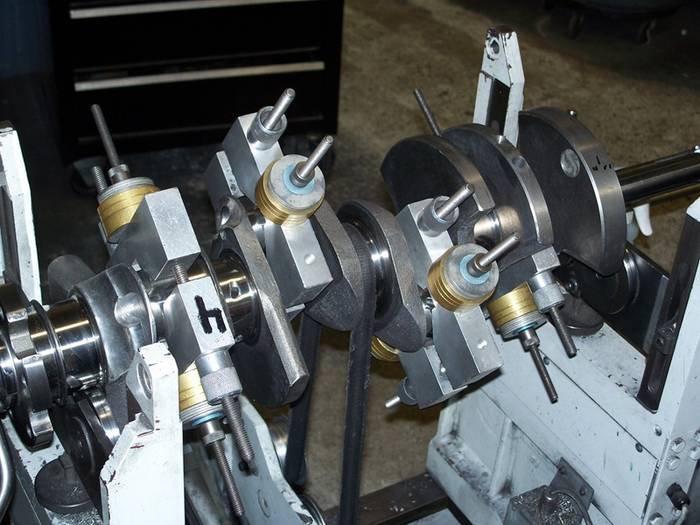
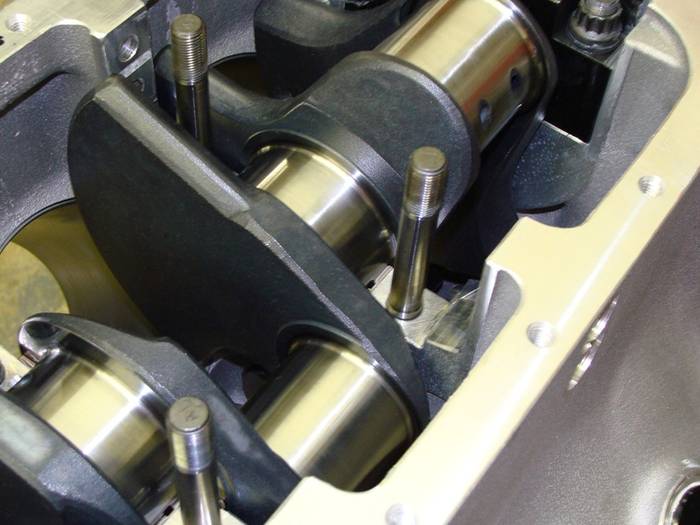
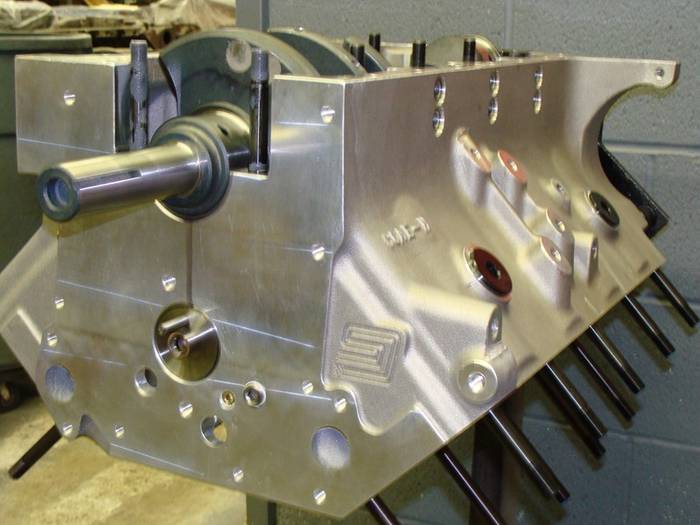
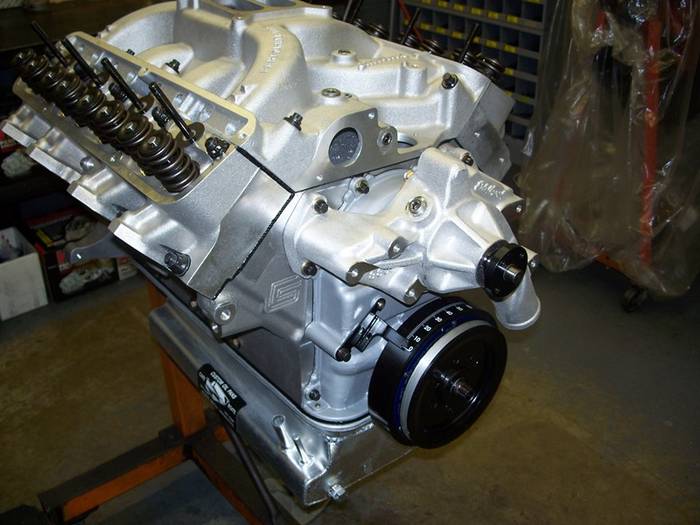
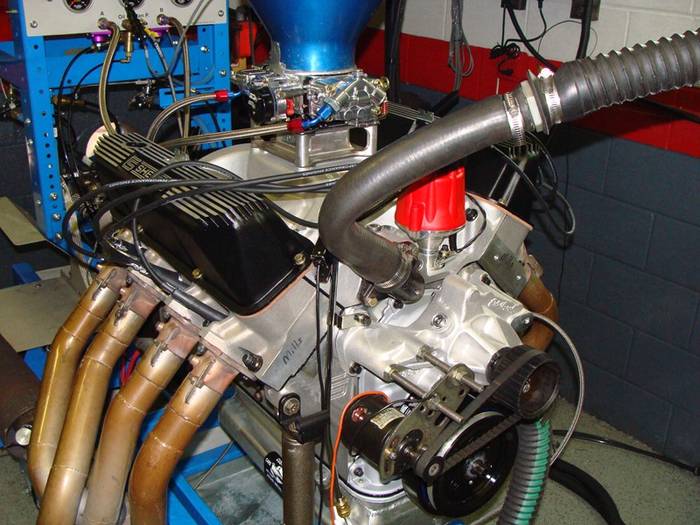
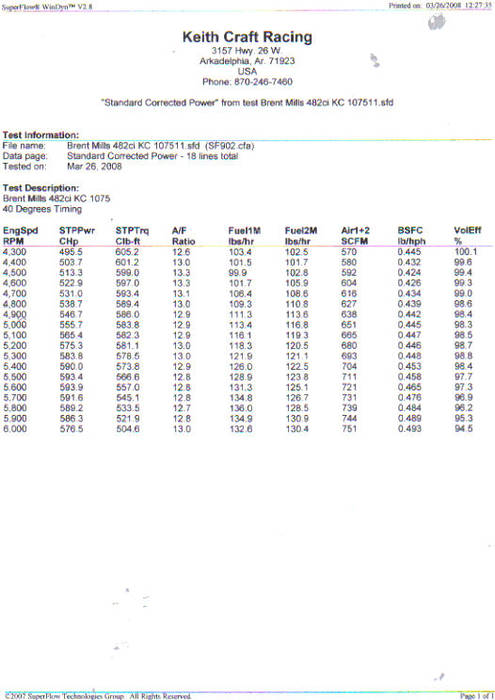
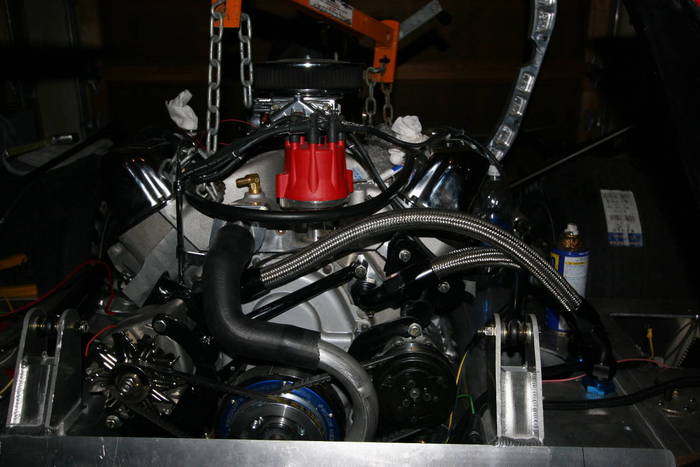
Well, I'm in the process of building an RCR GT MKIV, and I asked the folks at http://www.keithcraft.com/ to build something "appropriate" for such a ride. We settled on a Shelby block, 482, which ended up on the dyno with some impressive numbers. 594HP and 605TQ. Uhmmm...that oughta do!
I asked them to take some pictures and give me some captions, as I wanted to document the build of the car, and I have always wondered about what it takes to build these puppies. I know it's not rocket science, but to many of us, it seems like it. Anyways, below you'll find some pictures and descriptions of the process.
Boring, decking, and blueprinting done on RMC Machine
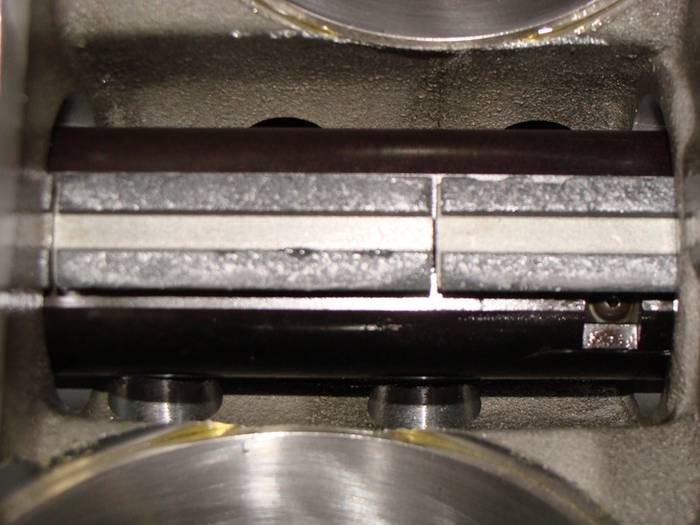
Here we are line honing the mains
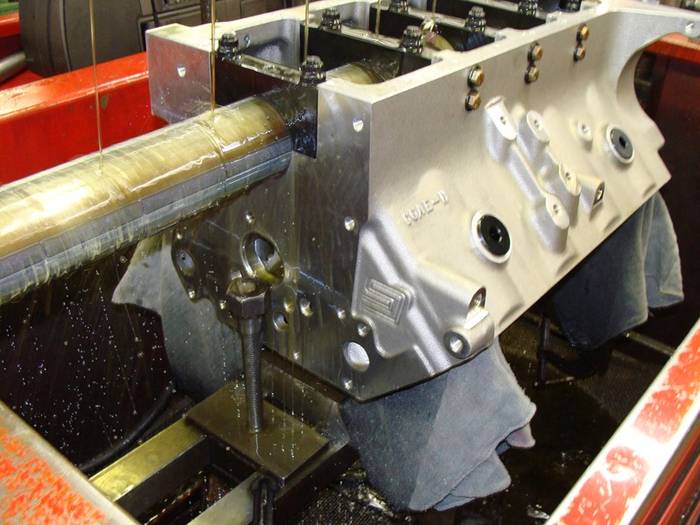
Honing the block with torque plates
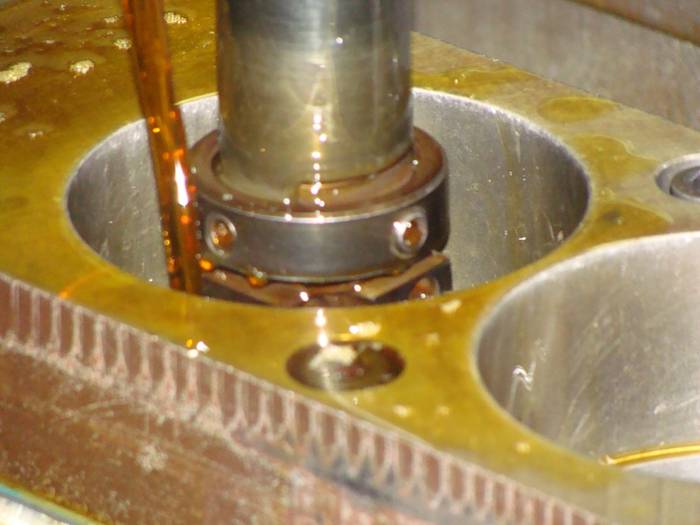
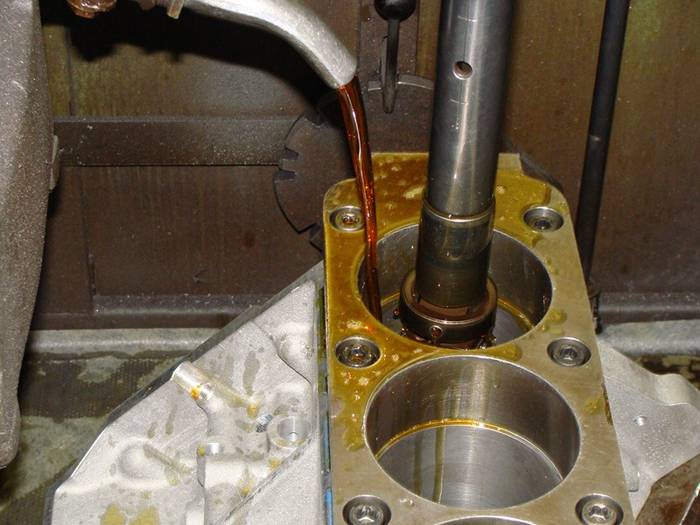
Honing bar inside block
Rotating assembly for engine build
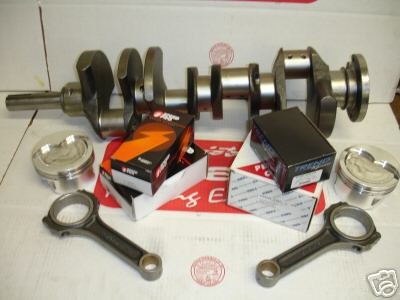
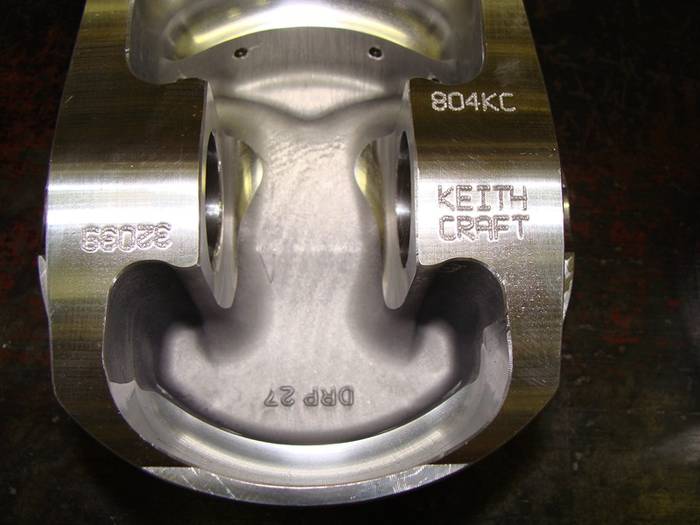
Custom Keith Craft Diamond Pistons
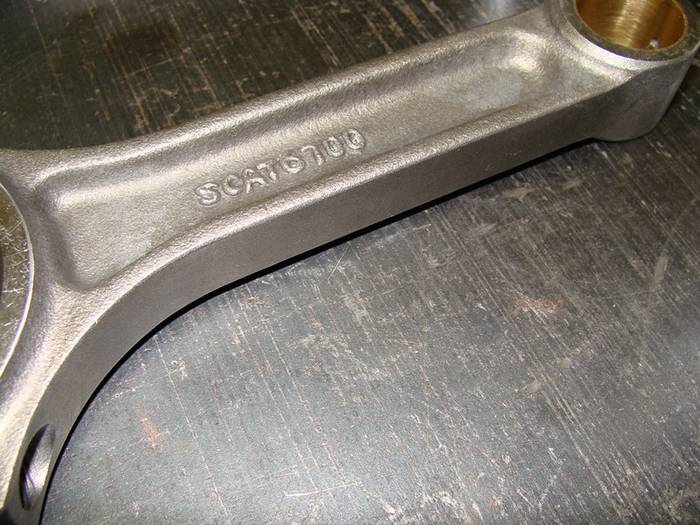
Scat I-Beam 6.700 Connecting Rods
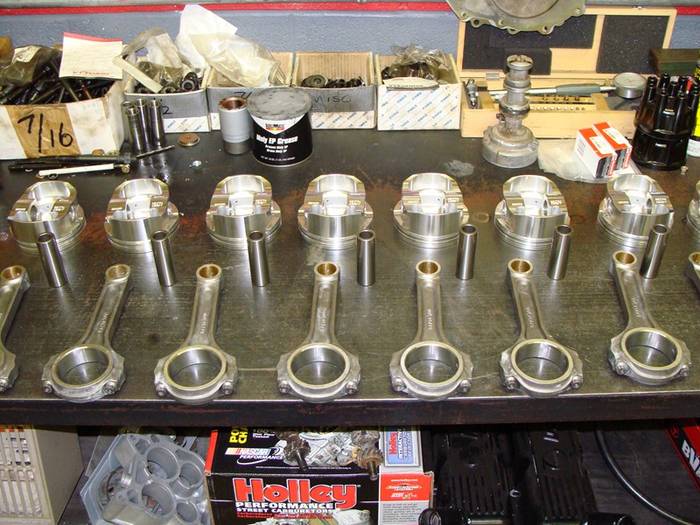
Pistons, pins, and rods before assembly
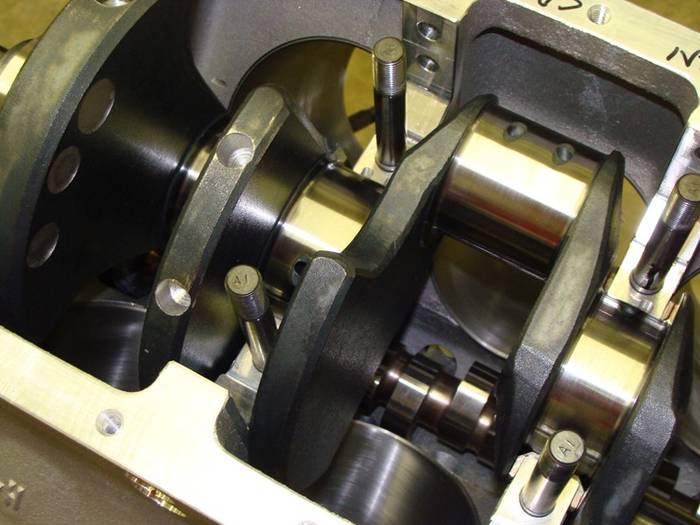
Crankshaft being balanced with correct bob weights
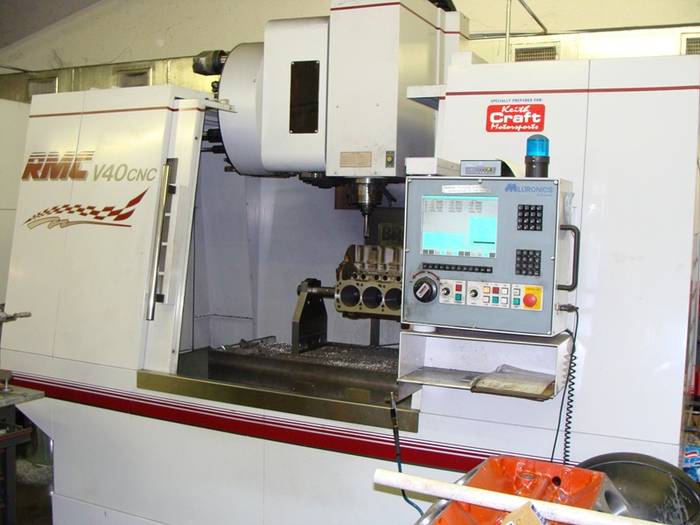
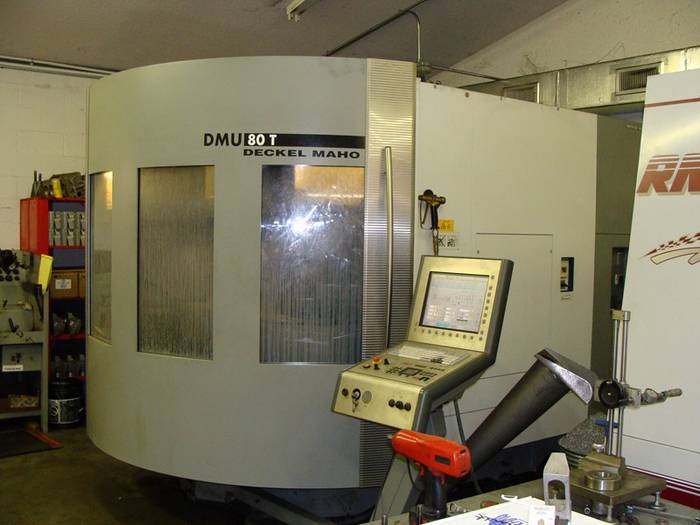
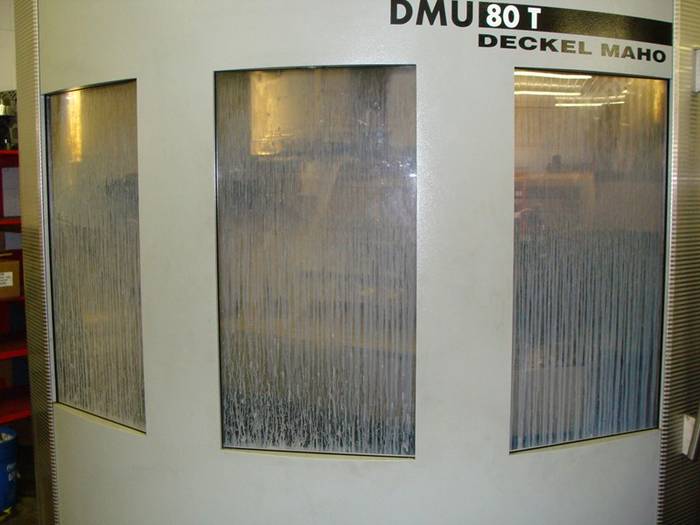
Heads being CNC ported in 5-axix CNC machine
Bare Edelbrock CNC ported Castings
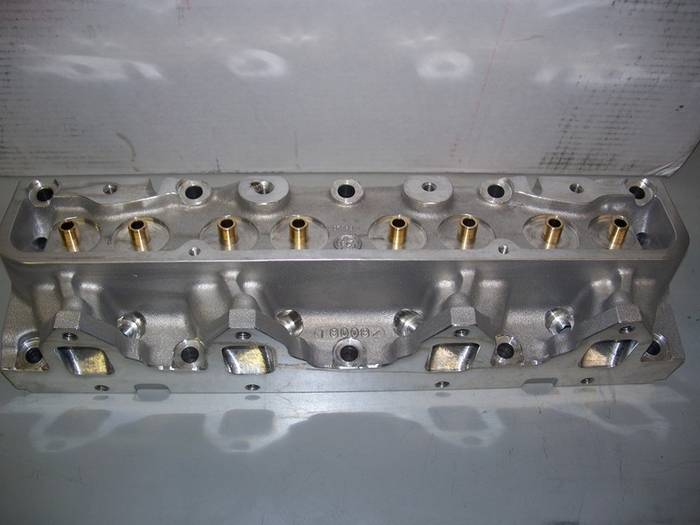
Chamber and valve job on Edelbrock CNC castings
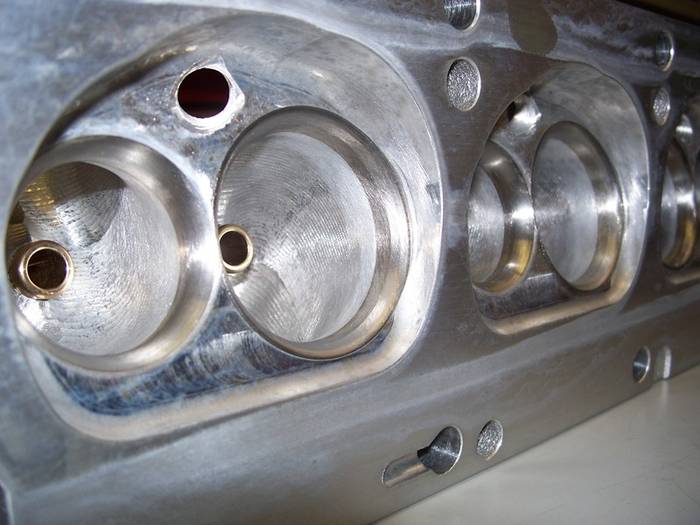
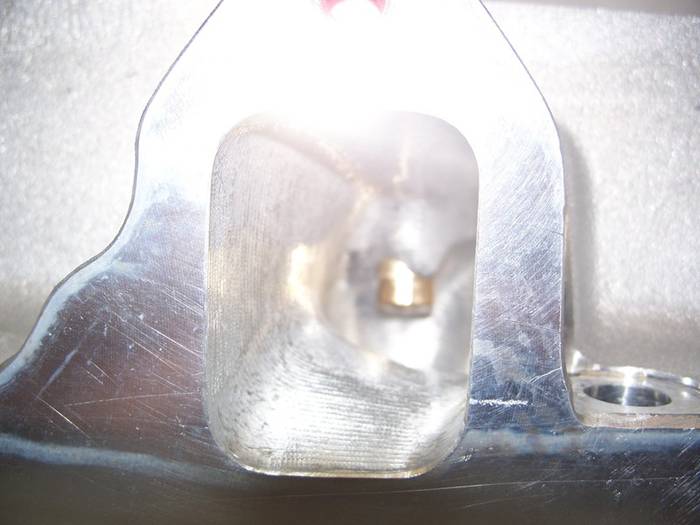
Exhaust ports on Edelbrock Castings
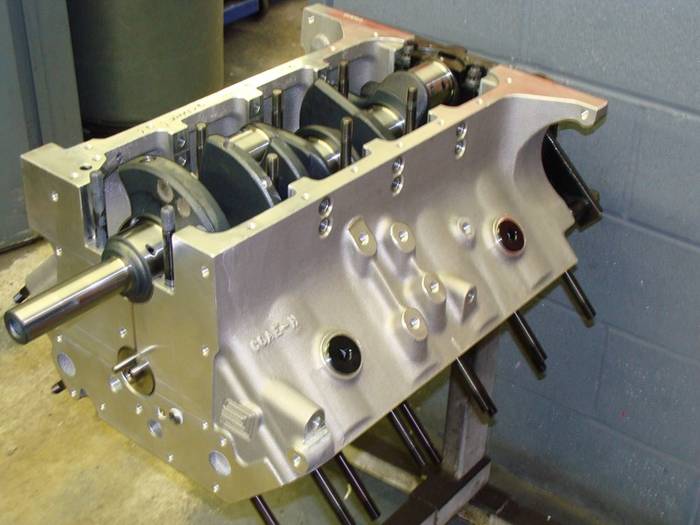
Shelby block with head and main studs, checking block for crankshaft rotation.
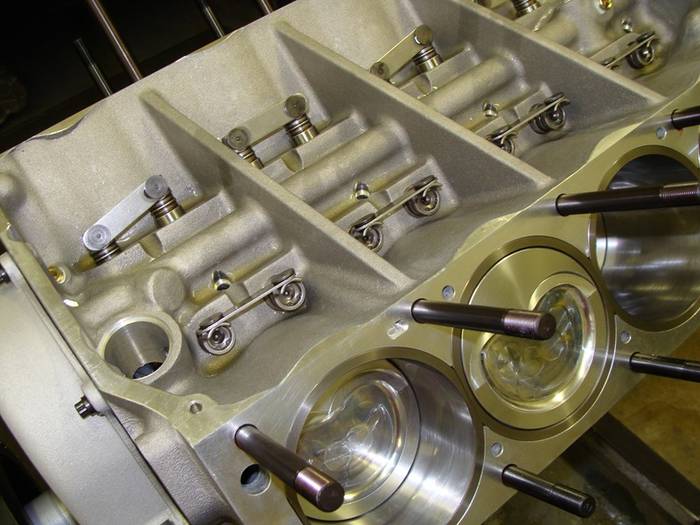
Shortblock with lifters and timing set installed.
Shortblock with damper and oil pan.
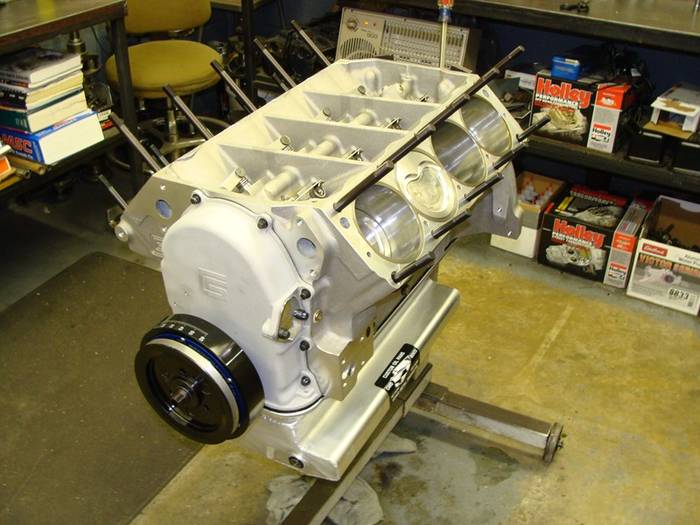
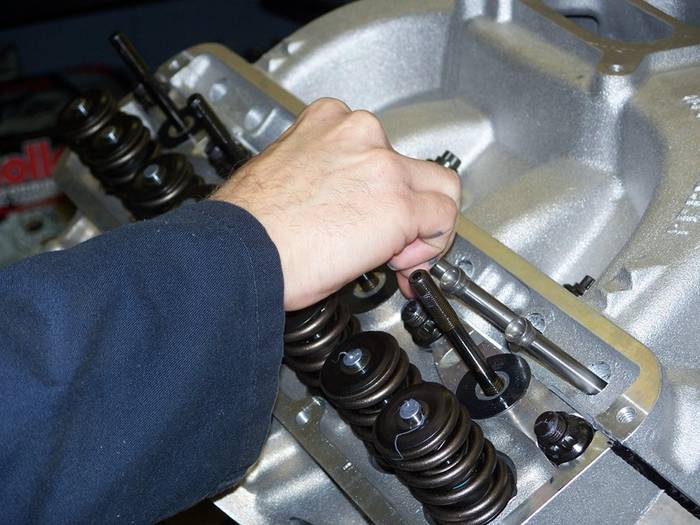
Long block ready for valvetrain installation.
Moly on the pushrods to keep from coming off lifter during assembly.
Engine on SF-902 for Dyno Test and Tune
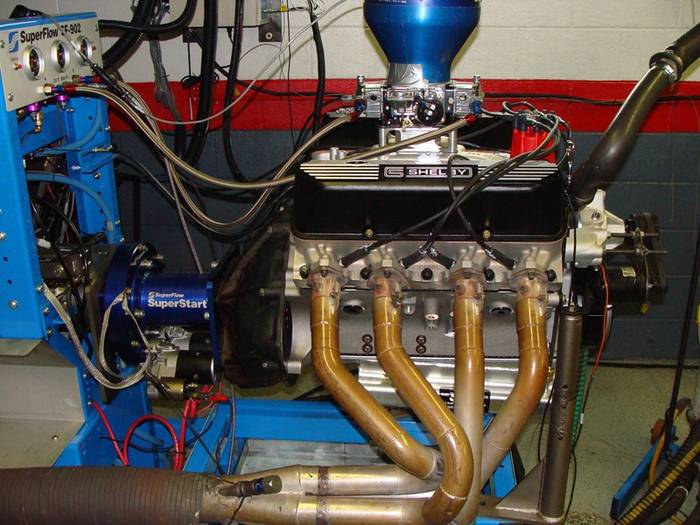
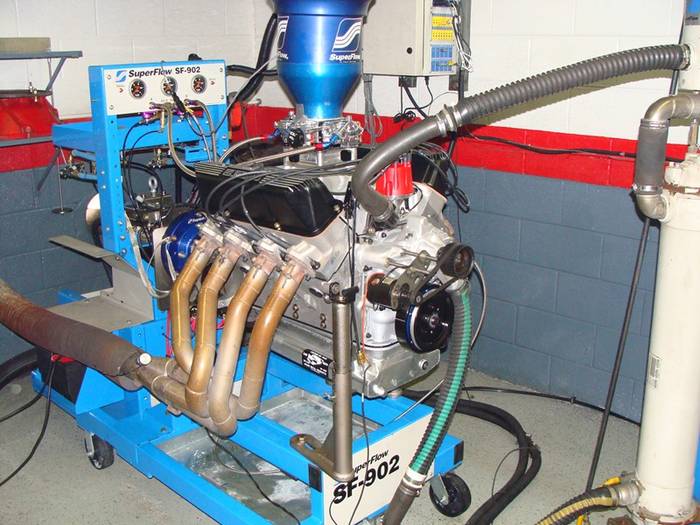
Dyno #'s!
Brent Mills
Club Hot Rod
www.clubchopper.com
www.clubcobra.com
www.usafiat500.com
-
03-04-2010 06:02 PM #5
CHR Member/Admin
- Join Date
- Apr 2001
- Location
- Olympia
- Car Year, Make, Model: 1964 Shelby 427 Cobra rep
- Posts
- 434
My Social Networking
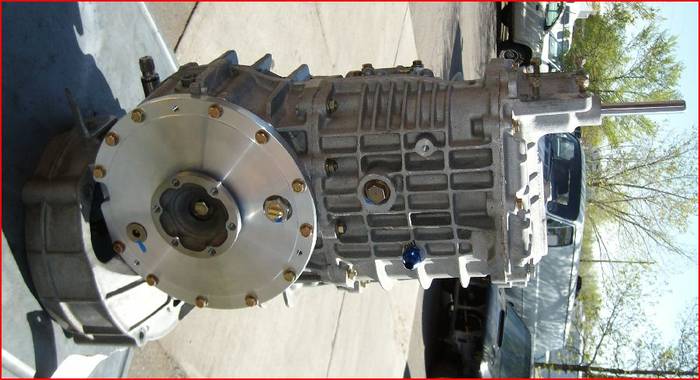
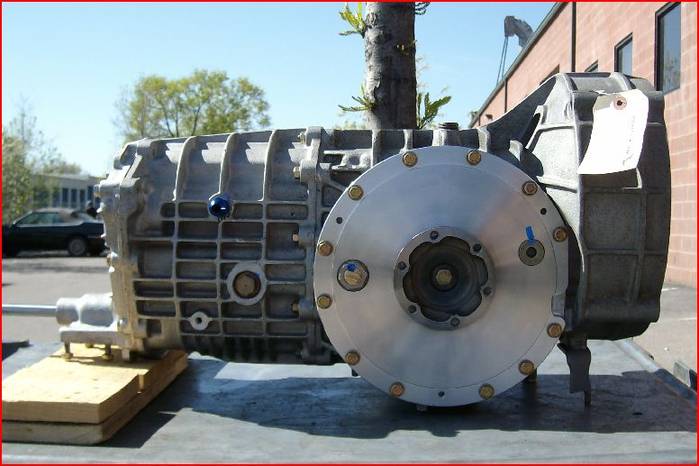
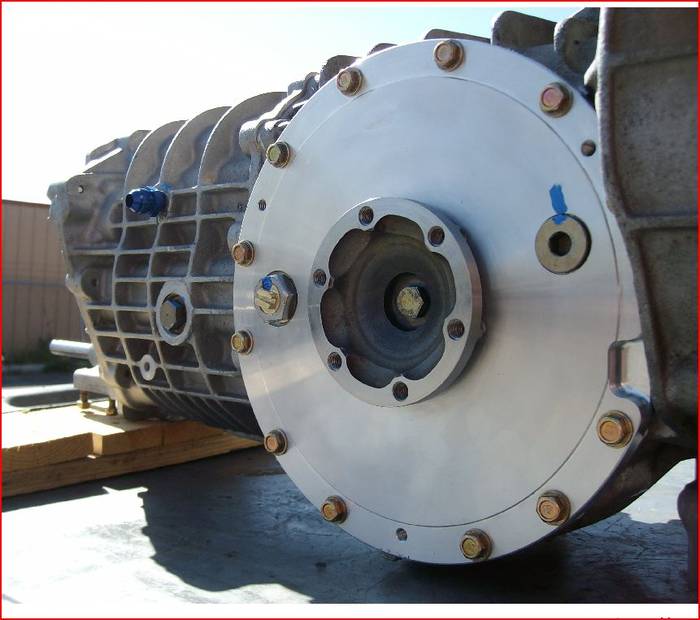
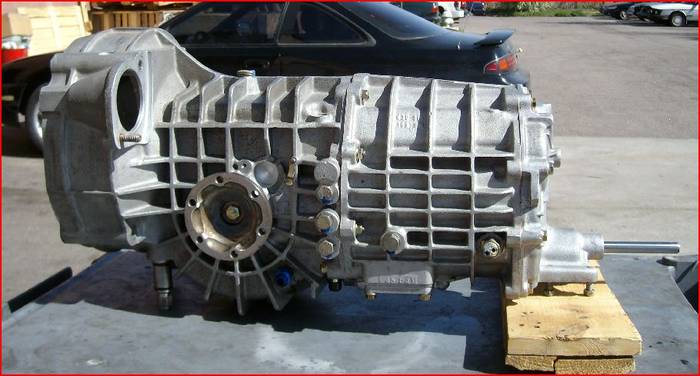
Aside from the engine pics above, the transaxle built by GBOX LLC. Porsche and Getrag service. Performance driveline engineering. is on its way.
Brent Mills
Club Hot Rod
www.clubchopper.com
www.clubcobra.com
www.usafiat500.com
-
03-04-2010 06:02 PM #6
CHR Member/Admin
- Join Date
- Apr 2001
- Location
- Olympia
- Car Year, Make, Model: 1964 Shelby 427 Cobra rep
- Posts
- 434
My Social Networking
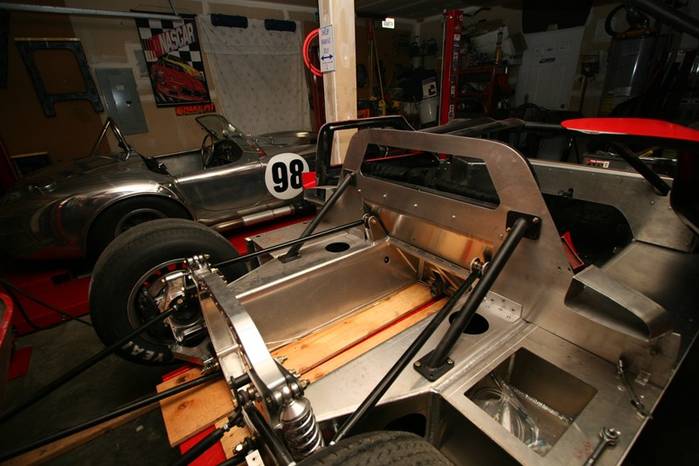
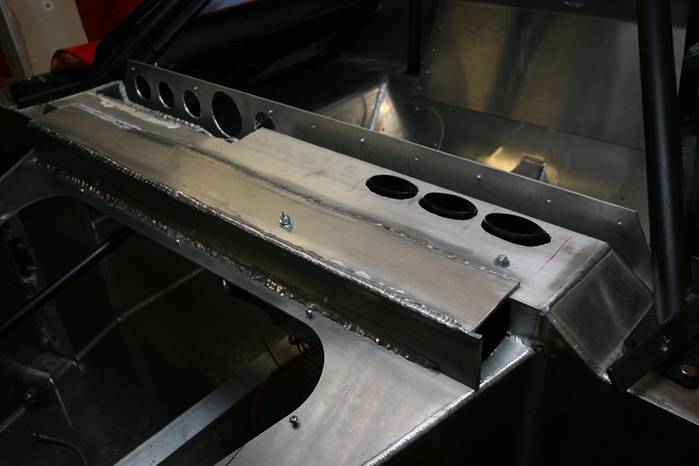
Here are a few things I have been working on....Admittedly, I am not a TIG welding professional, but I'm improving. Be nice!
That's me using a plasma cutter to make a big ass hole in all that nice work that Fran and the gents at his shop put together.

The reason I cut a bunch of crap out was so I could get the heating and air unit a couple inches higher making foot and leg room a little more accommodating for my wife or any other passenger (could have left as is). Note, this is not done yet.
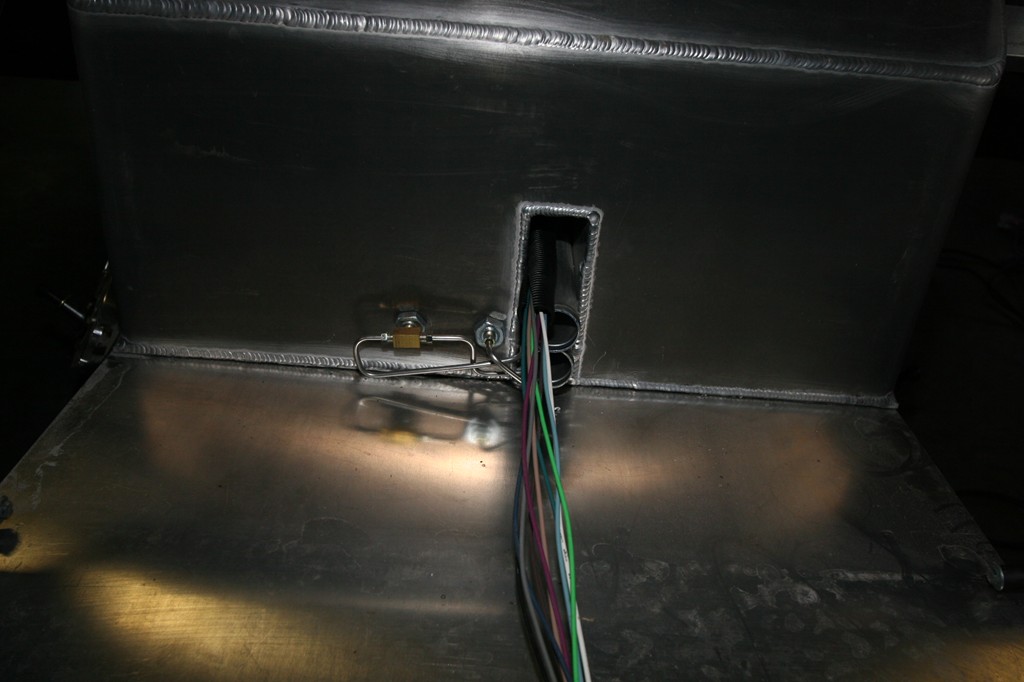
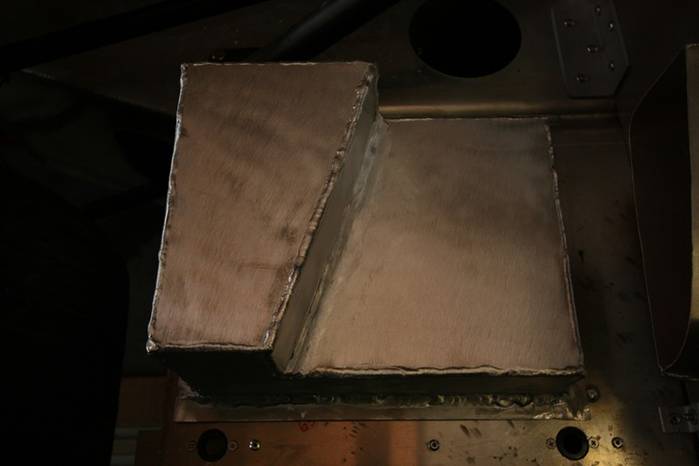
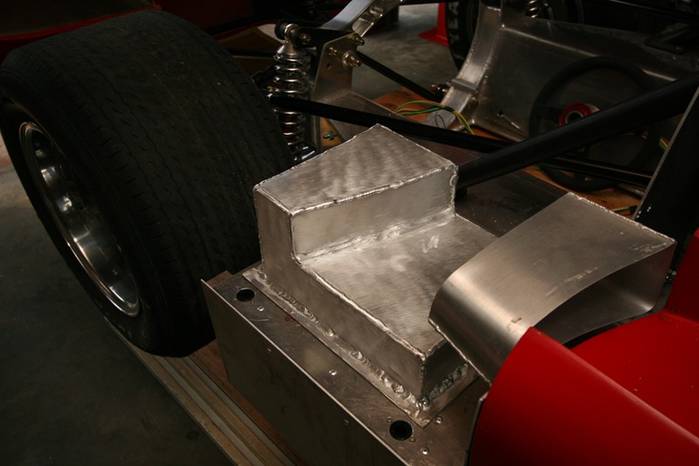
Here I am making a faux oil tank to cover the battery and to look like original. Still need to finish up the filler neck. Welds are not "perfect" so I'll probably grind and run more beads in some areas. I have especially difficult time doing the inside of the 90 degree corners for some reason. Drives me nuts! It is fun doing this sort of thing though, and with more practice, it'll be fun and look great to boot.
Brent Mills
Club Hot Rod
www.clubchopper.com
www.clubcobra.com
www.usafiat500.com
-
03-04-2010 06:03 PM #7
CHR Member/Admin
- Join Date
- Apr 2001
- Location
- Olympia
- Car Year, Make, Model: 1964 Shelby 427 Cobra rep
- Posts
- 434
My Social Networking
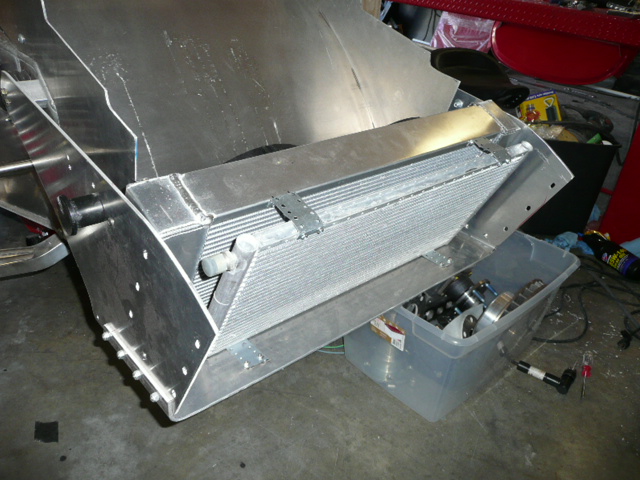
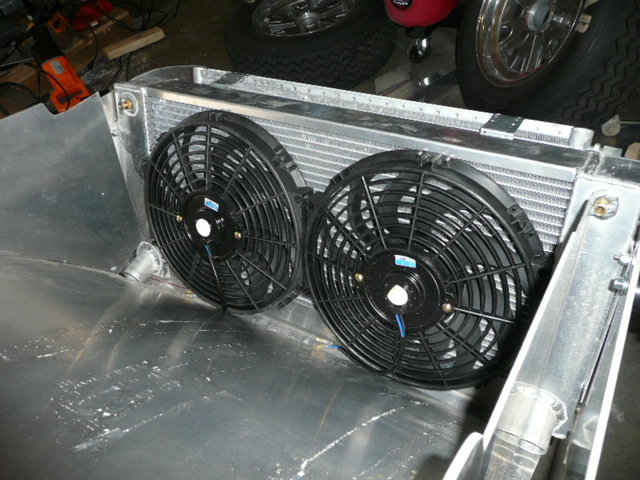
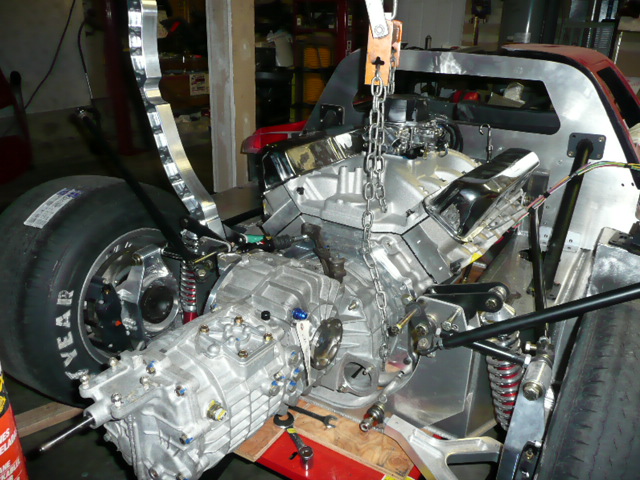
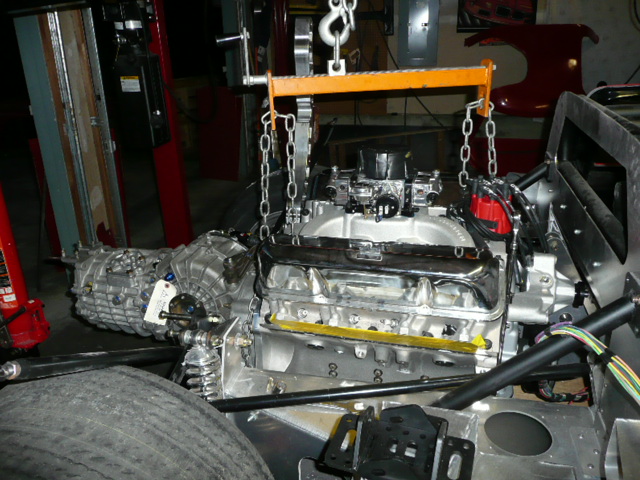
Finally had a little time to do some work on this thing. Got the radiator in place and test fit the engine/transaxle.

Brent Mills
Club Hot Rod
www.clubchopper.com
www.clubcobra.com
www.usafiat500.com
-
03-04-2010 06:03 PM #8
CHR Member/Admin
- Join Date
- Apr 2001
- Location
- Olympia
- Car Year, Make, Model: 1964 Shelby 427 Cobra rep
- Posts
- 434
My Social Networking
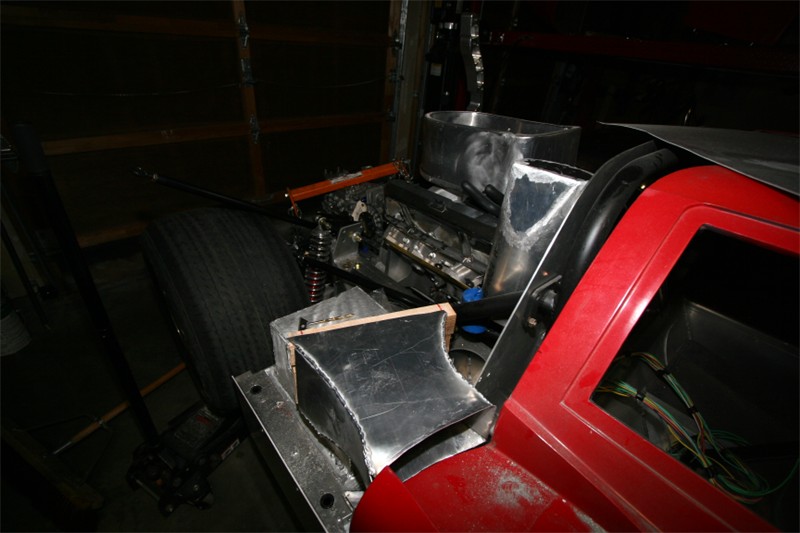
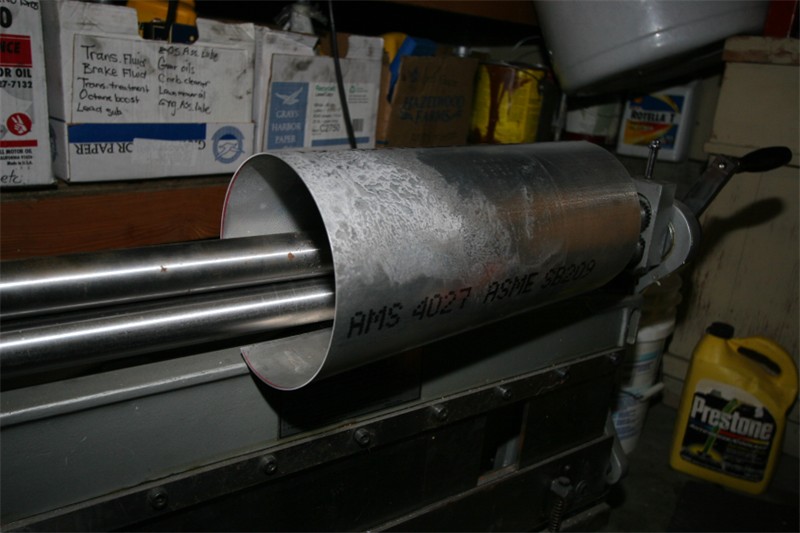
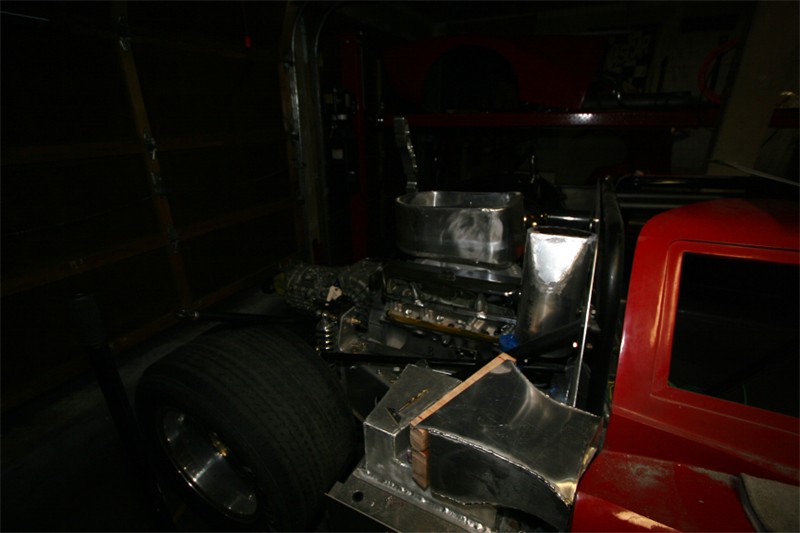
Making progress here and there. Have the engine and transaxle mounted, though they will be coming back out for other work. Working on making the side scoops that will lead into mocal oil coolers. Working on the expansion tank per originals. That was kind of fun using a slip roll to take a nice flat piece of aluminum and turn it into a 6" diameter tube. And made a turkey pan. Welding and aluminum work is FUN.
Here's some progress pics:

Brent Mills
Club Hot Rod
www.clubchopper.com
www.clubcobra.com
www.usafiat500.com
-
03-04-2010 06:04 PM #9
CHR Member/Admin
- Join Date
- Apr 2001
- Location
- Olympia
- Car Year, Make, Model: 1964 Shelby 427 Cobra rep
- Posts
- 434
My Social Networking
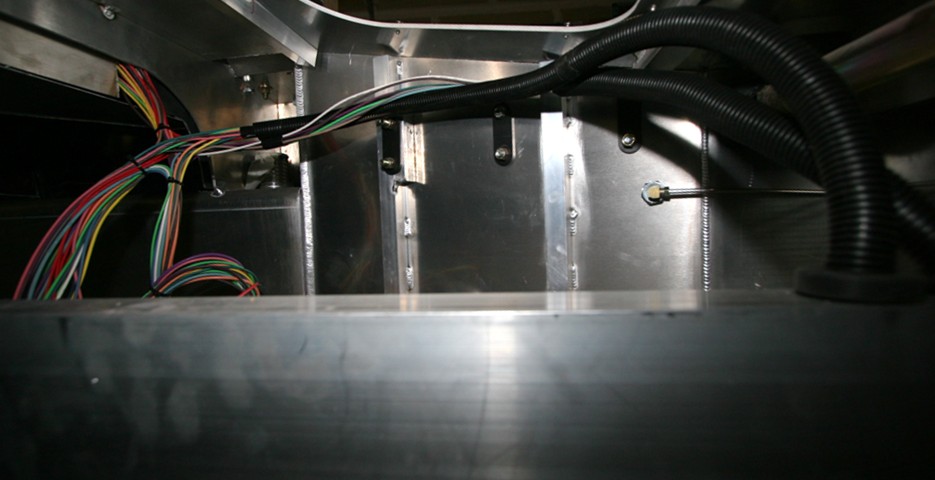
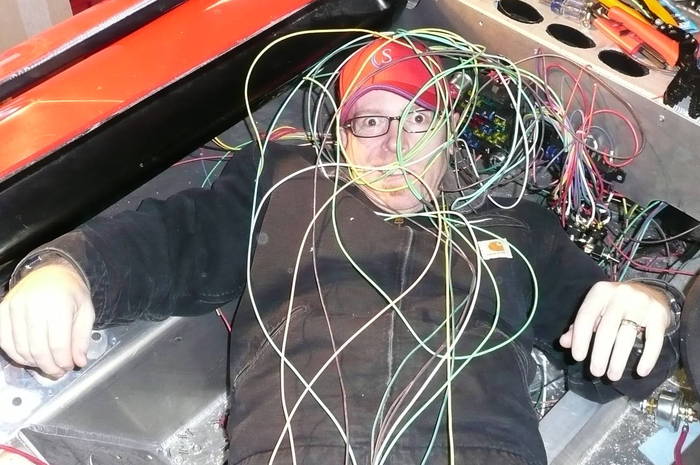
The wiring just might be getting the better of me.

Brent Mills
Club Hot Rod
www.clubchopper.com
www.clubcobra.com
www.usafiat500.com
-
03-04-2010 06:04 PM #10
CHR Member/Admin
- Join Date
- Apr 2001
- Location
- Olympia
- Car Year, Make, Model: 1964 Shelby 427 Cobra rep
- Posts
- 434
My Social Networking
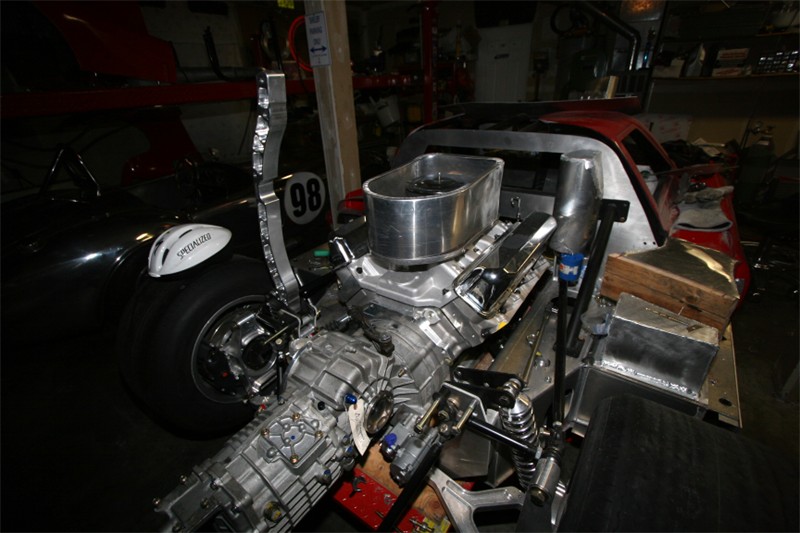
Well, I decided that the bracket system that I fabricated would lead to trouble based on some of the feedback here, so I went a little more conventional route. What a pain in the ass, but I'm very happy with the end results.
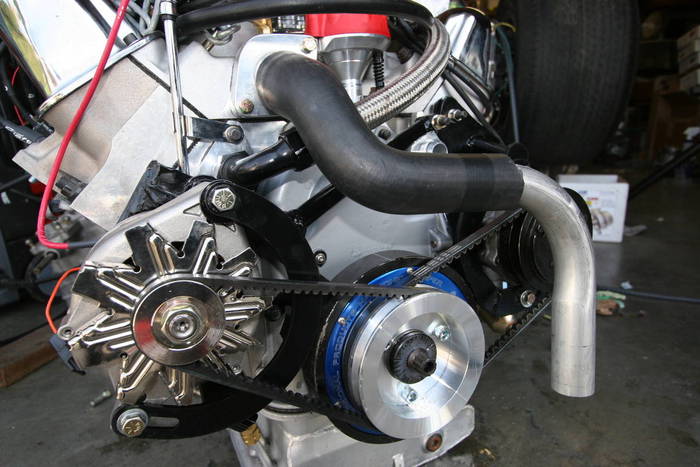
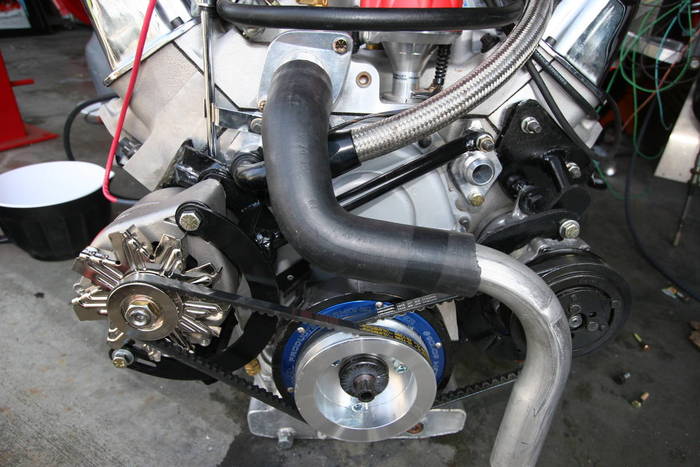
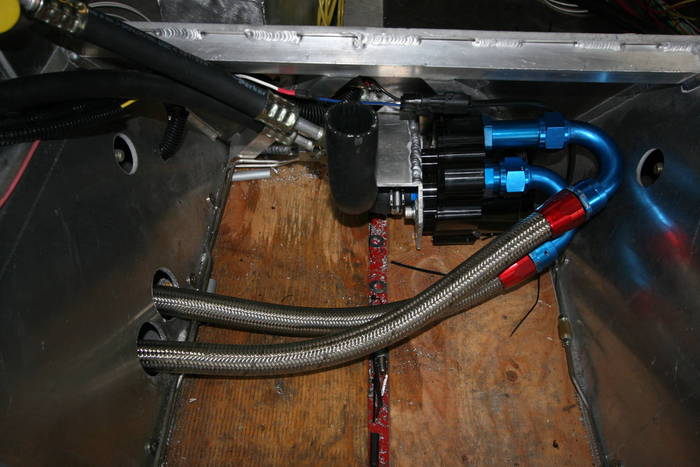
Wiring is complete sans actual connection to lights, etc. Engine is sitting back in it's special little spot. Cooling system lines and pump routed. Things are starting to look like a car! Still a lot of work to go of course, and it will take about 5x long as I think it will, but...feeling pretty good about my progress recently.
Here are just a few pics of progress.
Brent Mills
Club Hot Rod
www.clubchopper.com
www.clubcobra.com
www.usafiat500.com
-
03-04-2010 06:05 PM #11
CHR Member/Admin
- Join Date
- Apr 2001
- Location
- Olympia
- Car Year, Make, Model: 1964 Shelby 427 Cobra rep
- Posts
- 434
My Social Networking
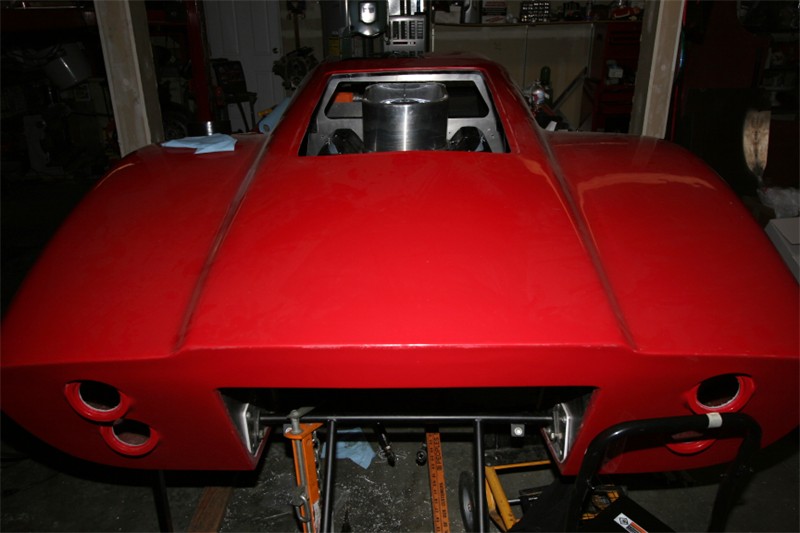
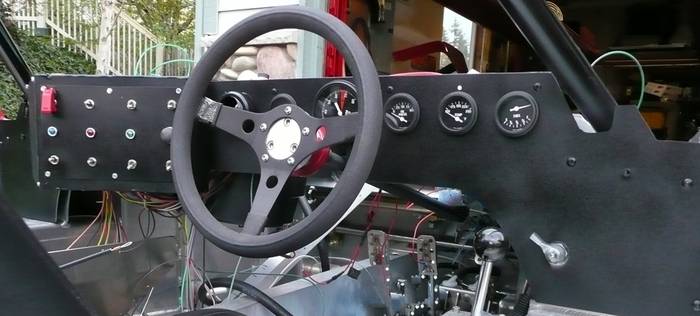
Well, after a bit of time off...lots of summer and family issues, I have been making some reasonable progress with hopes to get the car to the body shop maybe next week.
Here's the dash which is pretty much completed, with the exception of the foux exposed fuse terminal which will be added. Pics don't really do it justice as I hadn't cleaned up after working all day on the thing, and you can't really see the crinkle finish in the pictures.
Here are some pictures of the rear spoiler and side spoilers.....Kinda fun to make and fairly straight forward. The key was making both sides like the same and to get the arch in the rear spoiler looking smooth and right, as it's not flat which would have been much easier.
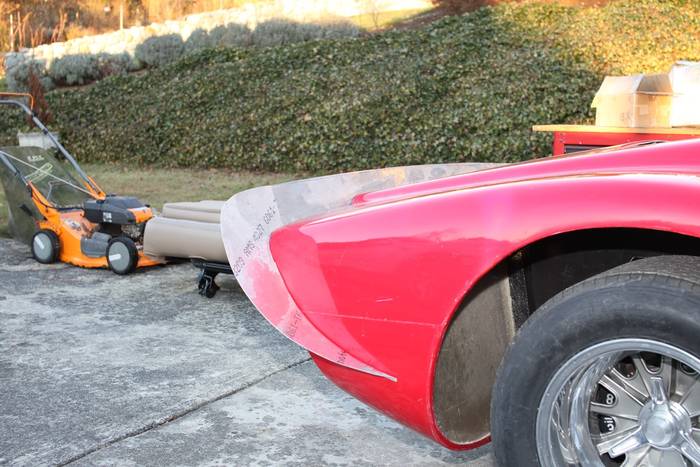
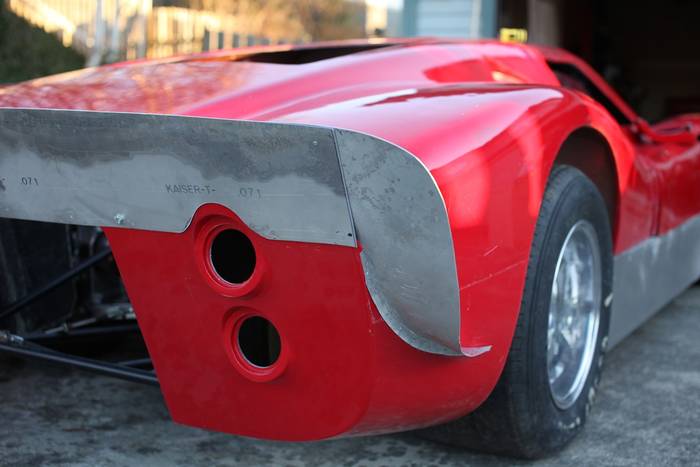
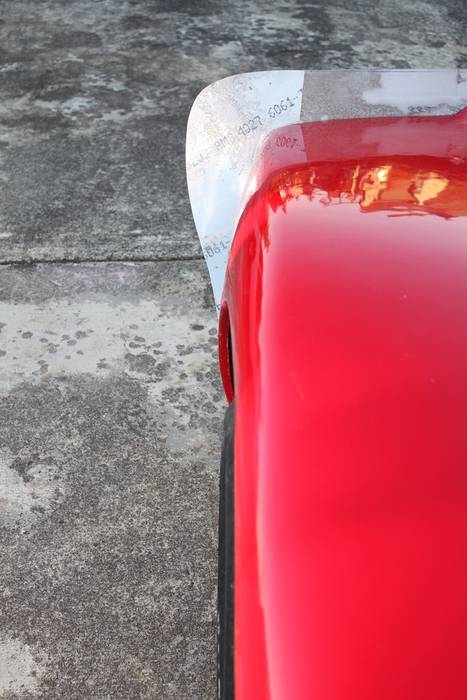
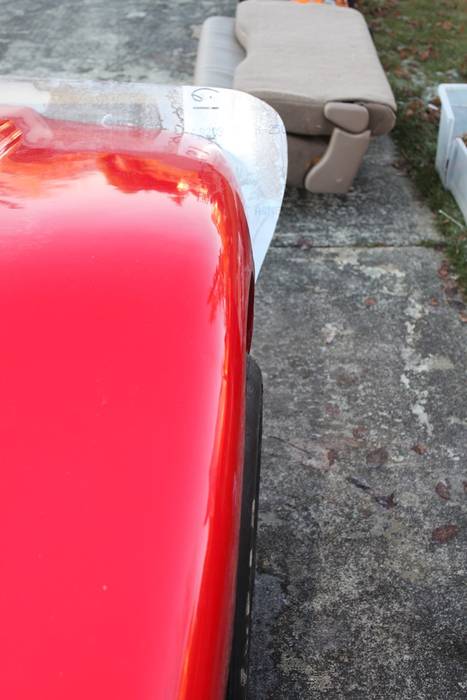
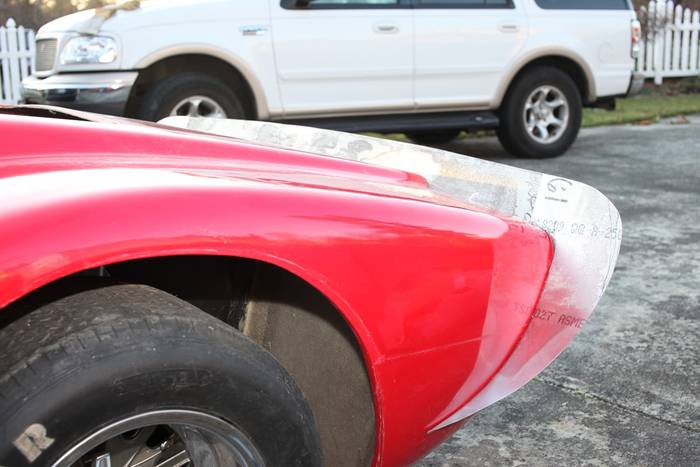

Body sags to the left a little....need to talk with Fran on how to correct...at least the spoiler is striaght.
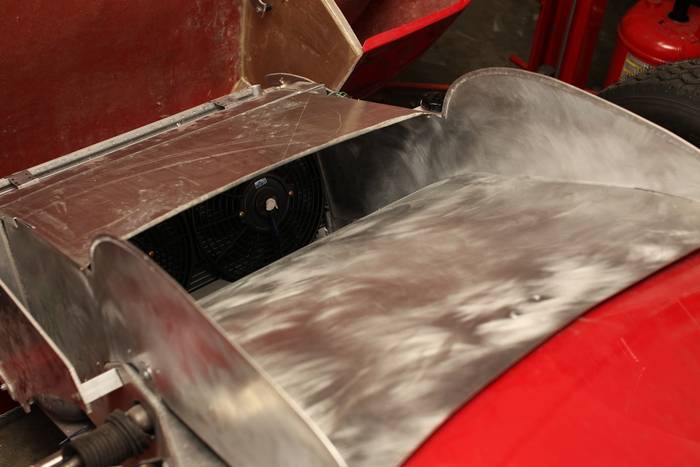
Also needed to make up the front shroud thingy coming from the radiator nostril area. Tried making it close to original and it took me several tries and a lot of hours to get it down.
- I first took a flat sheet of metal and put a half inch 90 degree bend on each side of it. The nostril area isn't straight, so I compensated for that with one end down by the radiator being and inch or so narrower than up by the wind shield.
- I then started using a shrinker machine to get the appropriate bends to get the appropriate slope, etc down to the radiator.
- Then I took a relatively thin sheet and made a patter for the sides....This was relatively tricky and time consuming but ended up with a reasonable fit and look. Had to make sure to get both of the fins that stick up out of the hood to look the same.
- Then, from what I can tell by looking at many pictures of orginals, there's a thin strip of aluminum folded over and runs along the top edge of the fins - presumably to make them more ridged. So, I took about a 3/4ths inch wide strip of aluminum, put about a 120 degree bend in it with my brake and then used the clamp on my brake to squeeze it flat (I put a sheet in the crease so it didn't bend it all the way and crack the metal). Then I used my shrinker again and carefully followed the contour of the fins. Once they were good, pried the piece apart with a small screw driver (what a pain in the ass) down the length of the piece so I was able to slide it on the fins. Once on, I used the brake clamp again to squeeze the metal onto the fins and they are secured well.
- Then I made a top shroud from the radiator top to the front of the outlet on the hood....this really firmed up the unit too.
- There was a lot of other little things that went into it, along with some cursing, and many hours, but I think it turned out ok
A little more progress today. Fabbed a little with aluminum and then cut the filler cover accordingly to fit and then mounted. Kinda fun. Still a bit of finish work, but you get the idea.
Brent Mills
Club Hot Rod
www.clubchopper.com
www.clubcobra.com
www.usafiat500.com
-
03-04-2010 06:05 PM #12
CHR Member/Admin
- Join Date
- Apr 2001
- Location
- Olympia
- Car Year, Make, Model: 1964 Shelby 427 Cobra rep
- Posts
- 434
My Social Networking
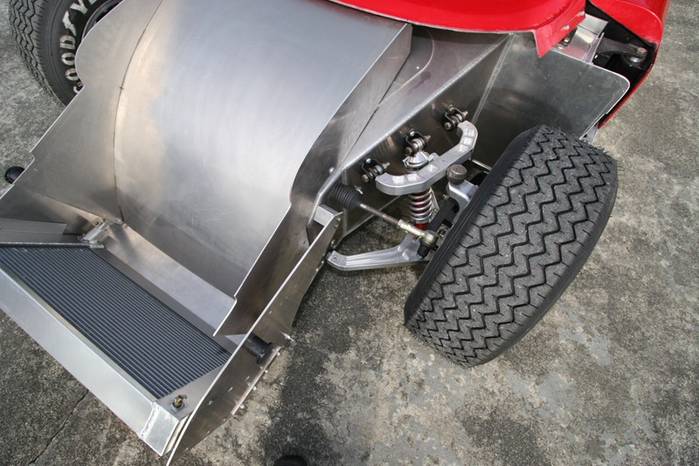
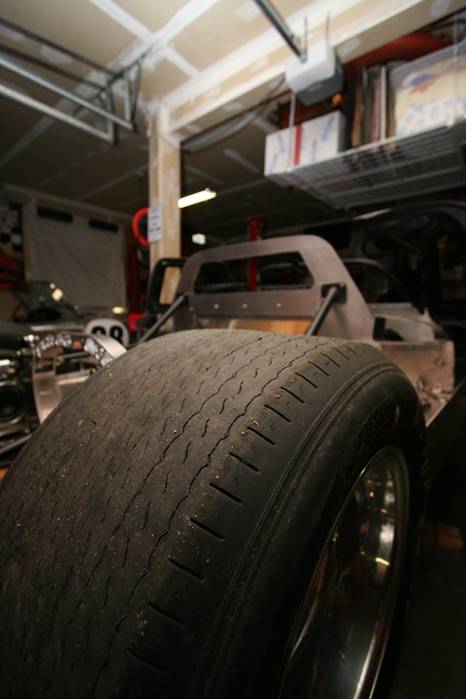
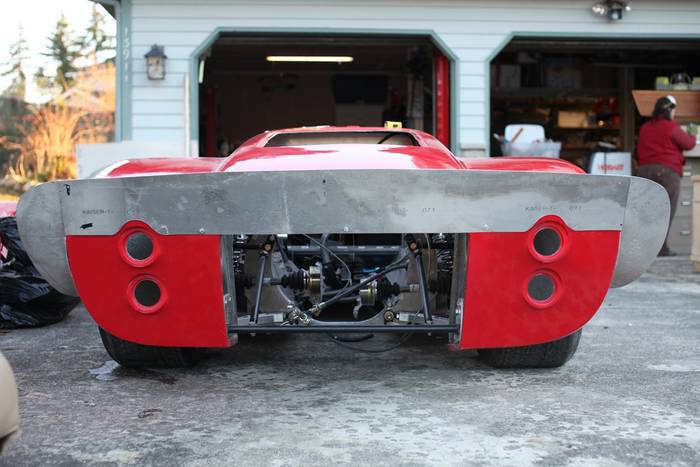
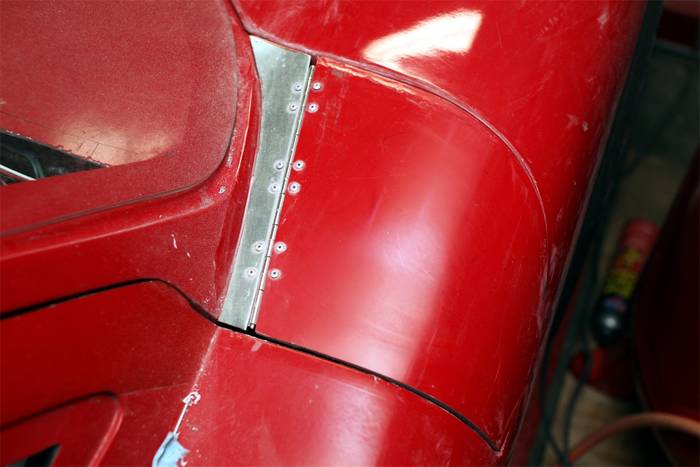
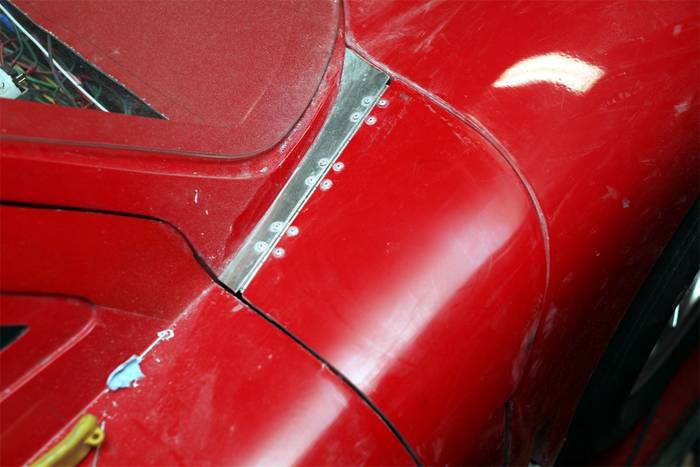
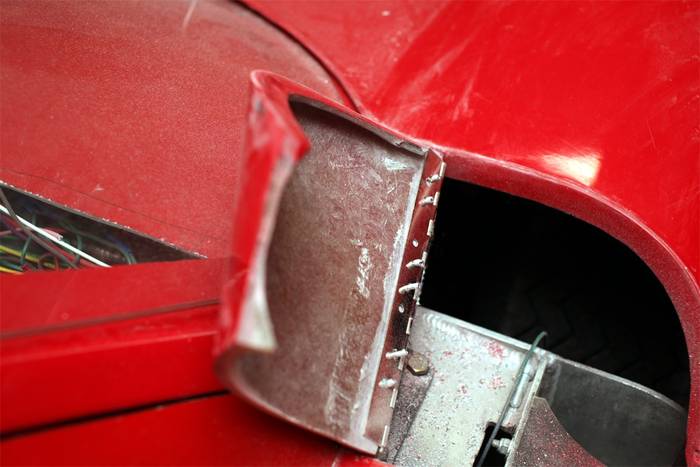
Well, it may not seem like much in the next few pictures, but it sure was a lot of work. Let me start by saying that for a project like this, an air rivet gun made my life a LOT easier than it could would have been by hand!
I needed to make the ends of the chasis on the inside of the wells look close to original. Required some time and effort to be sure and the pictures really don't do well to show all of the work as the tires were in the way and the flash casts shadows, but it is what it is....
Front setup:
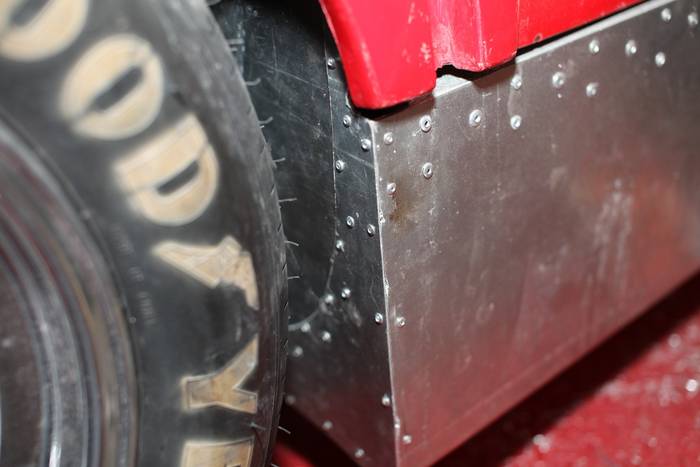
Back:
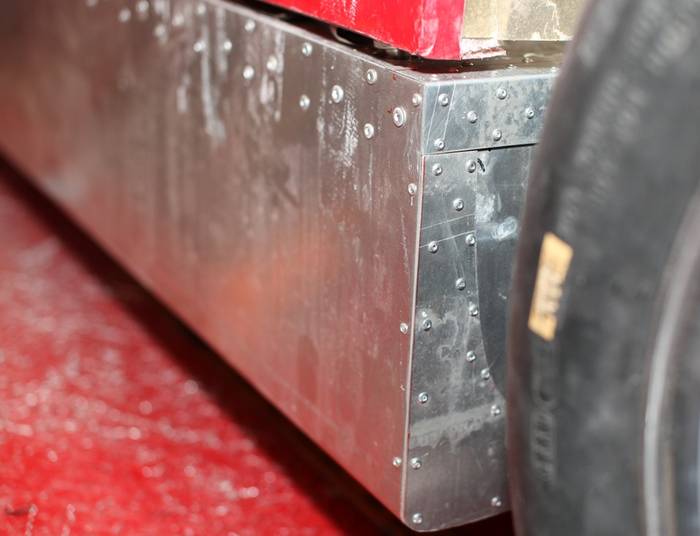
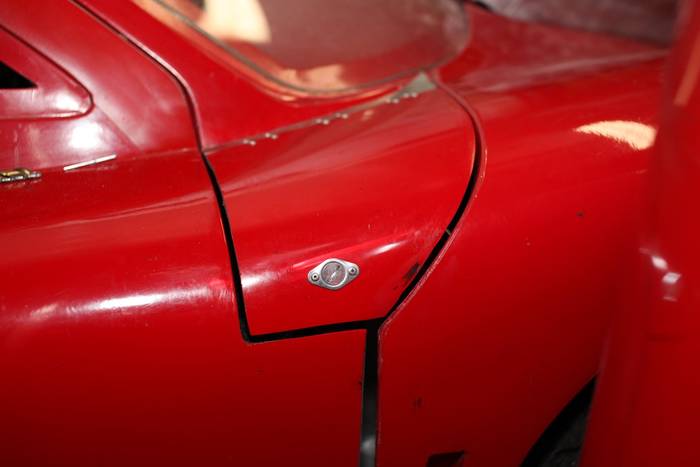
Added appropriate rivets down the side...A lot of work to make it look pretty ok.
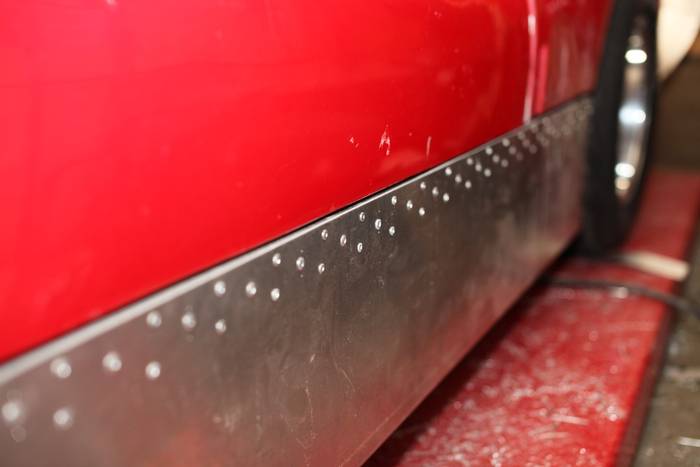
Added Dzus fastener for the fuel cover (front body panel not latched so that's why the gaps don't look quite right...though I do still have a little work to do there):
Brent Mills
Club Hot Rod
www.clubchopper.com
www.clubcobra.com
www.usafiat500.com
-
03-04-2010 06:06 PM #13
CHR Member/Admin
- Join Date
- Apr 2001
- Location
- Olympia
- Car Year, Make, Model: 1964 Shelby 427 Cobra rep
- Posts
- 434
My Social Networking
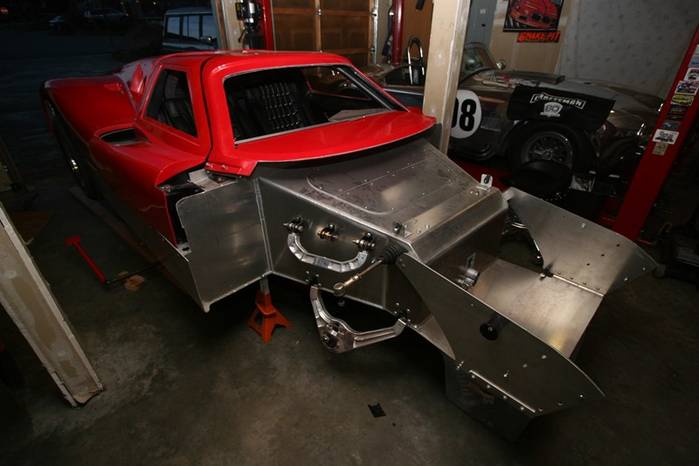
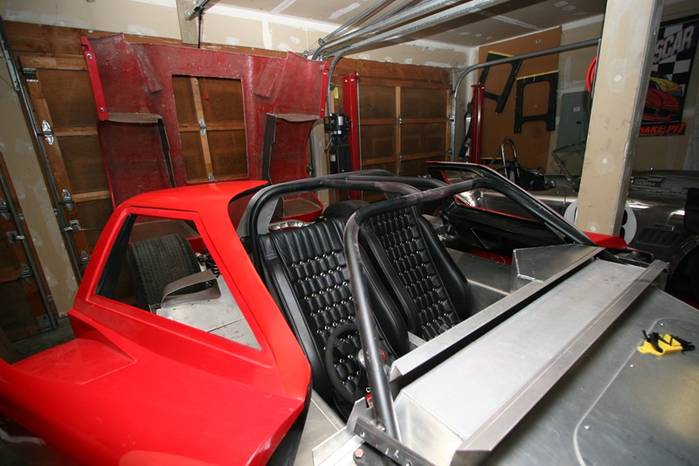
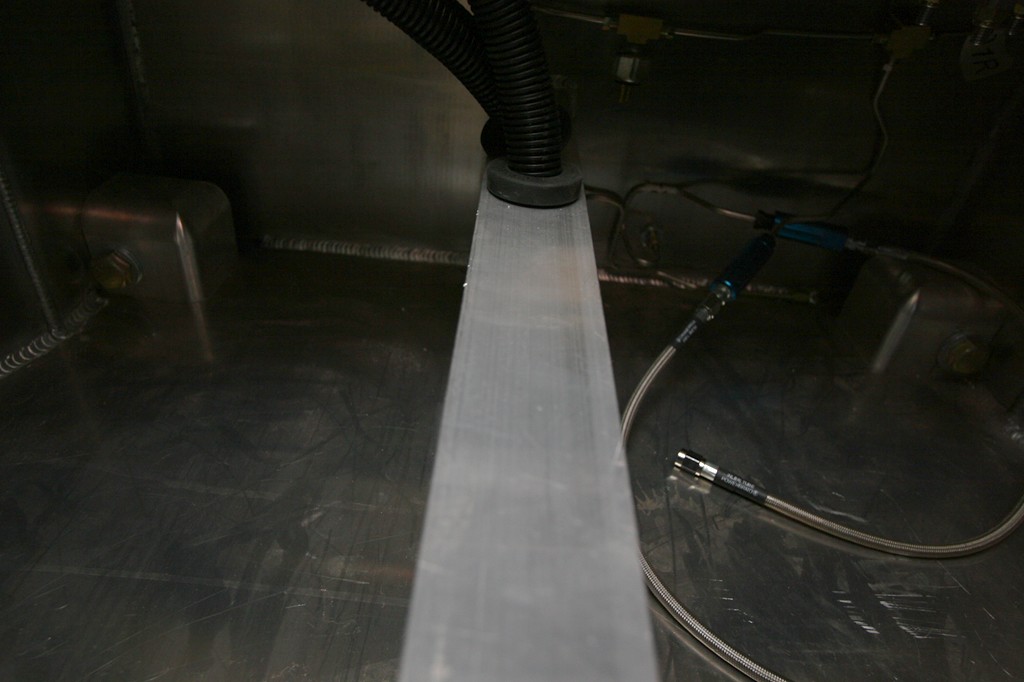
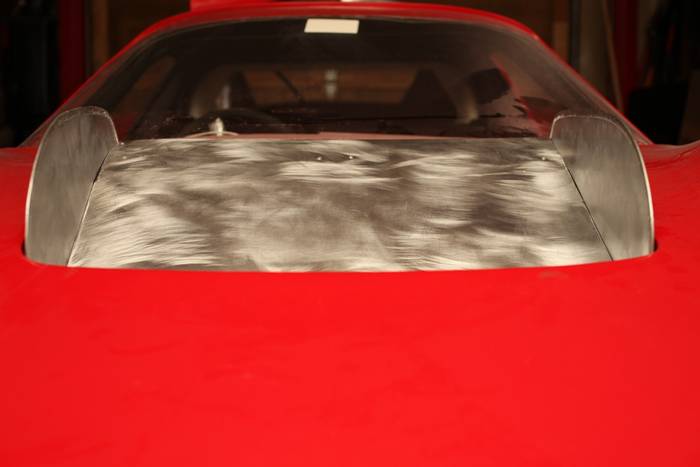
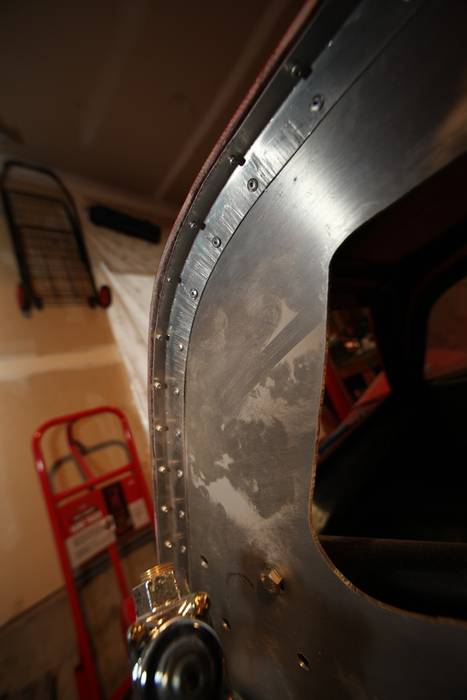
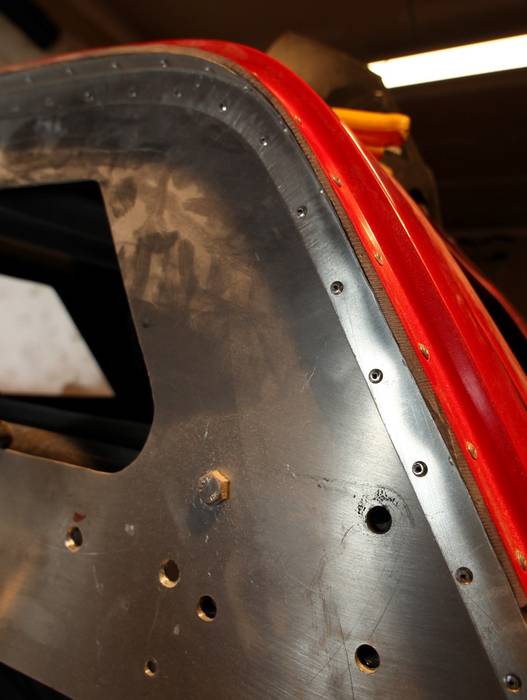
Made a little progress today...Needed to get the firewall mated to the spider and make it it look as original as possible. Didn't really clean things well before taking pictures, so....
Brent Mills
Club Hot Rod
www.clubchopper.com
www.clubcobra.com
www.usafiat500.com
-
03-04-2010 06:07 PM #14
CHR Member/Admin
- Join Date
- Apr 2001
- Location
- Olympia
- Car Year, Make, Model: 1964 Shelby 427 Cobra rep
- Posts
- 434
My Social Networking
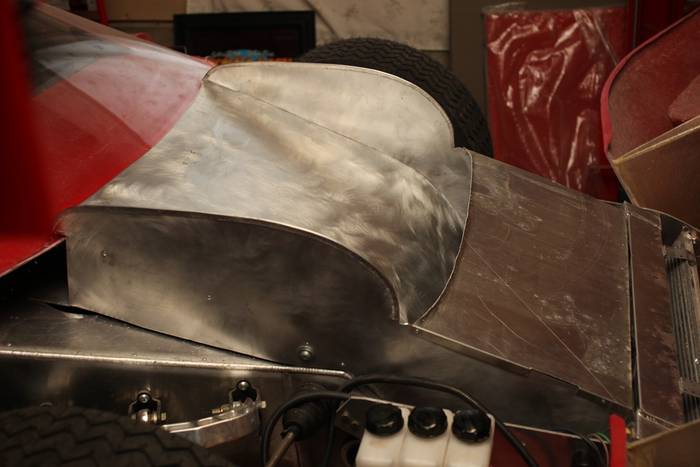
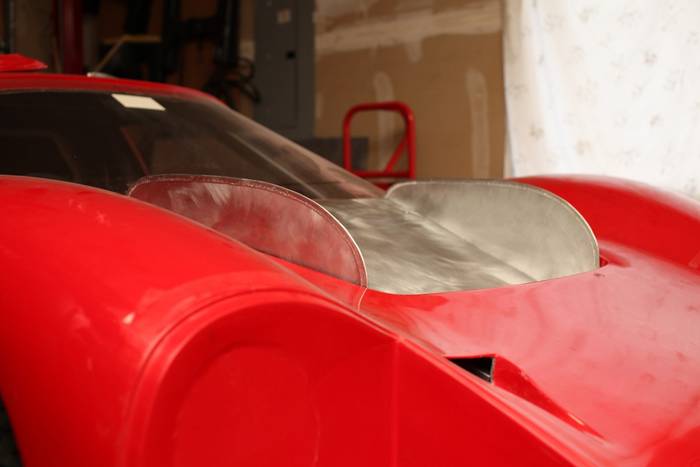
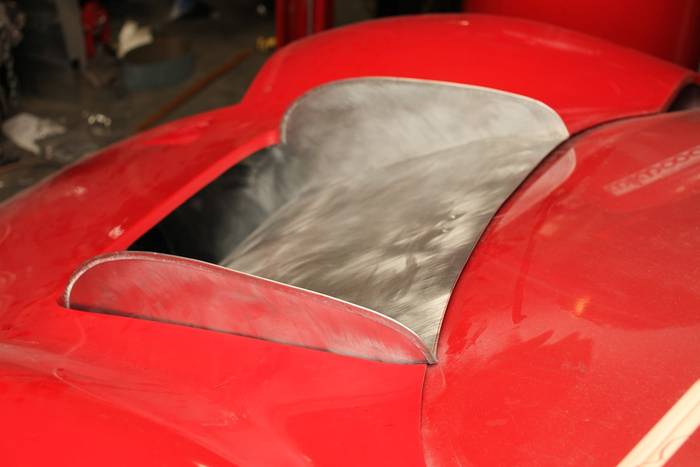
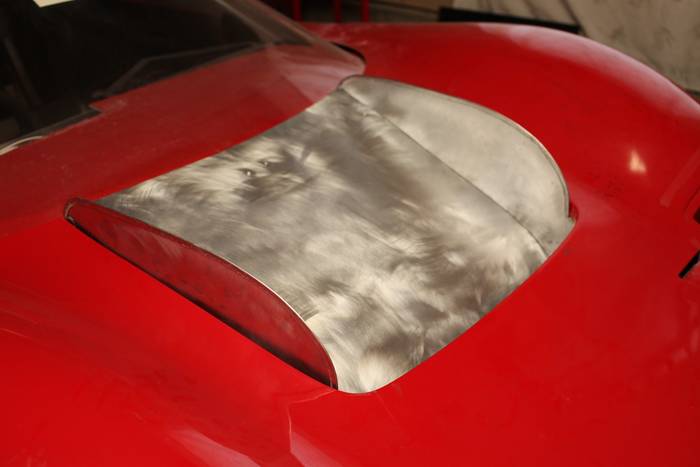
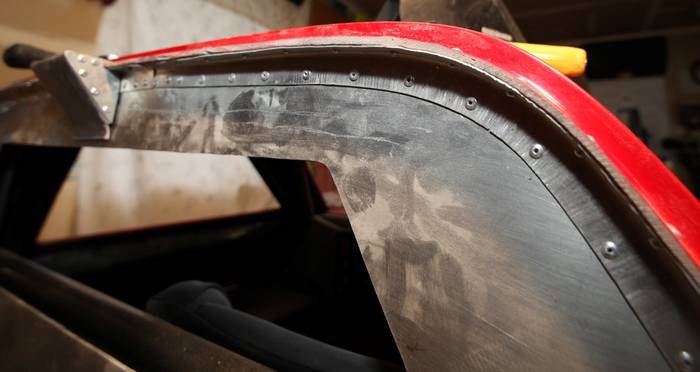
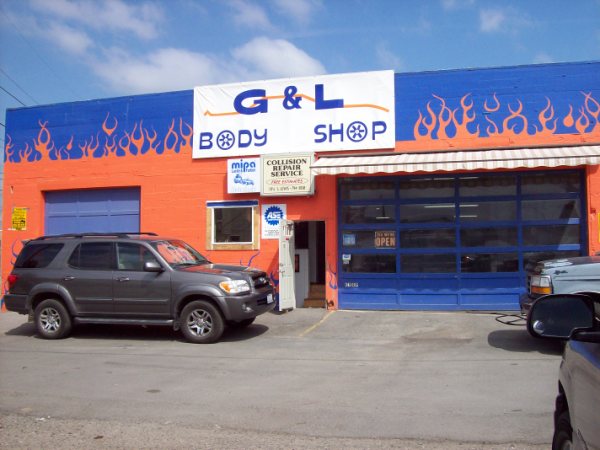
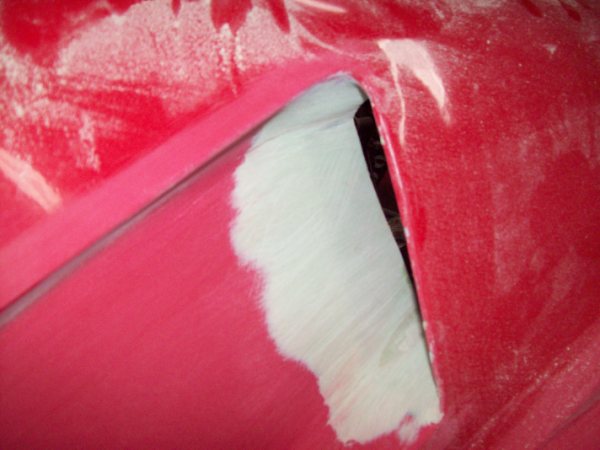
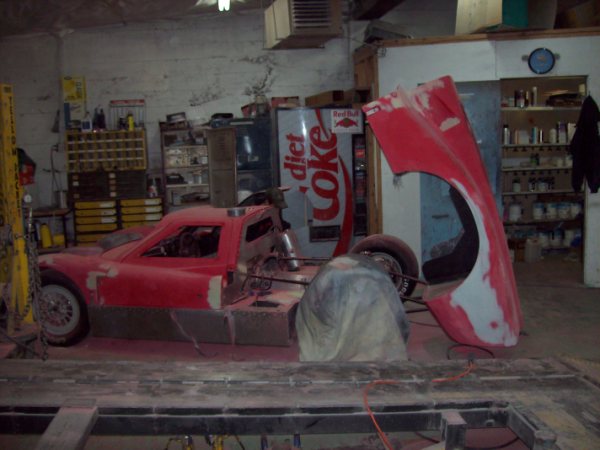
Nothing like progress! Rich and the guys over at G & L http://gandlbodyshop.com/ have been busy on the MKIV. One of the really great things about working with them to this point is that Rich has been open to me coming in and doing odds and ends on the car while there at the shop. He found some stuff that needed to be worked on from my end and I came in for a couple of hours to shape a little metal on the spoiler, etc. Offered me tools and air and a helping hand while I was there. Cool!
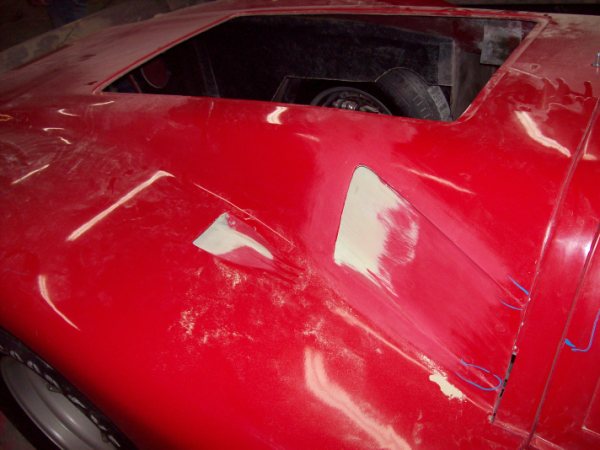
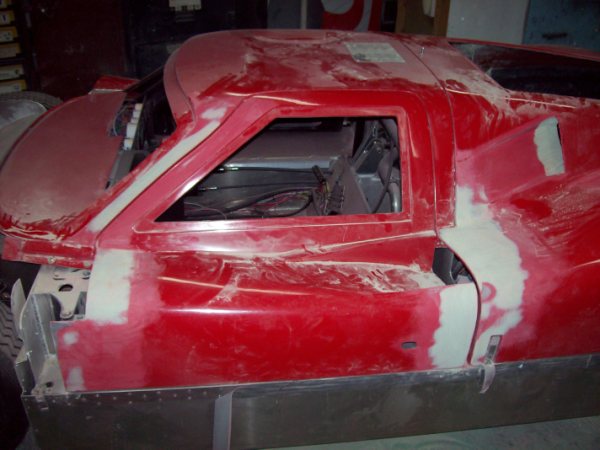
Well, here are some of the progress pics. I think they are pretty much ready to do a full coat of primer and then block that out as the next step in the process.
One of the neat things I decided to do (at least I think it's neat), is to extend the inside surface of the scoop thingy's (see pictures) so that the extend beyond where just the hole would have been to give it a bit more finished look. Not exactly like original I guess, but I think it will look better. Rich found that my shoddy glasswork wasn't quite up to snuff and reinforced a bit and then filled/smoothed the inlets. Looks great!


Brent Mills
Club Hot Rod
www.clubchopper.com
www.clubcobra.com
www.usafiat500.com
-
03-04-2010 06:20 PM #15
 CHR Member
- Join Date
- Feb 2006
- Location
- Sparta
- Car Year, Make, Model: 31 Ford Model A
- Posts
- 541
You got to much time on your hands..........lol
Cool project love that body style.
BradcSome days it's not even worth chewing thru the restraints !
 Reply With Quote

Posting Permissions
- You may not post new threads
- You may not post replies
- You may not post attachments
- You may not edit your posts

Either return this forum to what was or get the HELL OUT!
Dead!