


 258Likes
Thread: 41 Willys Gasser project


Results 1 to 15 of 1724
 LinkBack URL
 About LinkBacks
Hybrid View
-
04-30-2011 01:57 AM #1
 CHR Member

- Join Date
- Apr 2009
- Location
- watford
- Car Year, Make, Model: 26T Coupe, 32 Roadster, 41 Willys Coupe
- Posts
- 2,363
No mate i know about the expansion/contraction thing plus of course glass don't stick that well to steel, Everything is bolted and clamped, I never hang hinges/locks etc etc on the glass, i prefer to sandwich the glass so its not stressed, never had a star crack ever in any of my glass cars doing it this way. i'm probably teaching my granny to suck eggs here as your obviously a laminator
 Originally Posted by lamin8r

Its aweful lonesome in the saddle since my horse died.
-
04-30-2011 02:12 AM #2
CHR Member
- Join Date
- Feb 2008
- Location
- Inglewood
- Car Year, Make, Model: 60 F100 truck
- Posts
- 6,339
 Haha,Steve,nice one...good turn of phrase there.. Originally Posted by roadster32
Thought you would know about that,,I feel like I am teaching granny to suck eggs...
Haha,Steve,nice one...good turn of phrase there.. Originally Posted by roadster32
Thought you would know about that,,I feel like I am teaching granny to suck eggs... I am trying to get back to the redevelopment of the 32/5w bodies,and the new floor[fibreglass,8mm thick,reinforced]so I am very interested in your work in the framing side..Admittedly,we have some stringent regs here with steel framing in glass bodies..so its interesting to watch what you are doing on this particular build..I have had a good hard look at Wescotts framing,Deuce Customs[Australia],so I know where we are going..Just gotta get in there..Hopefully in a week or three..
Micah 6:8
If we aren't supposed to have midnight snacks,,,WHY is there a light in the refrigerator???
Robin.
-
04-30-2011 02:20 AM #3
CHR Member
- Join Date
- Apr 2009
- Location
- watford
- Car Year, Make, Model: 26T Coupe, 32 Roadster, 41 Willys Coupe
- Posts
- 2,363
Lamin8r a lot of them seem to use round tube curved to match the contour, i've done it that way myself but it don't give you anywhere to attach panels as its round and i can't see it being as rigid as square tube in triangles as if its curved it can still be flexed on the bend where as the square tube allows trim clip holes to be drilled into it. Not sure of the science of it all but my cars don't have any rattles like some glass cars.
Obviously if your doing bodies to sell you may have to go the round tube route as it is less time consuming.Its aweful lonesome in the saddle since my horse died.
-
04-30-2011 02:29 AM #4
CHR Member
- Join Date
- Feb 2008
- Location
- Inglewood
- Car Year, Make, Model: 60 F100 truck
- Posts
- 6,339
Probably,a combination of both,Steve..But I will be leaning towards square as much as possible..The B pillars have to be minimum 38mm o/d x min.3mm wall,and the rails above the doors,25mmx25mm,3mm wall..The rest is by virtual commonsense,or as the certifier sees it..The floor will be glass,with a reinforcer from B pillar to B pillar,plus,we need a fixed bulkhead between the trunk area and passenger compartment..I have to build a body,chop it,set it up on a chassis,and start from there,as I intend to do a new set of molds,with a 2''or 2 1/2 ''chop..Micah 6:8
If we aren't supposed to have midnight snacks,,,WHY is there a light in the refrigerator???
Robin.
-
04-30-2011 02:45 AM #5
CHR Member
- Join Date
- Apr 2009
- Location
- watford
- Car Year, Make, Model: 26T Coupe, 32 Roadster, 41 Willys Coupe
- Posts
- 2,363
Very much like what i like to use mate, I like 50mm x 25mm x 3mm for A & B posts as it can stiffen them right up, i use a combination of 25mm & 20mm elsewhere, even 25mm square can be a bitch to accomodate sometimes.
Where the tube is in compression or tension i drop to 1.6mm wall as its still very strong used in this way and light too, as you say a bit of common sense is needed.
On the Willys there just isn't the room to run a 50 x 25 x 3 up the A post, this is why the firewall frame is a bit beefy, its all 20 x 20 x 1,6 but is incredibly strong and doesn't flex in any direction which is good as i have to tie in the door hinges to it, its a bit tight in this area because of the recessed firewall.
Originally Posted by lamin8r
Its aweful lonesome in the saddle since my horse died.
-
04-30-2011 09:49 AM #6
CHR Member
- Join Date
- Apr 2009
- Location
- watford
- Car Year, Make, Model: 26T Coupe, 32 Roadster, 41 Willys Coupe
- Posts
- 2,363
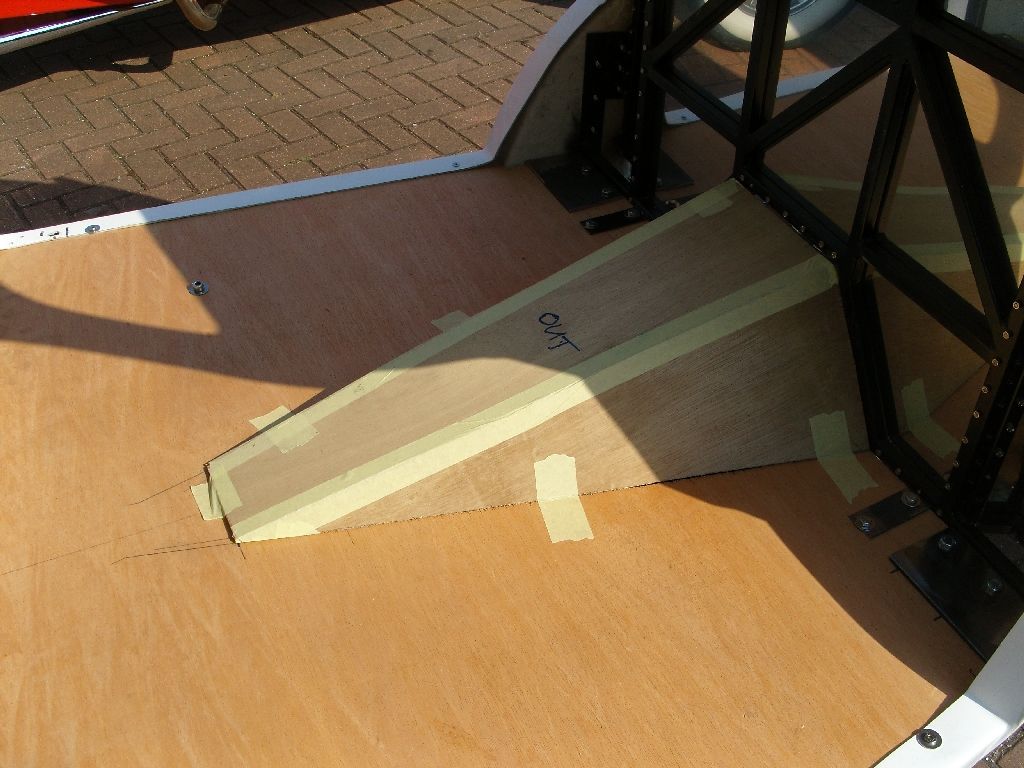
Not such a productive day today mainly because its been bl00dy hot
I got the weight bar fitted and made a template for the trans tunnel and a few other boring bits. The trans tunnel could of been lower but i want to mount my shifter on it so i made it a bit higher.

Its aweful lonesome in the saddle since my horse died.
-
05-07-2011 11:45 AM #7
CHR Member
- Join Date
- Apr 2009
- Location
- watford
- Car Year, Make, Model: 26T Coupe, 32 Roadster, 41 Willys Coupe
- Posts
- 2,363
Weather been a bit on off today but managed to get a bit done amongst the interuptions.
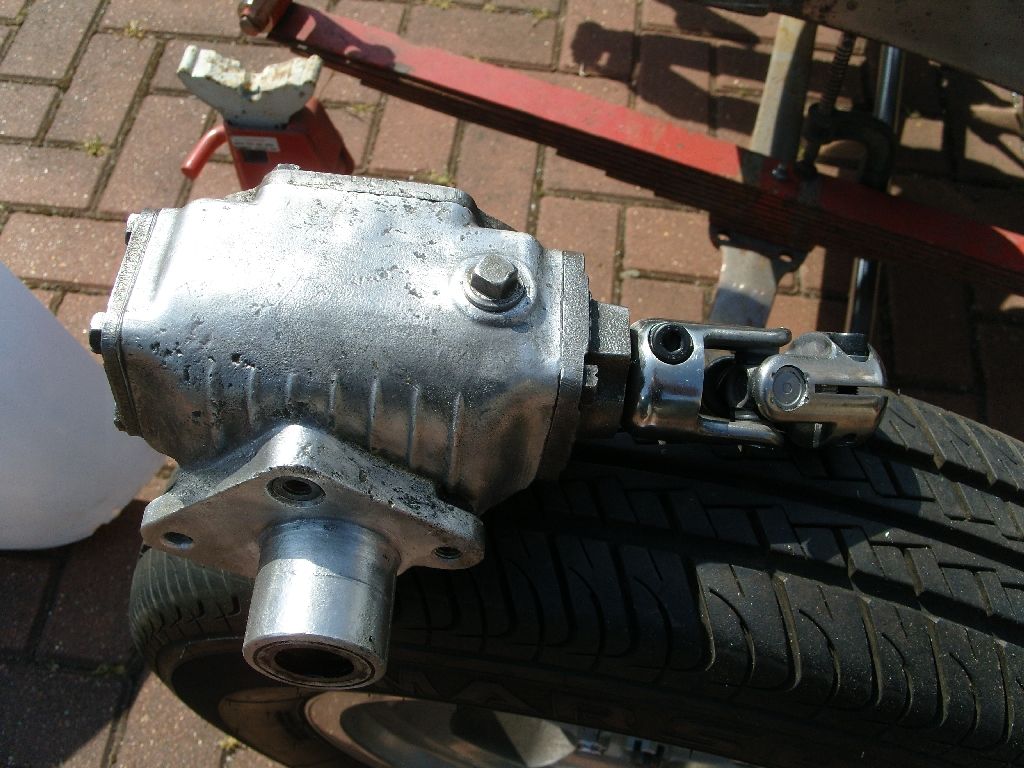
Originally was using a Vega box but just not enough clearance on engine as its a bit lower in the frame than most, Alternative was to use a Land Rover box, these are very underated and easy to mount and work real nice.
The box is fitted with a built in column which was no use to me so i cut it off just above the top bearing, doing this means a oil seal has to be fitted on top of the top bearing, a 1.75" OD 3/4" ID seal presses straight in.
The iiner column was then cut down, the majority of it is tube but the bottom couple of inches is bar so 2 flats were ground on it and then it was fitted with a double D UJ.
I will bore a 2" hole in the side rail when the engine is next out as the hole has to have a sleeve welded in to the hole, also the mounting bolts need sleeves welding in also.
While having a tidy up i came across a pair of shocks i had bought at some time, they are new and had the right dimensions so i thought i would get them fitted today.
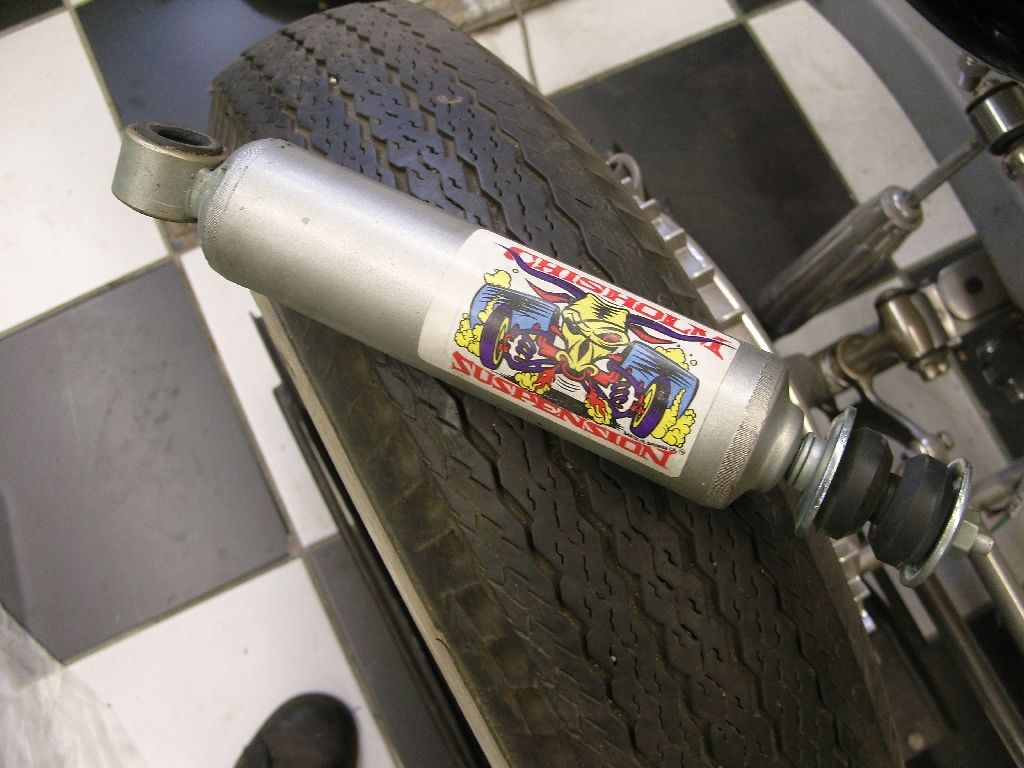
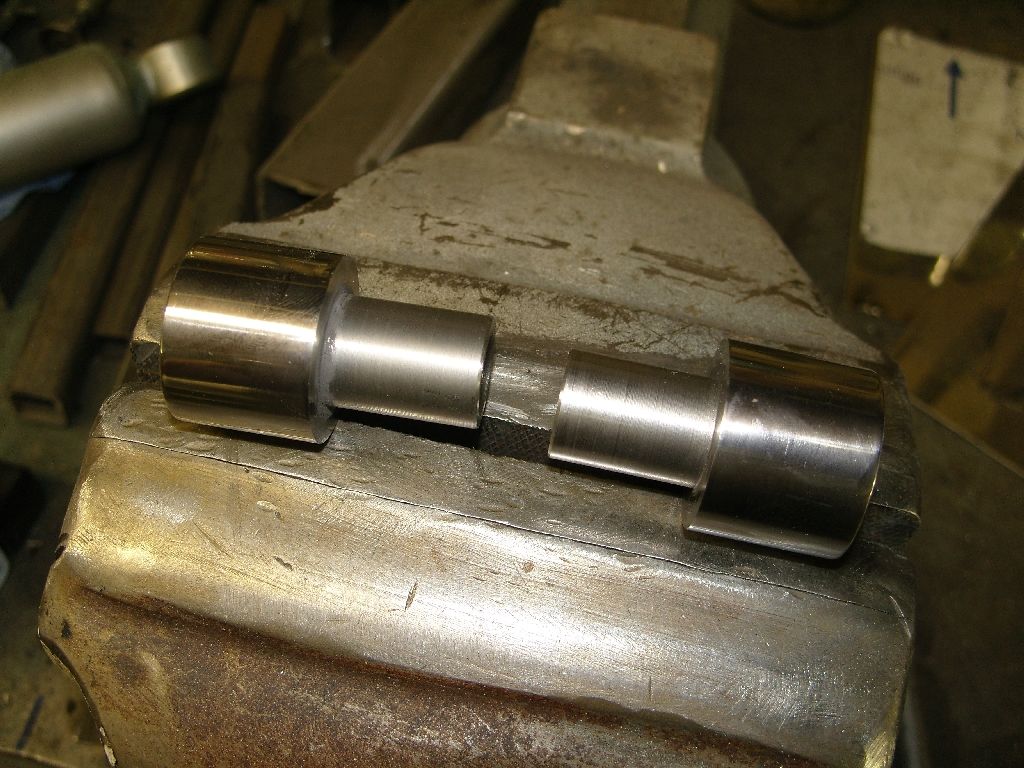
The shocks had a 2 bolt lower fixing so that was removed and i spun a couple of adaptrs up on the lathe for the shock to mount on and also space them off the front axle slightly.
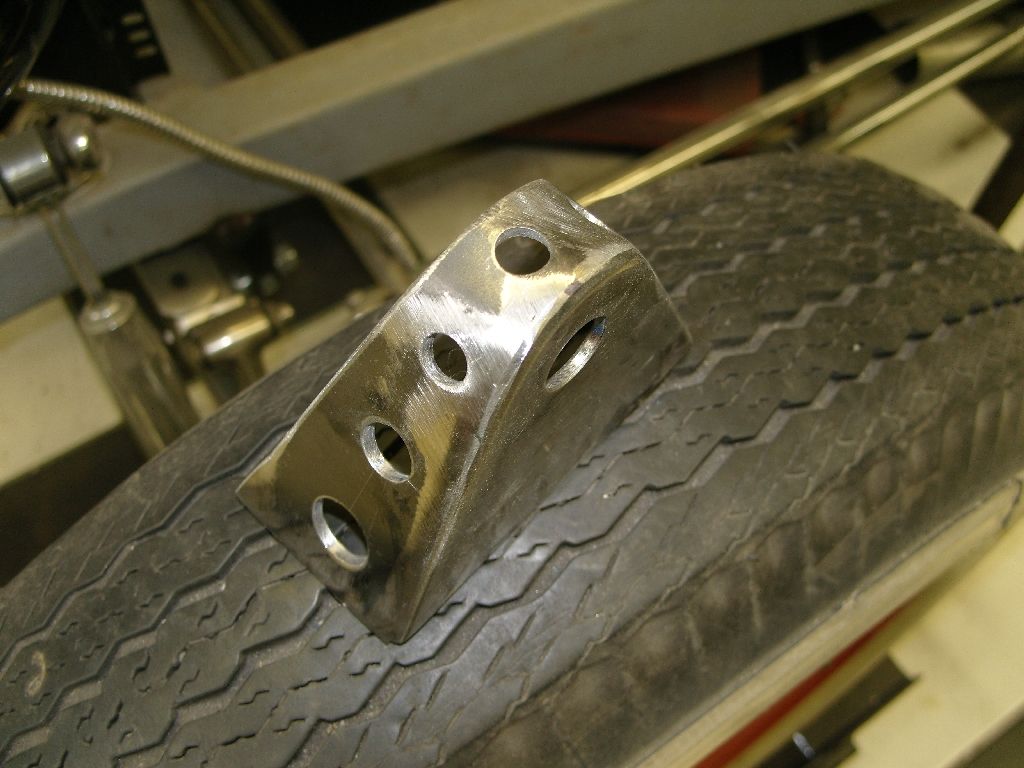
The top mount was made from 1/8" flat plate, a few holes were added so they are slightly less boring.
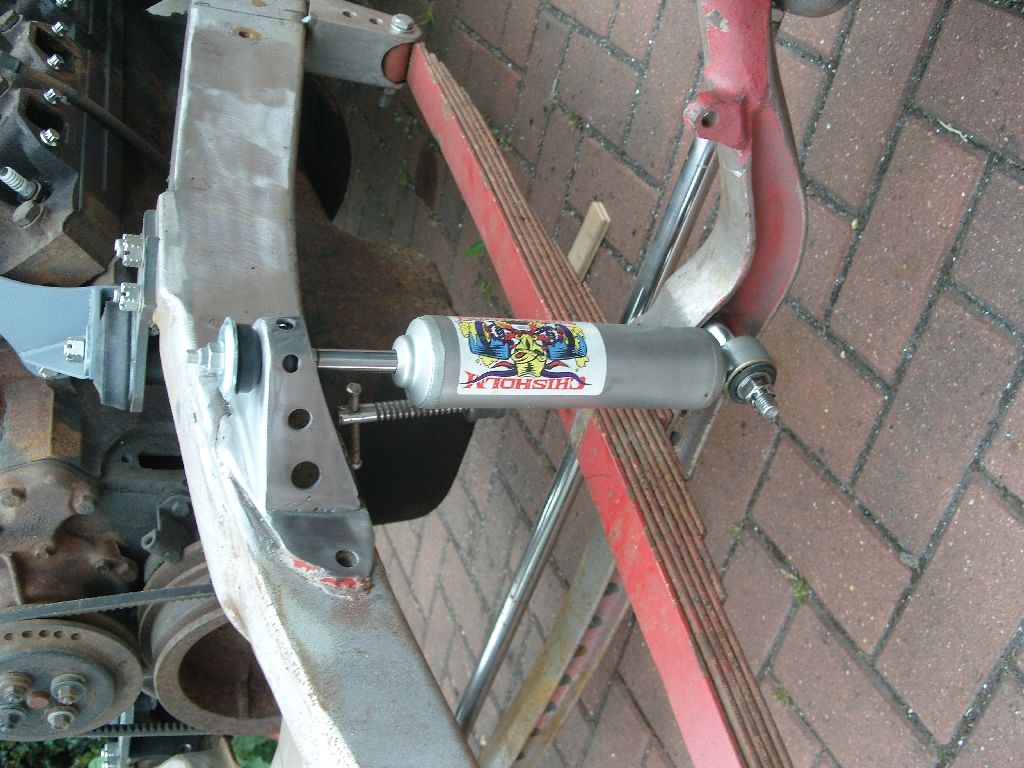
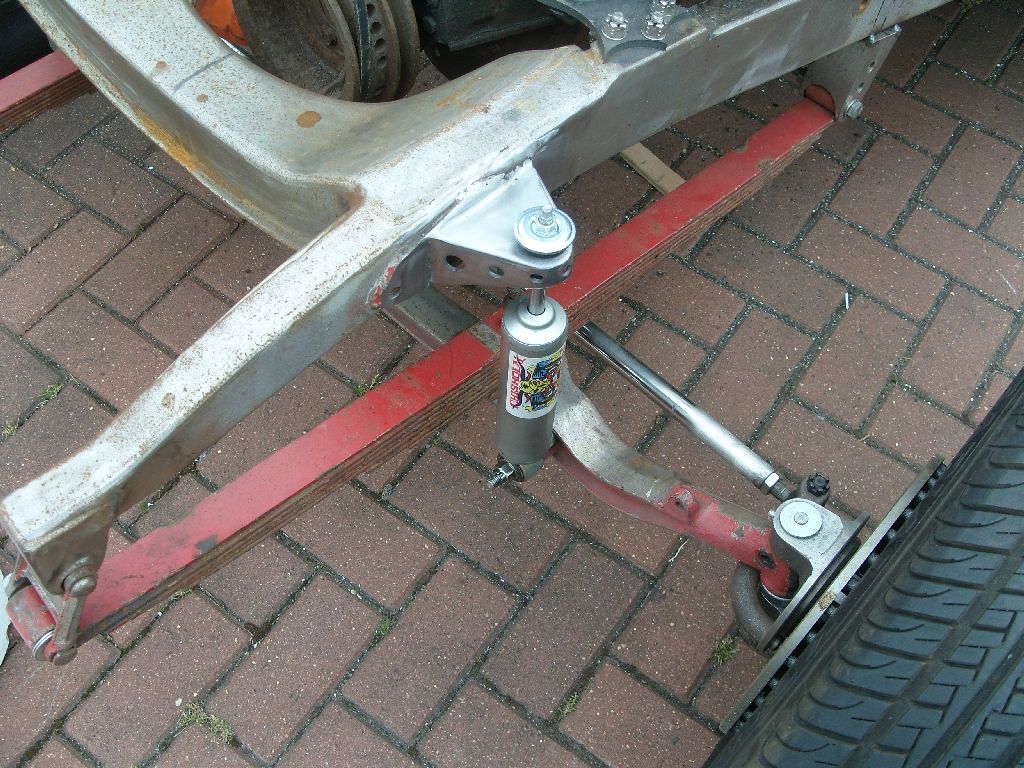
All welded and bolted in place.
Its aweful lonesome in the saddle since my horse died.

 Reply With Quote

Posting Permissions
- You may not post new threads
- You may not post replies
- You may not post attachments
- You may not edit your posts

i've enjoyed the years here . made a lot of friends. most who have left. i see no reason to continue with this so hope to see you somewhere else. i dont think this site will ever be back. it's lived...
Dead!